
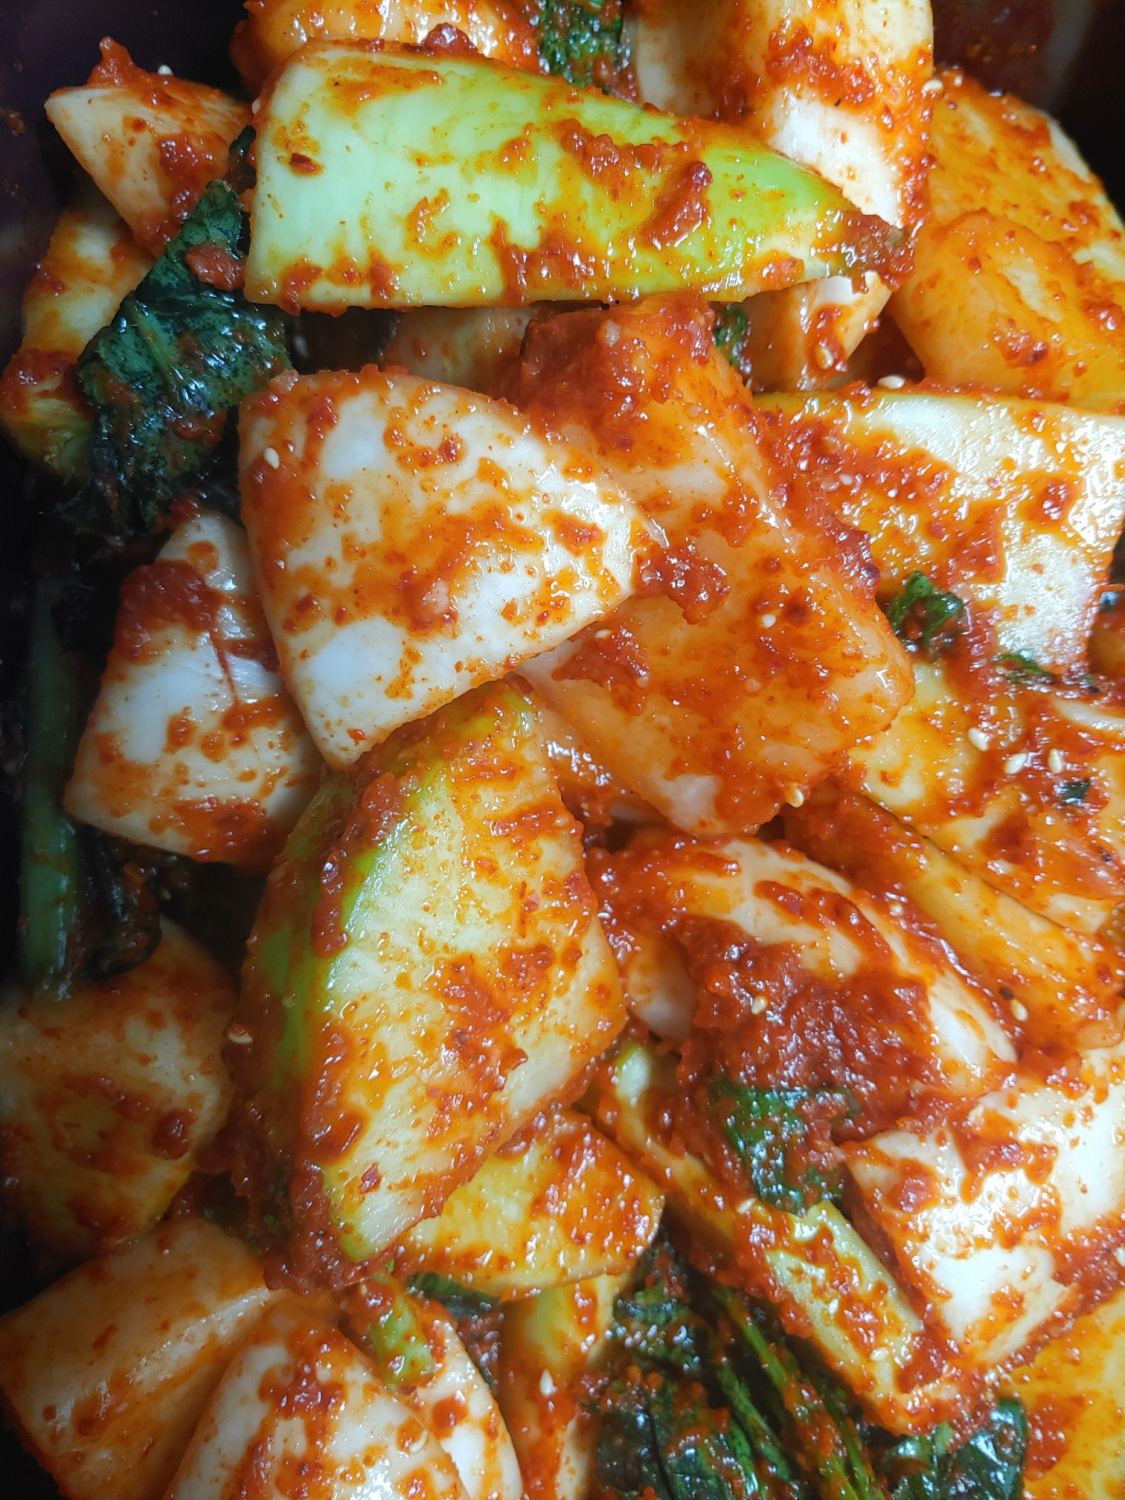
Crisp and Sweet Seokbakji Kimchi
Making Delicious Seokbakji Kimchi with Seasonal Radishes

Radishes are so sweet these days, making them perfect for any dish! This Seokbakji kimchi is wonderfully crisp and flavorful, making it a great accompaniment to any meal. Here’s a recipe for this chunky, bite-sized kimchi that’s a joy to eat.
Main Ingredients- 3 Korean radishes (large)
- 1 bunch radish greens
- 1 bunch mustard greens
- 1 cup coarse sea salt
- 1 Tbsp Shinwhadang (or sugar)
Seasoning Ingredients- 1 onion
- 1 apple (or Korean pear)
- 30g ginger
- 3 Tbsp salted shrimp
- 1 Tbsp fish sauce (anchovy or sand lance)
- About 15 cloves garlic (sliced or minced)
- 1 ladleful cooked rice (about 1/2 cup)
- 1/2 cup soju (or Korean rice wine)
- 3 cups gochugaru (Korean chili flakes)
- Sesame seeds, to taste
- 1 onion
- 1 apple (or Korean pear)
- 30g ginger
- 3 Tbsp salted shrimp
- 1 Tbsp fish sauce (anchovy or sand lance)
- About 15 cloves garlic (sliced or minced)
- 1 ladleful cooked rice (about 1/2 cup)
- 1/2 cup soju (or Korean rice wine)
- 3 cups gochugaru (Korean chili flakes)
- Sesame seeds, to taste
Cooking Instructions
Step 1
First, wash the radishes thoroughly. Prepare 3 large Korean radishes, cut them into 4-5cm pieces, and then chop them into large, chunky cubes. Cutting the radishes too small can diminish the satisfying bite, so aim for generously sized pieces.

Step 2
Unlike Kkakdugi (cubed kimchi), Seokbakji is characteristically cut wider and thicker. Make sure to cut them generously so you get a substantial mouthful with every bite.

Step 3
Prepare about a bunch of radish greens and cut them into 4-5cm lengths. If you have mustard greens, cut about a bunch to a similar length to prepare them together. Adding mustard greens significantly enhances the kimchi’s flavor.

Step 4
Place the large radish cubes into a large bowl. Sprinkle evenly with 1 cup of coarse sea salt. Gently massage the salt into the radish pieces with your hands, ensuring even distribution.

Step 5
Add 1 Tbsp of Shinwhadang (or sugar) for sweetness and umami, and lightly mix. Shinwhadang can provide a deeper sweetness.

Step 6
Add the cut radish greens to the bowl and gently mix them in. Incorporating radish greens and mustard greens not only adds beautiful color but also contributes a refreshing taste, acting as excellent garnishes.

Step 7
Prepare the ingredients for blending. In a blender, combine 1 onion, 1 apple (or pear), 30g ginger, 15 cloves garlic, 3 Tbsp salted shrimp, 1 Tbsp fish sauce, and 1 ladleful of cooked rice (as a substitute for glutinous rice paste). Blend until smooth. Adjust the consistency with a little maesil-cheong (plum extract) or more fish sauce if needed. (Adding 2 Tbsp of maesil-cheong is recommended.)

Step 8
Let the salted radishes sit for about 30 minutes, then stir them. At this point, you can add the chopped mustard greens and let them pickle in the brine.

Step 9
After pickling for about another hour, the radishes should be suitably pliable, bending easily. Be careful not to over-pickle, as they can become mushy. Check their condition periodically.

Step 10
If there are any impurities in the coarse sea salt, lightly rinse the pickled radishes under cold running water. (This step can be skipped if the saltiness is not too intense.)

Step 11
Drain the rinsed radishes on a colander for about 20 minutes. Thoroughly draining the water is crucial to prevent the kimchi from becoming soggy and to maintain its crispness.

Step 12
Pour the smoothly blended seasoning mixture into a large bowl.

Step 13
Add 3 cups of gochugaru (Korean chili flakes). This is a key ingredient for the kimchi’s color and spiciness, so adjust the amount to your preference.

Step 14
Pour in 1/2 cup of soju and mix the seasoning well. Adding soju helps preserve the kimchi’s crisp texture for longer and removes any unwanted odors. (This ingredient is optional.)

Step 15
Mix the gochugaru and the blended seasoning thoroughly. Using cooked rice instead of glutinous rice paste helps the seasoning adhere well, resulting in a more delicious kimchi.

Step 16
Add the drained, pickled radishes to the bowl with the seasoning.

Step 17
Add half of the prepared seasoning and gently mix it with the radishes. Be careful not to over-mix, as this can crush the radish pieces.

Step 18
Add the remaining seasoning gradually, checking the radish’s texture and adjusting the seasoning to your liking. If more saltiness is needed, use coarse sea salt or regular salt. Ensure the mustard greens and radish greens are also well-coated with seasoning.

Step 19
Finally, sprinkle a generous amount of sesame seeds on top for a visually appealing and flavorful finish.

Step 20
The finished Seokbakji kimchi can be left at room temperature for about a day before refrigerating. While it’s delicious to eat immediately, for a more developed flavor, allow it to ferment at room temperature for 2-3 days before storing it in the refrigerator.

Step 21
Break off a chunky piece and take a bite – it’s delightfully crisp even when fresh! It would be perfect served alongside a steaming bowl of Seolleongtang (ox bone soup) once it’s fermented.
