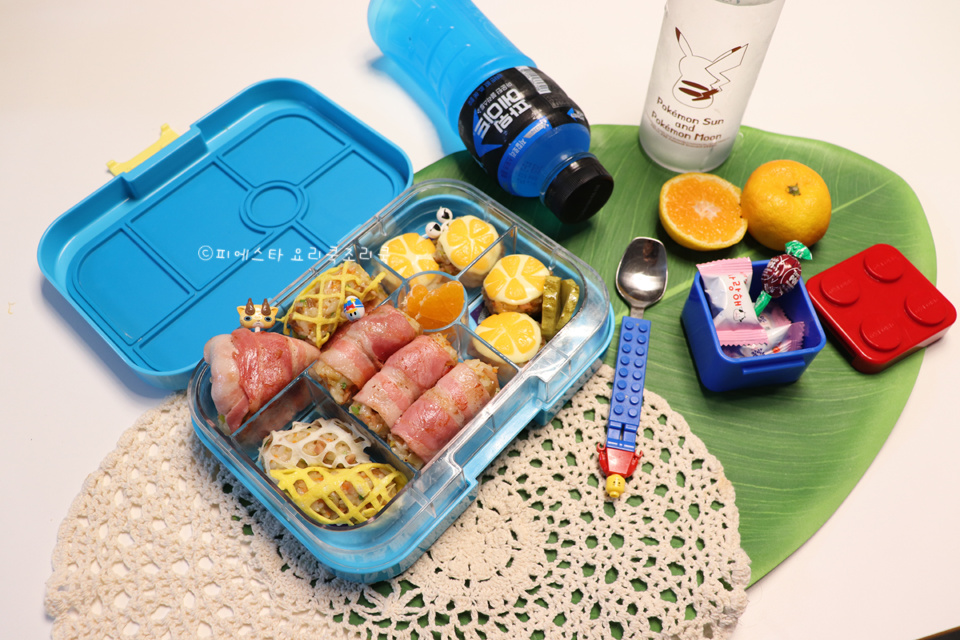
Colorful & Cute Rice Balls
Decorate Your Picnic Lunchbox with Adorable Rice Balls! ♬

Autumn is the season for picnics and field trips! If you’re tired of the usual gimbap or inarizushi for your children’s lunchboxes, try making special rice balls this time that will capture their eyes and taste buds. Instead of chicken wings or col-pop, you can make special occasions even more enjoyable with these carefully crafted, pretty rice balls. They are simple yet can be decorated into various fun shapes that kids will love!
Rice Ball Ingredients- 1/2 Onion
- 1/2 Carrot
- 1/2 Zucchini
- A little Burdock root (braised or fresh)
- 2/3 block Square ham
- 2 bowls Cooked rice (warm)
- 1 stalk Green onion
- 3 Tbsp Cooking oil
Cooking Instructions
Step 1
Finely mince the vegetables. For carrots and zucchini, slicing them thinly with a mandoline slicer before mincing will result in a better texture. While a vegetable chopper can be used, mincing by hand with a knife helps retain the texture without making it mushy. Finely chop the onion, ham, and burdock root similarly. Tip: If you prepare the vegetables the night before and store them in separate compartments of a sealed container, you can save significant time in the morning.

Step 2
Make flavorful scallion oil. Heat 3 tablespoons of cooking oil in a pan, add chopped green onions, and slowly sauté over medium-low heat to extract the green onion’s aroma. This scallion oil reduces the greasiness of the fried rice and adds a subtle smoky flavor.

Step 3
Sauté the vegetables to enhance their flavor. Once the scallion oil is fragrant, add the carrots and sauté briefly. Then, add the minced ham, burdock root, zucchini, and onion, and sauté them together. Cook until the moisture from the vegetables has evaporated and the flavors meld together.

Step 4
Add a savory seasoning. If making for a children’s field trip lunchbox, add 1/2 tablespoon of oyster sauce (using a rice spoon) for a savory flavor without being too strong. Stir well to combine with the ingredients.

Step 5
Add the rice and stir-fry. Once all the vegetables are sautéed, reduce the heat to the lowest setting. Add 2 bowls of warm cooked rice and gently mix with a spatula while stir-frying. Tip: To ensure the rice balls hold their shape well, it’s best to cook the rice with slightly more water than usual, making it a bit softer. Softer rice grains will clump together more easily when shaping.

Step 6
Shape them into cute and pretty forms! It’s time to make your rice balls even more special. First, shape them into elongated cylinders, which are easy to wrap with bacon. If you want to create character shapes your kids love, you can also use molds.

Step 7
Try making other shapes too! Besides cylinders, you can also shape them into triangles, which children will find fun. Different shapes will make mealtime more enjoyable for your kids.

Step 8
Don’t forget the cute round shape! Round balls are the most basic shape, but making them small and dainty makes them even more adorable. They can look like mini patties.

Step 9
Wrap them with bacon. Once you’ve shaped the rice balls, prepare thinly sliced bacon. Place the bacon at one end of the rice ball and roll it up around the shape. Tuck the end of the bacon inside the rice ball to secure it without unraveling.

Step 10
A tip for securing bacon rice balls more firmly! After cutting the bacon in half, when you start wrapping the rice ball, leave about 1cm of the cut edge exposed at the end and attach it. Applying a little egg wash to the end of the bacon will help it stick better and stay secure.

Step 11
Grill until golden brown to finish. Place the bacon-wrapped rice balls in a pan and cook slowly over low heat. If you cook them over medium heat or higher, the bacon might loosen as it cooks. It’s important to roll them gently over low heat to ensure even browning and prevent the bacon from unraveling. Serve them in the lunchbox while still warm.


