
Chewy & Nutty! Homemade Soy Bean Powder Injeolmi Rice Cakes
Homemade Sweet Rice Cakes (Injeolmi) with Roasted Soybean Powder: A Guide Using a Stand Mixer

While tidying up my refrigerator, I stumbled upon some roasted soybean powder I had purchased. Since I hadn’t used it recently, I decided to get creative and make some Injeolmi! Making fresh Injeolmi at home is incredibly rewarding, offering a delightful chewy texture and a rich, nutty flavor from the soybean powder. This guide will walk you through the process using a stand mixer for convenience. Get ready to impress yourself with these delicious homemade rice cakes that rival those from the bakery!
Ingredients for Injeolmi- Sweet rice (glutinous rice)
- Roasted soybean powder
- Salt (1 tsp)
Cooking Instructions
Step 1
First, rinse the sweet rice thoroughly until the water runs clear. Soaking the rice for about 30 minutes beforehand will yield even better results. Then, cook the soaked sweet rice in a rice cooker as you would regular rice. It’s best to cook it slightly firmer than usual; too much water can result in a sticky, mushy texture, so use a little less water than you normally would for this recipe.

Step 2
Transfer the freshly cooked, slightly firm sweet rice directly into your stand mixer bowl while it’s still hot. The grains should be distinct and not clumped together. If you don’t have a stand mixer, prepare a large, sturdy bowl and have your tools ready for pounding or kneading the hot rice.

Step 3
Add 1 teaspoon of salt to the sweet rice in the stand mixer bowl. This salt will enhance the natural sweetness of the rice and balance the overall flavor profile of the Injeolmi.

Step 4
Attach the dough hook to your stand mixer and begin to mix on a low to medium speed. You’ll notice the rice grains gradually breaking down and coming together to form a cohesive, chewy dough. If you’re doing this manually, you can pound the hot rice with a mallet (tteokmae) or, wearing thick gloves for heat protection, knead the rice vigorously with your hands until it becomes a smooth, elastic dough.

Step 5
During the mixing process, periodically use a spatula to scrape down the sides of the mixer bowl, gathering any stray rice dough back into the center. This ensures that all the rice is evenly incorporated and kneaded, leading to a consistent texture.

Step 6
Continue kneading until the dough reaches your desired chewy consistency. The more you knead, the more elastic and satisfyingly chewy your Injeolmi will be. Keep an eye on the dough’s texture and adjust the kneading time as needed. If kneading by hand, aim for at least 10 minutes of vigorous pounding or kneading.

Step 7
Line a tray or cutting board with plastic wrap. Drizzle about 1-2 tablespoons of sesame oil evenly over the plastic wrap. This step is crucial to prevent the rice cake from sticking and also imparts a subtle, delightful sesame aroma.

Step 8
Carefully transfer the kneaded Injeolmi dough onto the oiled plastic wrap. Be cautious as the dough may still be quite warm.

Step 9
Gently flatten the dough into your desired thickness using the plastic wrap. You can lightly oil your hands with sesame oil to help smooth the surface for a cleaner finish. Lightly brush the top of the dough with a bit more sesame oil to prevent it from drying out.

Step 10
Cover the dough with another layer of plastic wrap and let it cool completely at room temperature. It’s essential to let the Injeolmi cool down thoroughly; if you try to cut or shape it while it’s still warm, the dough will be too soft, sticky, and lose its shape.

Step 11
Once the Injeolmi dough has cooled completely and is firm enough to handle, prepare your roasted soybean powder. Spread a generous amount of roasted soybean powder onto a large plate or tray.
Step 12
Cut the cooled Injeolmi dough into your preferred serving sizes. To prevent the rice cake from sticking to your knife, you can lightly oil the blade or coat it with soybean powder before cutting. Coat each piece generously with roasted soybean powder on all sides, ensuring every surface is covered.

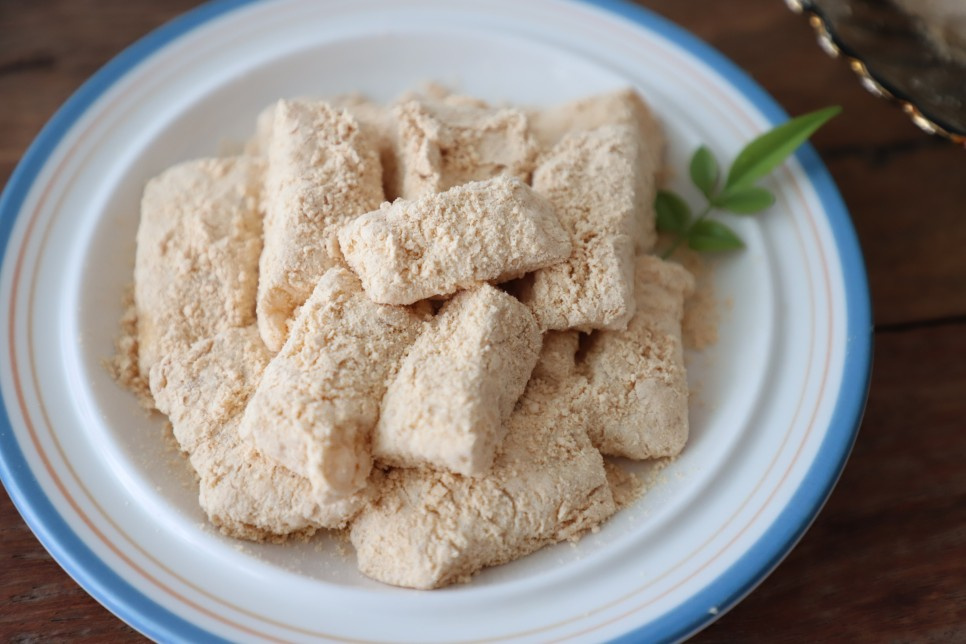
Step 13
Carefully shape the coated Injeolmi pieces, ensuring they don’t stick together. You can lightly re-coat any cut surfaces with soybean powder if needed. Your delicious homemade Injeolmi is now ready to be enjoyed! Store any leftovers in an airtight container.

Step 14
Enjoying freshly made, chewy, and nutty Injeolmi at home is truly a delight! You’ll find they are just as delicious as store-bought versions, making the effort worthwhile. This recipe is surprisingly simple, so don’t hesitate to make it for a satisfying snack or a special occasion treat. It pairs wonderfully with a warm cup of tea!
