
Chewy and Delicious Yakshik Made Easily in a Rice Cooker
How to Make Yakshik Successfully with a Rice Cooker (Beginner-Friendly!)

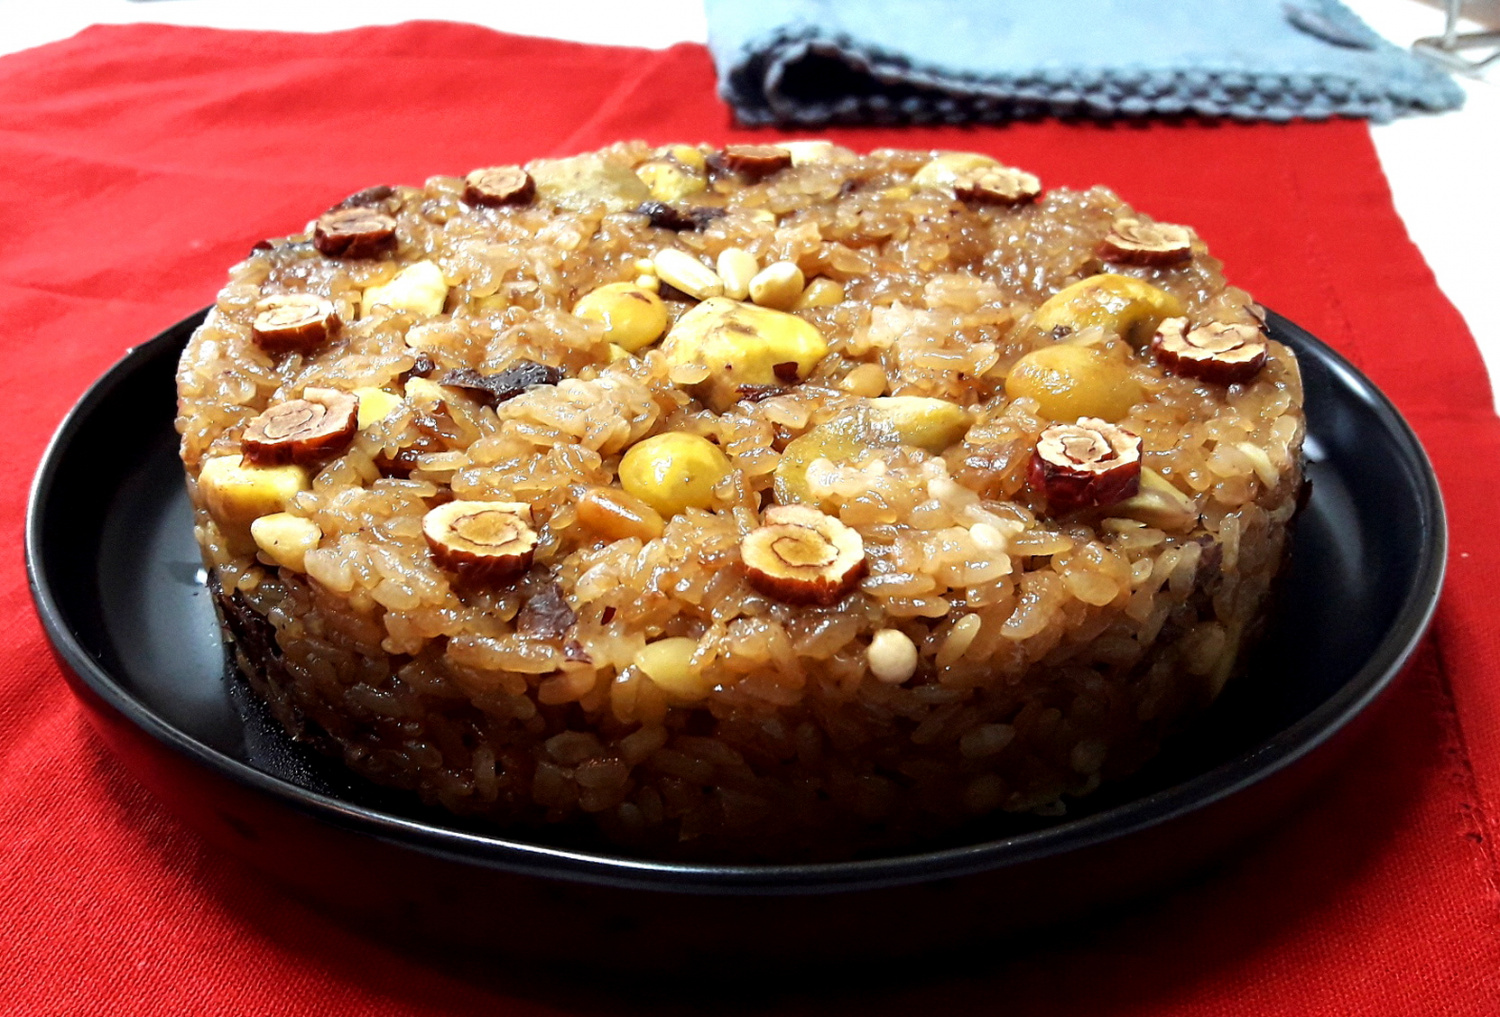
Whip up a delicious and chewy Yakshik with just your rice cooker! This recipe combines the delightful chewiness of glutinous rice with the rich flavors of chestnuts, dates, and pine nuts. Unlike traditional Yakshik, which can be quite involved, this rice cooker method allows you to easily and quickly create a wonderful Yakshik at home. Enjoy this glossy, chewy, and subtly sweet Korean sweet rice cake as a hearty breakfast on busy mornings or as a delightful dessert for special occasions.
Key Yakshik Ingredients- 4 cups glutinous rice (approx. 560g)
- 16 shelled chestnuts
- 22 dried dates
- 6 tablespoons pine nuts (approx. 45g)
- 1/2 handful ginkgo nuts (approx. 20g)
- 3 tablespoons sesame oil (approx. 45ml)
Sweet Yakshik Seasoning- 5 tablespoons soy sauce (approx. 75ml)
- 100g brown sugar
- 2 tablespoons oligodang (corn syrup or similar sweetener) (approx. 30ml)
- 1/2 teaspoon ground cinnamon
- A pinch of ground ginger
- 5 tablespoons soy sauce (approx. 75ml)
- 100g brown sugar
- 2 tablespoons oligodang (corn syrup or similar sweetener) (approx. 30ml)
- 1/2 teaspoon ground cinnamon
- A pinch of ground ginger
Cooking Instructions
Step 1
First, rinse the 4 cups of glutinous rice under running water until clean, then soak it in plenty of water for about 2 to 3 hours to allow it to fully hydrate. While the rice is soaking, prepare the other ingredients. Cut the shelled chestnuts into quarters. Remove the stems from the dried dates and make a slit to remove the pits. Chop the pitted dates into bite-sized pieces, about 1.5 cm. Peel and prepare the ginkgo nuts, and clean the pine nuts. Don’t discard the date pits! Place them in a pot with 5 cups of water and simmer for about 20 minutes. Strain this liquid to get a flavorful broth that will be used as the cooking liquid for the Yakshik. This process removes any bitterness from the pits and adds a subtle sweetness and aroma. Set aside the chopped dates.

Step 2
Drain the well-soaked glutinous rice thoroughly in a sieve, letting any excess water drip away. Ensuring the rice is well-drained is crucial for achieving a chewy texture without the Yakshik becoming mushy when cooked.

Step 3
In a large bowl, combine all the seasoning ingredients: 5 tablespoons of soy sauce, 100g of brown sugar, and 2 tablespoons of oligodang. Add 3 cups of the strained date pit broth that you prepared earlier. Stir well until the sugar is completely dissolved. To incorporate the ground cinnamon smoothly, it’s best to sift it over the mixture and gently whisk it in to prevent lumps. This ensures the seasoning is evenly distributed throughout the glutinous rice.

Step 4
Now, transfer the drained glutinous rice into the inner pot of your rice cooker. Scatter the quartered chestnuts, chopped dates, ginkgo nuts, and pine nuts evenly over the rice. Pour the prepared seasoning mixture over everything. Using a spatula, gently mix the rice and ingredients to ensure they are evenly coated with the seasoning. Close the lid and select the ‘Cook’ or ‘White Rice’ setting, just as you would for regular rice. You can also use ‘Mixed Grains’ or ‘Nutritious Rice’ settings if your rice cooker has them.

Step 5
Once the cooking cycle is complete, open the rice cooker! You’ll see a glossy, chewy, and wonderfully sticky Yakshik. While it’s still warm, drizzle in the 3 tablespoons of sesame oil and gently mix with a spatula, being careful not to mash the rice grains. This adds a lovely sheen and flavor. It’s best to let it cool slightly before mixing thoroughly to avoid the glutinous rice becoming too sticky or mushy.

Step 6
Prepare a mold for shaping the Yakshik. You can use a square baking pan, a round cake ring (mousse ring), or any container you have at home. Lining the bottom and sides of the mold with plastic wrap or lightly greasing it with sesame oil will make it much easier to remove the Yakshik later without it sticking.

Step 7
Carefully transfer the slightly cooled Yakshik mixture into the prepared mold. Lightly moisten your spatula or hands with water to prevent sticking, then gently press and spread the mixture evenly into the mold, making the top surface flat. Cover with plastic wrap and press down again to compact the Yakshik firmly.

Step 8
Once the Yakshik has set somewhat, carefully unmold it. If the Yakshik is still very soft, you can briefly chill it in the refrigerator to help it firm up before unmolding for a cleaner presentation. Place the unmolded Yakshik on a piece of parchment paper; this makes slicing easier later.

Step 9
It’s important to let the Yakshik cool completely before slicing. If you try to cut it while it’s still warm, it will likely crumble and lose its shape. Be patient and let it cool down thoroughly for clean cuts.

Step 10
Once completely cooled, cut the Yakshik into your desired serving sizes (e.g., 3x3cm or 4x4cm squares). Wrap each piece individually and tightly with plastic wrap to maintain its shape and prevent the pieces from sticking together.

Step 11
For longer storage, wrap each piece of Yakshik in plastic wrap, then place them in a resealable freezer bag, ensuring it’s well-sealed, and freeze. To enjoy later, thaw at room temperature or briefly microwave until warm.

Step 12
Alternatively, Yakshik that you plan to eat soon can be stored at room temperature. Making a generous batch is convenient for a satisfying and quick meal replacement on busy mornings, or as a delightful snack. Enjoy your homemade Yakshik!
