
Bouncy Homemade Acorn Jelly (Dotorimuk)
Effortlessly Make Perfectly Chewy and Delicious Acorn Jelly at Home

Enjoy a wonderfully smooth and bouncy acorn jelly right in your own kitchen! This recipe guides you through making authentic Dotorimuk from scratch, offering a delightful texture that’s hard to find in store-bought versions. We’ll cover everything from preparing the jelly base to creating a vibrant, flavorful seasoning. We hope this video tutorial helps you master the art of homemade Dotorimuk!
Acorn Jelly Ingredients- Acorn powder 400g
- Water 2L
Acorn Jelly Seasoning Ingredients- Soy sauce 100ml
- Red pepper flakes 3 Tbsp
- Toasted sesame seeds 2 Tbsp
- Apple syrup 3 Tbsp
Vegetables for Seasoning- Red chili peppers 2
- Green chili peppers 3
- Minced garlic 1 Tbsp
- Cucumber 1
- Carrot a little
- Crown daisy a little
- Onion a little
- Sesame oil 3 Tbsp
- Soy sauce 100ml
- Red pepper flakes 3 Tbsp
- Toasted sesame seeds 2 Tbsp
- Apple syrup 3 Tbsp
Vegetables for Seasoning- Red chili peppers 2
- Green chili peppers 3
- Minced garlic 1 Tbsp
- Cucumber 1
- Carrot a little
- Crown daisy a little
- Onion a little
- Sesame oil 3 Tbsp
Cooking Instructions
Step 1
⑴ Making Perfectly Bouncy Acorn Jelly at Home
*Cup measurement: 200ml capacity
① Cooking the Acorn Jelly Base:
The golden ratio for making acorn jelly is 1 part acorn powder to 5 parts water. Therefore, for 400g of acorn powder, you’ll need 2L of water. If you’re using 200g of acorn powder (1 cup), use 1L of water.
First, pour 2L of water into a pot and gradually whisk in the 400g of acorn powder until dissolved. Many stores now sell pre-ground acorn powder specifically for making jelly, which you can find at places like Nonghyup (Korean agricultural cooperative).
It’s crucial to start cooking over medium-high heat and stir continuously with a whisk or spatula. If you stop stirring, the acorn powder can settle at the bottom, burn, or clump. Stir constantly for about 10 minutes, or until the mixture thickens. Once it starts boiling, continue stirring for about 5 minutes; this will prevent the jelly from splattering and ensure a smooth texture. After 10 minutes of consistent stirring and cooking, your smooth acorn jelly base will be ready.

Step 2
② Shaping and Cooling the Acorn Jelly:
The freshly cooked acorn jelly will be very hot. Avoid pouring hot jelly into plastic containers, as it can warp them. It’s best to use glass bowls or stainless steel molds. Pouring the mixture into a stainless steel mold and chilling it in the refrigerator for 2-3 hours will help it set firmly, making it easy to unmold later.
Allowing it to cool at room temperature can take a very long time. Therefore, place the mold with the acorn jelly directly into the refrigerator for at least 2-3 hours to set properly. This ensures the jelly is firm enough to be seasoned and mixed without breaking apart.

Step 3
③ Preparing the Flavorful Acorn Jelly Seasoning:
Now, let’s prepare the seasoning that will bring out the deliciousness of the acorn jelly. You’ll need: 100ml (half a paper cup) of soy sauce, 3 Tbsp of red pepper flakes, 2 Tbsp of toasted sesame seeds, and 3 Tbsp of apple syrup for a touch of sweetness. You can substitute the apple syrup with other types of syrup or honey.
(While the jelly is setting) The acorn jelly has been chilling in the refrigerator for about 3 hours and is now firm. Combine the seasoning ingredients in a bowl. Start with 100ml of soy sauce, then add 3 Tbsp of red pepper flakes for a spicy kick, followed by 2 Tbsp of toasted sesame seeds for nutty flavor. Finish with 3 Tbsp of apple syrup for a hint of sweetness. Mix these ingredients well. Set the seasoning aside while you prepare the vegetables.

Step 4
④ Chopping Fresh Vegetables for the Seasoning & Final Assembly:
Let’s prepare the vegetables to add to our seasoning: 2 red chili peppers, 3 green chili peppers, 1 Tbsp minced garlic, 1 cucumber, a little carrot, a little crown daisy, a little onion, and 3 Tbsp of sesame oil for aroma.
First, make a small cross-shaped cut at the tip of the red and green chili peppers, then mince them finely. This adds both color and a pleasant texture to the seasoning. Add 1 Tbsp of minced garlic and mix well. Next, trim the ends of the cucumber and slice it thinly on the bias; this adds a refreshing crunch and aroma. Finely chop or julienne the onion and carrot, and add a little crown daisy for freshness. (Optional: you can also finely chop lettuce or green onions to add.) Finally, drizzle in 3 Tbsp of sesame oil and mix everything thoroughly. Your vibrant seasoning is now ready!
⑤ Finishing and Storing Your Homemade Acorn Jelly:
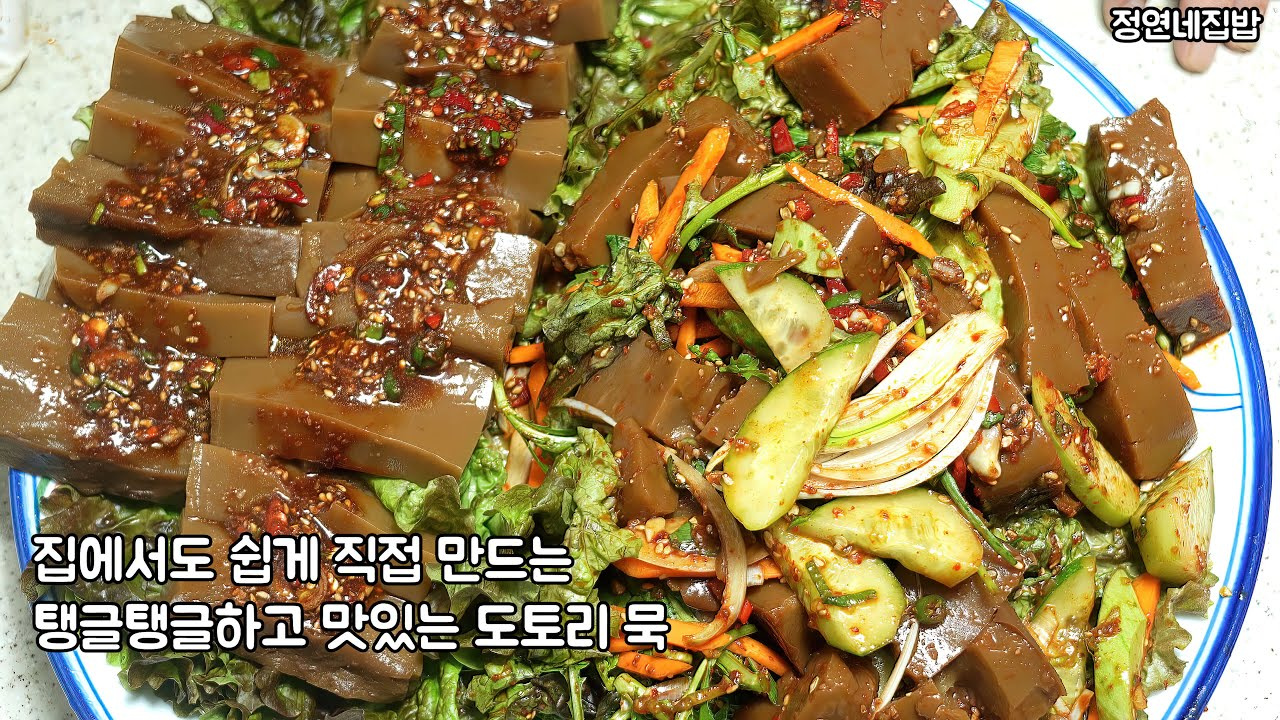
Carefully invert the chilled acorn jelly from its mold onto a serving plate. You should have a neat, rectangular block of jelly. Gently touch it – it should feel bouncy and tender. Now, cut the jelly into bite-sized pieces.
Arrange fresh lettuce leaves at the bottom of a serving bowl. Place the cut acorn jelly on top, followed by the prepared vegetables. Spoon your delicious seasoning over the jelly and vegetables, and gently toss everything together. Your homemade Dotorimuk salad is complete! We highly recommend enjoying this generously portioned, homemade acorn jelly. This concludes our recipe.
