
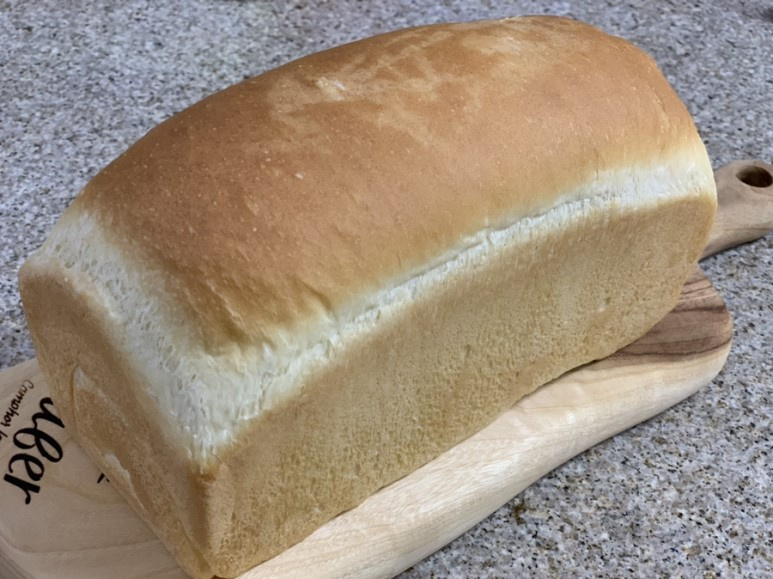
Basic Plain Loaf Bread
The Most Basic and Plain Loaf Bread, Kneaded with the Oseong Bread Maker

This is a recipe for making the most fundamental loaf bread in baking. Its plain taste is so satisfying that you’ll never get tired of it and can enjoy it anytime. Perfect for beginners looking to bake a wholesome and delicious loaf.
Ingredients- Bread flour 270g
- Skim milk powder 1 Tbsp
- Active dry yeast 1 tsp
- 1 Egg
- Honey 20g
- Lukewarm water 140g
- Vegetable oil 1 Tbsp
- Salt 1 tsp
Cooking Instructions
Step 1
In the bread maker bowl, combine the lukewarm water (140g) and active dry yeast (1 tsp). Gently shake the bowl to mix and dissolve the yeast.

Step 2
Next, sift the bread flour (270g) and skim milk powder (1 Tbsp) into the bread maker bowl. Sifting helps create a smoother dough.

Step 3
Add the honey (20g) and the egg (1), which has been left at room temperature to remove the chill.

Step 4
Place the bowl into the bread maker, select the ‘Dough’ or ‘Knead’ cycle, and start the machine. About 1 minute after kneading begins, sprinkle the salt (1 tsp) evenly over the dough. (It’s best to add salt after the initial mixing to avoid hindering yeast activity.)

Step 5
When the Oseong bread maker’s kneading timer reaches approximately 49 minutes, add the vegetable oil (1 Tbsp) to the dough. To prevent oil splattering, it’s recommended to place a piece of parchment paper over the bowl.

Step 6
About 7 minutes before the kneading cycle finishes, specifically when 42 minutes remain on the ‘Dough’ program, pause the machine and carefully remove the bowl. This is a good point to check the dough’s development.

Step 7
Gently remove the dough from the bread maker bowl. Lightly dust your work surface with flour and shape the dough into a smooth ball by ‘tumbling’ it. Place the rounded dough into a clean stainless steel bowl.

Step 8
Place the bowl with the dough inside a larger container (or your oven). Fill a Glasslock container with hot water (400ml) and place it inside the larger container to create a humid environment for proofing. Cover the dough bowl with a damp cloth. Close the lid of the larger container and let the dough undergo its first rise (bulk fermentation) for about 45 minutes.

Step 9
After the first rise, the dough should have approximately doubled in size. Carefully remove the bowl with the dough from the larger container.

Step 10
Turn the dough out of the bowl. Gently press down on the dough with your palms to release the large air bubbles (do not punch it down too hard!). Shape the dough into a smooth ball again using both hands, cover it with plastic wrap, and let it rest for about 15 minutes for the intermediate proof (bench rest).

Step 11
Remove the plastic wrap from the rested dough and lightly dust the surface with flour. Using a rolling pin, gently flatten the dough into a rectangle that is the length of your loaf pan. Aim for an even thickness.

Step 12
Starting from one of the shorter ends, roll up the dough tightly, similar to how you would roll a kimbap (sushi roll). Pinch the final seam closed to prevent it from opening during baking. Gently shape the sides and place the rolled dough into your prepared loaf pan.

Step 13
Proceed with the second proofing using a similar method to the first. Place the loaf pan inside the larger container. Add the hot water (400ml) in a Glasslock container to maintain humidity. Cover the loaf pan with a damp cloth, close the larger container’s lid, and let it proof for about 45 minutes.

Step 14
Preheat your oven to 180°C (350°F) about 2-3 minutes before the second proofing is complete. Check that the dough in the pan has risen to about 80-90% of the pan’s height. Carefully place the loaf pan into the preheated oven.

Step 15
Bake at 180°C (350°F) for 25 minutes. If you prefer a lighter crust color on top, you can loosely cover the top of the pan with aluminum foil during the last 8 minutes of baking.

Step 16
Once baked, remove the loaf from the oven. To easily release the bread from the pan, gently tap the bottom of the pan on a hard surface. Transfer the bread to a wire rack and let it cool completely before slicing.

Step 17
Although the recipe remains the same, the final bread always turns out differently depending on my mindset, actions, and the subtle nuances during the baking process. ^^ Enjoy the deliciousness of healthy food and create happy moments! ^^ #LoafBread #HomeBaking #PlainBread #BreadMaking #EasyBread #Baking