
Baek Jong-won’s Kkakdugi Fried Rice
The Ultimate Baek Jong-won Kkakdugi Fried Rice Recipe for Reviving Your Appetite

I made this fried rice using kkakdugi, my husband’s favorite radish kimchi, and it turned out incredibly delicious! It’s essential to use well-fermented kkakdugi for the best flavor. The combination of tangy, sweet, and savory kkakdugi with savory pork makes this dish irresistibly addictive. This simple yet impressive meal is a guaranteed hit!
Ingredients- 1 cup well-fermented kkakdugi (cubed radish kimchi)
- 1/3 cup kkakdugi liquid
- 1 bowl warm cooked rice
- 1 fresh egg
- 1 cup pork, cut into bite-sized pieces (stew meat recommended)
- 2/3 cup water
- Vegetable oil, for stir-frying
- 1/2 cup chopped green onions
Sauce- 2/3 Tbsp gochujang (Korean chili paste)
- 1/3 Tbsp sugar
- 1 Tbsp soy sauce
- Sesame oil, for finishing
- 2/3 Tbsp gochujang (Korean chili paste)
- 1/3 Tbsp sugar
- 1 Tbsp soy sauce
- Sesame oil, for finishing
Cooking Instructions
Step 1
First, finely chop the green onions. These will add a wonderful aroma and sweetness to your fried rice.

Step 2
Next, dice the kkakdugi into small, bite-sized pieces. If you prefer not to use a cutting board, you can also use kitchen scissors to cut the kkakdugi. Ensuring they are small will help them integrate well with the rice.

Step 3
If you’re using stew meat for the pork, cut it into manageable, bite-sized pieces so it cooks evenly and is easy to eat in the fried rice.

Step 4
Heat 1 tablespoon of vegetable oil in a frying pan over medium heat. Add the pork and stir-fry until it’s cooked through. If you’d like a saltier flavor, you can add a pinch of salt at this stage. Make sure to stir frequently to ensure even cooking.

Step 5
Once the pork has lost its pink color and is fully cooked, add the chopped green onions to the pan. Continue to stir-fry over medium heat until the green onions are fragrant and lightly browned. This step develops a delicious ‘scallion oil’ that enhances the overall flavor.

Step 6
When the pork and green onions are nicely sautéed, pour in the kkakdugi liquid (1/3 cup). This will form the flavorful base of your fried rice.

Step 7
Add the diced kkakdugi to the pan and stir-fry it with the other ingredients. Mash the kkakdugi slightly as you stir to help it break down and meld with the liquid.

Step 8
To prevent the fried rice from becoming too dry, add 2/3 cup of water. This will help all the ingredients combine smoothly.

Step 9
Add 1 tablespoon of soy sauce for a savory depth of flavor. This will balance the sweetness and tanginess of the kkakdugi.

Step 10
Stir in 1/3 tablespoon of sugar. This enhances the natural sweetness and complements the sourness of the kkakdugi.

Step 11
Finally, add 2/3 tablespoon of gochujang for a touch of spice and vibrant color. Reduce the heat to low and let the mixture simmer and thicken. The key here is not to over-reduce it; you want to leave a little moisture so the rice doesn’t become dry and clumpy. It should be slightly saucy.

Step 12
Once the mixture has reached the consistency shown in the picture, add 1 bowl of warm cooked rice. Turn the heat up to high and stir-fry vigorously until the rice is evenly coated with the sauce. Ensure every grain of rice is well-mixed.

Step 13
Finish by drizzling in a little sesame oil for a nutty aroma and give it a final quick stir.

Step 14
Spread the kkakdugi fried rice evenly in the pan. Reduce the heat to low and let it sit undisturbed for a few minutes to develop a delicious crispy bottom layer (nurungji). This toasted rice adds a wonderful texture and flavor. Be careful not to burn it!

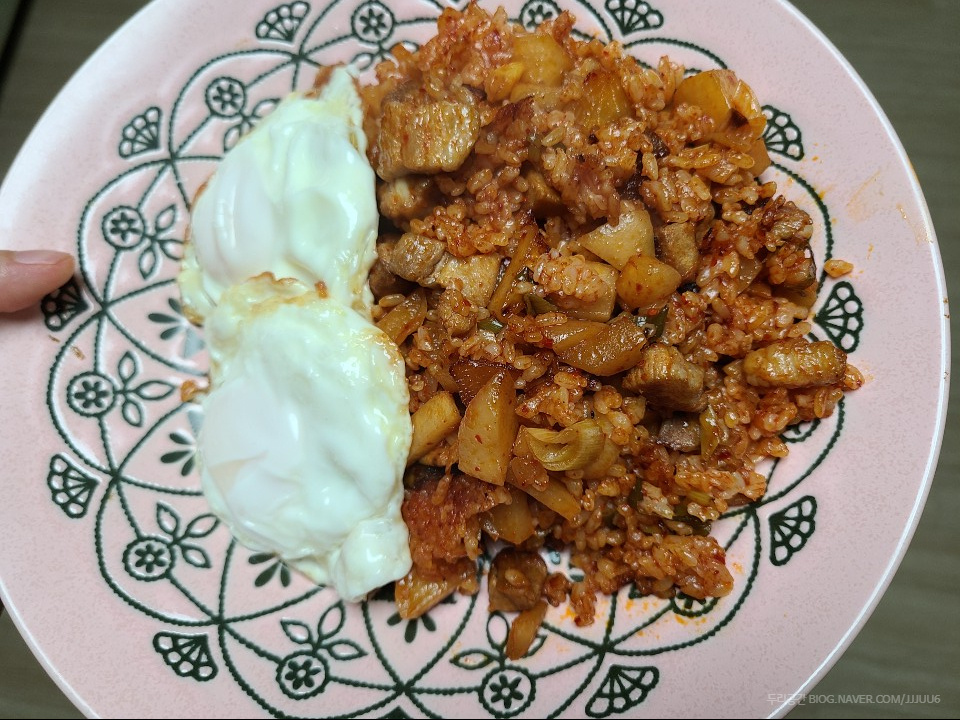
Step 15
For the perfect finish, top the fried rice with a sunny-side-up fried egg. The runny yolk creates a rich sauce that perfectly complements the spicy, savory fried rice. For tips on how to make a perfect sunny-side-up egg without flipping, please refer to the video.
