
Authentic Red Bean Buns (Anpan): Homemade Sweetness and Nuttiness
Recipe for Making Soft and Sweet Red Bean Buns at Home

Nothing quite beats the charm of freshly baked red bean buns! This recipe will let you fully experience the delight of making Anpan right in your own kitchen. It’s perfect for those who find store-bought Anpan lacking – the exquisite combination of a soft, moist bun and a sweet red bean filling generously mixed with crunchy walnuts is simply divine. If you’ve ever been disappointed by red bean buns that were too sweet, too dry, or had a bland bun, it’s time to make them yourself. You’ll enjoy delicious red bean buns with a subtly flavored exterior and a rich, sweet filling. While it might seem like a lot of effort at first, you’ll quickly get the hang of it after a few tries, and soon you’ll be making them whenever the craving strikes. As this is one of my favorite breads, I hope you experience the best Anpan with this carefully crafted recipe.
Dough Ingredients- 300g Bread flour
- 6g Active dry yeast
- 45g Granulated sugar
- 5g Salt
- 35g Unsalted butter, softened
- 1 Large egg, room temperature
- 145ml Lukewarm water
Nutty Red Bean Filling- 180g Sweet red bean paste (store-bought or homemade)
- Chopped walnuts, to taste (for extra flavor!)
Egg Wash for Glaze- 1 Egg yolk
- 2 Tbsp Water
Homemade Red Bean Paste (Optional)- 450g Cooked adzuki beans
- 350g Granulated sugar
- 1.5g Salt
- 180g Sweet red bean paste (store-bought or homemade)
- Chopped walnuts, to taste (for extra flavor!)
Egg Wash for Glaze- 1 Egg yolk
- 2 Tbsp Water
Homemade Red Bean Paste (Optional)- 450g Cooked adzuki beans
- 350g Granulated sugar
- 1.5g Salt
- 450g Cooked adzuki beans
- 350g Granulated sugar
- 1.5g Salt
Cooking Instructions
Step 1
If making your own red bean paste: Rinse the adzuki beans thoroughly. Place them in a pot and cover with water, ensuring the beans are fully submerged. Bring to a boil over high heat.
Step 2
Once the water is boiling vigorously, carefully drain the beans using a sieve. Discard this cooking water; this step helps remove any bitterness from the beans.
Step 3
Return the rinsed beans to the pot. Add just enough fresh water to cover the beans. Simmer over low heat until the beans are very soft and easily mashable. They should be tender enough to break apart with a fork.
Step 4
Add plenty of fresh water to the softened beans. Stir in the sugar and salt. Bring the mixture to a rolling boil over high heat, stirring occasionally.

Step 5
Once the bean mixture has thickened to your desired consistency, remove it from the heat. Use an immersion blender (hand blender) to process the beans until smooth or to your preferred texture. A slightly chunky texture is also delicious.

Step 6
Return the paste to the pot and cook over medium heat, stirring constantly, until the excess moisture evaporates and the paste becomes thick and spreadable. It should be firm enough not to ooze out of the buns.

Step 7
Stir the finely chopped walnuts into the prepared red bean paste. The nutty aroma will perfectly complement the sweetness of the paste.

Step 8
Now, let’s make the dough. In a large bowl, combine the bread flour, active dry yeast, sugar, and salt. Mix them lightly. (Ensure the salt and yeast are not in direct contact to prevent deactivation).
Step 9
Add the beaten egg to the mixture. Use a spatula or your hands to combine the ingredients until a shaggy dough begins to form.
Step 10
Gradually add the lukewarm water while mixing. The dough will start to come together and become shaggy, then gradually clump into a cohesive mass.
Step 11
Once the dough has formed a rough ball, add the softened butter. Knead the dough for at least 10 minutes, stretching and folding it, until it becomes smooth and elastic. Proper kneading develops the gluten, which results in a soft and fluffy bun.
Step 12
Shape the kneaded dough into a ball and place it in a lightly oiled bowl. Cover the bowl with plastic wrap or a damp cloth. Let it rise in a warm place (around 27-30°C or 80-86°F) for about 30 minutes, or until the dough has doubled in size (first proof).

Step 13
Lightly flour your work surface. Gently punch down the risen dough to release the gas. Use a bench scraper to divide the dough into equal portions (about 6-8 pieces).

Step 14
Shape each portion of dough into a smooth ball. Cover them with a damp cloth or plastic wrap and let them rest at room temperature (around 26-27°C or 79-81°F) for about 15 minutes for the intermediate proof. While the dough is resting, divide the red bean paste into equal portions (about 30g each) and roll them into balls.

Step 15
Gently flatten each rested dough ball with your palm into a round, disc shape. Place a ball of red bean filling in the center. Carefully bring the edges of the dough up and over the filling, pinching them together to seal securely. Roll the sealed dough gently between your palms to create a smooth, round bun.

Step 16
Place the filled buns on a baking sheet lined with parchment paper. Cover them with plastic wrap or a damp cloth and let them proof for about 10 minutes. They should puff up slightly.

Step 17
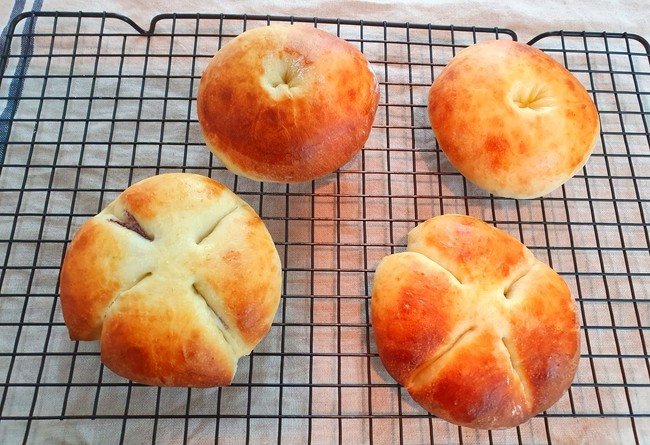
After the second proof, brush the tops of the buns lightly with the egg wash for a golden sheen. For decorative purposes, you can gently flatten the tops with a rolling pin and then create patterns. You can make simple round buns or score them with a knife or bench scraper to resemble a flower.

Step 18
Using a knife or a bench scraper, make about 5-6 cuts on the top of each bun to create a flower-like pattern. This will make them look more appealing after baking.

Step 19
For round buns, after flattening with a rolling pin, gently press the center with your thumb to create a slight indentation. Brush the entire surface with the egg wash. Cover the buns again with plastic wrap or a damp cloth and let them undergo a final proof in a warm place (around 27-30°C or 80-86°F) for about 30 minutes.

Step 20
Bake in a preheated oven at 190°C (375°F) for 10-13 minutes, or until the buns are golden brown and cooked through. The tops should be beautifully browned.

Step 21
When you slice into a warm bun, you’ll find the red bean filling is perfectly moist and sweet, offering a delightful taste experience. Enjoy the warmth and homemade goodness of your freshly baked Anpan!
