
Aromatic Mayleaf Kimchi: A Taste of Spring
A Delicious and Healthy Mayleaf Kimchi Recipe

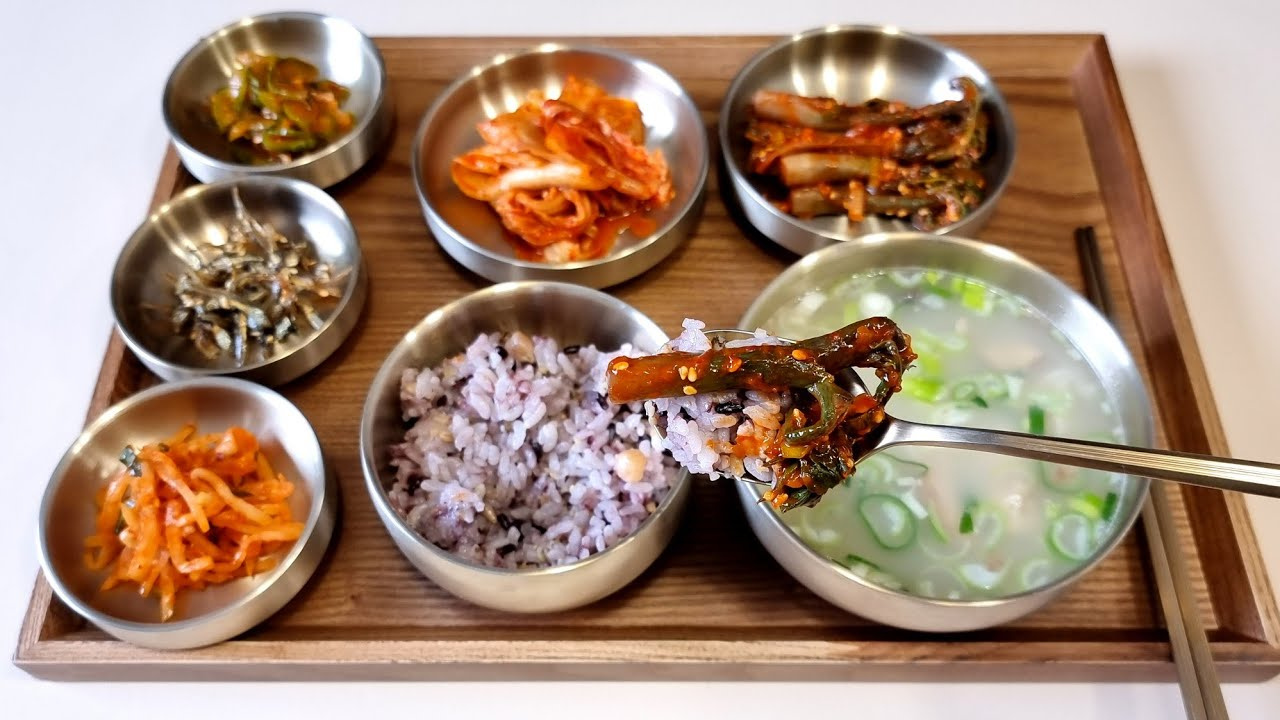
I tried making Mayleaf (Dureup) Kimchi for the very first time! Mayleaf isn’t usually a vegetable my kids eat, so I don’t often buy it. However, I heard my future son-in-law loves Mayleaf, so I immediately ordered some directly from the source! I ordered 1kg, and it was more than I expected. I figured eating it all blanched and dipped in spicy-sweet gochujang sauce would get monotonous, so I decided to make kimchi with half of it. I thought it would be nice to have it on hand to eat over time, and it turned out to be a great idea! Because it was sourced directly, the freshness and aroma were incredible. From now on, I plan to order it directly from the source every spring. The taste was on a completely different level compared to what I’ve bought at the supermarket – I was so surprised! And honestly, I found the kimchi version even more delicious than the usual gochujang dip. This is a special, refreshing kimchi that can be enjoyed for a limited time during spring. Enjoy making your own delicious Mayleaf Kimchi!^^
Ingredients- 500g blanched Mayleaf (Dureup)
- 2 Tbsp potato starch
- 300ml water
- Pinch of salt (for blanching)
Seasoning- 1/2 cup starch paste (made by mixing 2 Tbsp potato starch with 1 cup water and boiling)
- 3 Tbsp red pepper flakes (gochugaru)
- 3 Tbsp fish sauce
- 1 Tbsp minced garlic
- 1/3 tsp MSG or other seasoning powder (optional, for umami)
- A little chopped green onion
- A little sesame seeds
- 1/2 cup starch paste (made by mixing 2 Tbsp potato starch with 1 cup water and boiling)
- 3 Tbsp red pepper flakes (gochugaru)
- 3 Tbsp fish sauce
- 1 Tbsp minced garlic
- 1/3 tsp MSG or other seasoning powder (optional, for umami)
- A little chopped green onion
- A little sesame seeds
Cooking Instructions
Step 1
Prepare the Mayleaf: Wash the fresh Mayleaf thoroughly. To make it more tender, you can lightly peel the bitter outer skin or trim the thick parts of the stems with a knife.

Step 2
Blanch the Mayleaf: Bring a pot of water to a rolling boil, add a pinch of salt, and blanch the Mayleaf for about 1 to 1.5 minutes. Be careful not to overcook it, as it can become mushy. Blanching it briefly is key to preserving its fragrant aroma.

Step 3
Rinse and Drain: Immediately rinse the blanched Mayleaf under cold running water to cool it down. This helps maintain its crisp texture and vibrant color. Once thoroughly drained, cut them into bite-sized pieces.

Step 4
Make the Starch Paste: In a pot, combine 1 cup of water with 2 tablespoons of potato starch. Stir well to dissolve any lumps, then cook over low heat, stirring constantly, until it becomes a transparent paste. Let it cool completely. (Note: The ‘1/2 cup starch paste’ in the ingredients refers to the volume of this cooled paste.)

Step 5
Prepare the Seasoning Mix: In a bowl, combine the cooled starch paste, red pepper flakes, fish sauce, minced garlic, and seasoning powder. Mix everything together to create a flavorful kimchi seasoning.

Step 6
Combine Mayleaf and Seasoning: Add the prepared seasoning mix to the Mayleaf. Toss in the chopped green onions and sesame seeds. Gently mix everything together, ensuring the seasoning coats the Mayleaf evenly. Be careful not to mash the leaves.

Step 7
Serve: Arrange the well-mixed Mayleaf Kimchi attractively on a plate. It’s best served chilled, so refrigerate it for a while before serving. Enjoy this special spring delicacy, your delicious Mayleaf Kimchi!
