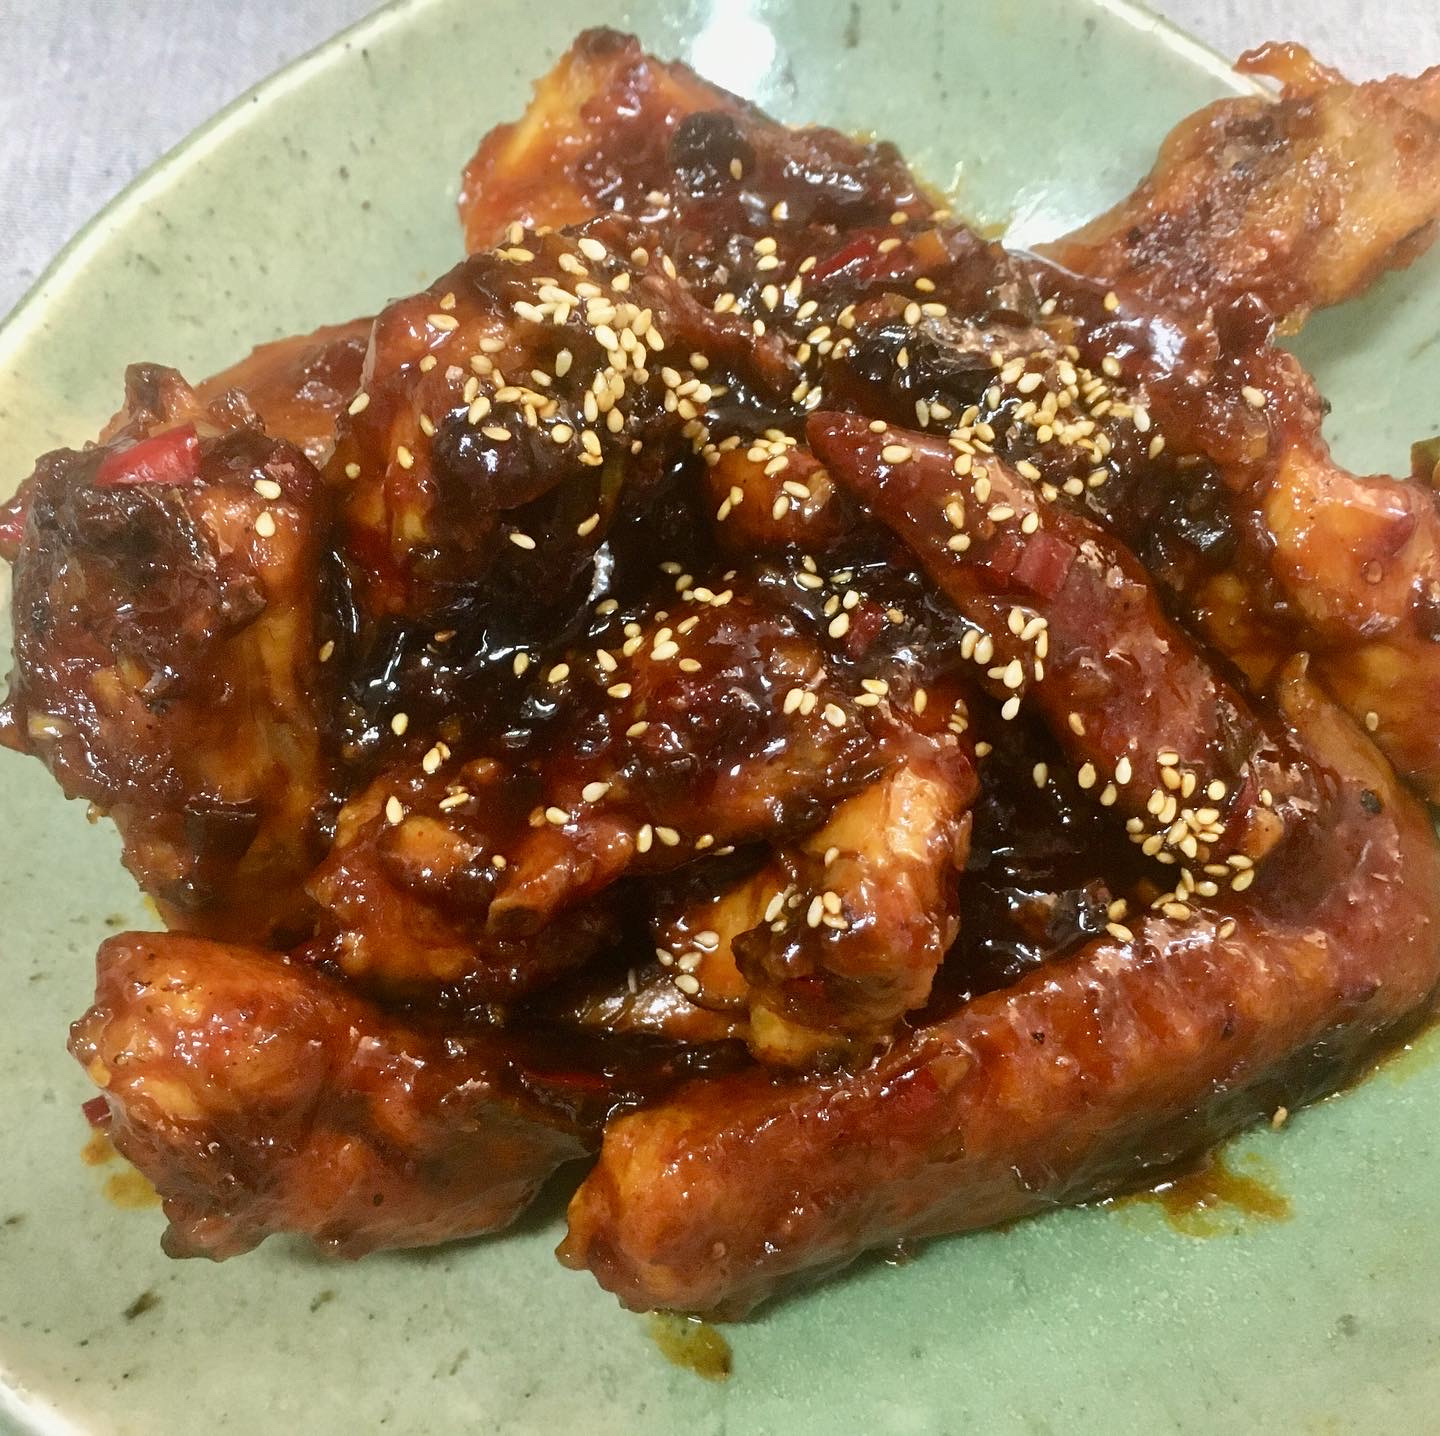
Air Fryer Spicy Glazed Chicken
Easy & Delicious! How to Make Spicy Glazed Chicken with an Air Fryer

Master the art of making perfectly spicy and sweet glazed chicken right in your air fryer! Even if you’ve accidentally bought a tougher chicken like a native breed, this recipe ensures a chewy texture and an incredibly delicious, savory finish.
Chicken Ingredients- 1.5kg chicken (prepared)
- 1.5 Tbsp minced garlic salt (or regular salt and minced garlic)
- 3 Tbsp minced garlic
- Pinch of black pepper
- Pinch of salt
- A splash of cooking wine (like Cheongju)
- 3 green chili peppers (like Cheongyang peppers)
- 3 red chili peppers
- 3 dried bird’s eye chilies (optional)
- A little olive oil
Spicy Glaze Sauce- 2 Tbsp sugar
- 3 Tbsp rice wine (like Mirin)
- 2 Tbsp soy sauce
- 2 Tbsp corn syrup (or rice syrup)
- 1.5 Tbsp gochujang (Korean chili paste)
- 1/2 cup water (approx. 100ml)
- 2 Tbsp sugar
- 3 Tbsp rice wine (like Mirin)
- 2 Tbsp soy sauce
- 2 Tbsp corn syrup (or rice syrup)
- 1.5 Tbsp gochujang (Korean chili paste)
- 1/2 cup water (approx. 100ml)
Cooking Instructions
Step 1
First, rinse the chicken thoroughly under running water and pat it dry. You can remove the skin if you prefer, or leave it on for extra crispiness. In a bowl, place the chicken and season it with 1.5 Tbsp of minced garlic salt, a pinch of black pepper, and a splash of cooking wine. Gently massage the seasonings into the chicken. Let it marinate for 30 minutes. If you are using a larger chicken or a native breed, marinating for about 1 hour will allow the flavors to penetrate deeper. If you don’t have minced garlic salt, you can use regular salt mixed with minced garlic.

Step 2
The marinating time can be adjusted based on the size of the chicken and your preference. While 30 minutes is usually sufficient, marinating for an hour will ensure the flavors are more deeply infused, especially for larger cuts.

Step 3
Wash the green and red chili peppers, remove the stems, and thinly slice them crosswise. You can remove the seeds if you prefer less heat.

Step 4
Finely mince the dried bird’s eye chilies for an extra kick of heat. If you don’t have them, you can omit this ingredient. Adjust the spiciness to your liking.

Step 5
After marinating, drain any excess liquid from the chicken. In a separate bowl, combine 3 Tbsp of minced garlic, a little olive oil, a pinch of salt, a pinch of pepper, and a generous amount of starch (like cornstarch or potato starch). Coat the chicken pieces evenly with this mixture to create a light coating. (While batter made with frying flour or all-purpose flour is common, using starch for air fryer cooking results in a crispier and lighter crust.)

Step 6
Arrange the coated chicken pieces in the air fryer basket. Cook at 200°C (390°F) for a total of 40 minutes, flipping the chicken halfway through to ensure even browning. (For standard-sized chicken, about 20 minutes is usually enough. Adjust the cooking time based on your chicken’s size and your air fryer’s performance.)

Step 7
The chicken should come out of the air fryer looking golden brown and delicious. Don’t worry if any parts seem slightly undercooked; they will finish cooking in the glaze.

Step 8
Heat a little olive oil in a wide pan over medium heat. Add the minced garlic and the minced bird’s eye chilies (if using) and the sliced green and red chilies. Sauté until fragrant, being careful not to burn the garlic.

Step 9
Once the garlic and chilies are nicely sautéed, add the sugar, soy sauce, rice wine, corn syrup, and gochujang. Pour in the 1/2 cup of water to create the glaze sauce. Stir well and bring to a simmer. (For a sweeter glaze, you can substitute corn syrup with rice syrup.)

Step 10
When the sauce is bubbling, add the air-fried chicken to the pan. Stir continuously over high heat, coating the chicken evenly with the sauce, and cook until the sauce has thickened and reduced to a sticky glaze. (You’ll notice the starch coating on the chicken helps the glaze thicken quickly.)

Step 11
Voila! Your homemade spicy glazed chicken is ready. Even though I accidentally used a native breed chicken, the chewy texture combined with the perfectly balanced sweet and spicy glaze was absolutely divine. Don’t forget to savor every last bit of that delicious sauce!


