
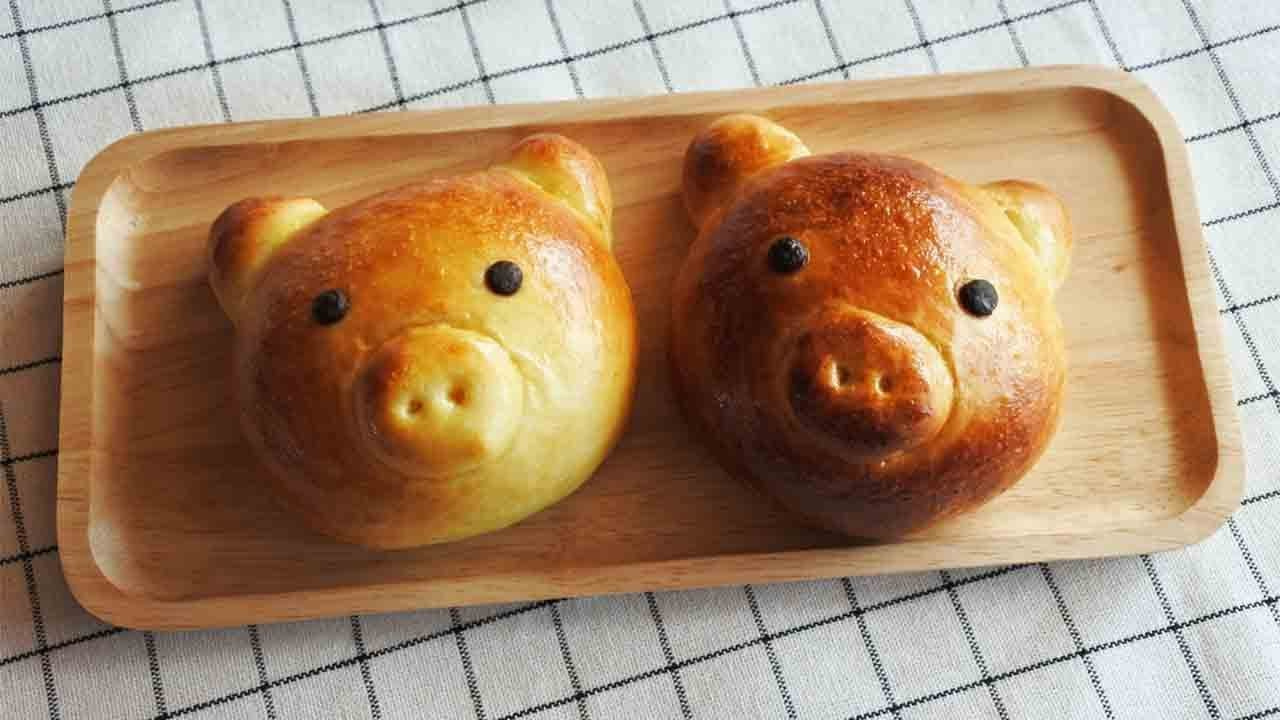
Adorable Golden Pig Bread
Make Cute Piggy Buns to Celebrate the Year of the Golden Pig in 2019! | Hyossom Recipe

Happy New Year 2019, the Year of the Golden Pig! Create these adorable and delicious piggy buns, filled with good fortune. Enjoy the delightful combination of soft bread and sweet sweet potato filling. (Makes approx. 7 buns)
Dough- 200g bread flour: Use bread flour for a chewy texture.
- 30g sugar: Adds sweetness and helps the yeast activate.
- 4g salt: Enhances flavor and strengthens the dough.
- 4g instant dry yeast: The leavening agent that makes the bread rise.
- 40g egg: Contributes to the bread’s softness and color.
- 90g warm milk: Milk around 35-40℃ (95-104℉) is ideal for yeast.
- 30g unsalted butter: Softened at room temperature.
Sweet Potato Filling- 210g steamed sweet potato: Mashed until smooth.
- 5g unsalted butter: Adds richness to the filling.
- 25g sugar: Balances the sweet potato’s natural sweetness and adjusts consistency.
- 25g milk: Makes the filling smoother.
Decoration- Egg wash, as needed: For a golden sheen on the baked buns.
- 14 chocolate chips: For the cute eyes of the piggy buns.
- 210g steamed sweet potato: Mashed until smooth.
- 5g unsalted butter: Adds richness to the filling.
- 25g sugar: Balances the sweet potato’s natural sweetness and adjusts consistency.
- 25g milk: Makes the filling smoother.
Decoration- Egg wash, as needed: For a golden sheen on the baked buns.
- 14 chocolate chips: For the cute eyes of the piggy buns.
Cooking Instructions
Step 1
Let’s start by making the ‘Dough’. In a large bowl, combine the bread flour, sugar, salt, and instant dry yeast. Mix them lightly. Then, add the egg and warm milk. Mix everything with your hands or a dough hook on a mixer until a cohesive dough forms, excluding the butter, for about 5 minutes.

Step 2
Once the ingredients are partially combined, add the softened unsalted butter. Knead the dough for about 15-20 minutes until the butter is fully incorporated and the dough becomes smooth and elastic. It’s crucial to knead until the dough is silky and stretchy.

Step 3
Shape the finished dough into a ball, place it in a lightly oiled bowl, and cover it with plastic wrap to prevent drying. Let it undergo a first proof in a warm place (around 40℃ / 104℉) for 50 minutes. The dough should increase in size by 1.5 to 2 times its original volume.

Step 4
While the dough is proofing, let’s prepare the ‘Sweet Potato Filling’. While the steamed sweet potato is still warm, mash it thoroughly with a fork or a potato masher in a bowl. Add the unsalted butter, sugar, and milk to the mashed sweet potato. Mix well until everything is combined into a smooth paste.

Step 5
To check if the first proof is complete, gently poke the dough with your finger. If the indentation remains without the dough springing back, or if the dough has visibly doubled in size, it’s ready.

Step 6
After the first proof, gently punch down the dough on a lightly floured surface to release the air. Divide the dough into approximately 7 equal portions. Roll each portion into a smooth ball and let it rest briefly.

Step 7
Cover the dough balls with plastic wrap or a damp kitchen towel and let them rest for 15 minutes for an intermediate proof. This resting period makes the dough more pliable and easier to shape.

Step 8
Take one dough ball and flatten it with your palm. From this flattened dough, pinch off two small pieces (about 5g each) for the ears and one slightly smaller piece (about 3g) for the snout. Set these aside.

Step 9
Flatten the main dough piece again into a disc. Place about 30g of the sweet potato filling in the center. Carefully bring the edges of the dough up and pinch them together to enclose the filling completely, ensuring there are no gaps. Lightly flatten the top to create a base for the face.

Step 10
Now, let’s attach the features. Shape the reserved dough pieces into triangles for the ears and an oval for the snout, then gently press them onto the face. Use the tip of a chopstick or a straw to create two small indentations for the nostrils, adding a cute touch.

Step 11
Place the shaped piggy buns on a baking sheet lined with parchment paper, leaving some space between them. Cover them loosely with plastic wrap or a damp cloth to prevent the surface from drying out. Let them undergo a second proof in a warm place (around 40℃ / 104℉) for 30 minutes. They will puff up nicely.

Step 12
Once the second proof is complete, brush the surface of the buns evenly with egg wash for a beautiful golden-brown finish when baked. Use a toothpick to gently poke two holes where the eyes will be, then press a chocolate chip into each hole to create the piggy’s eyes.

Step 13
Bake the piggy buns in a preheated oven at 170℃ (340℉) for about 10 minutes, or until they are golden brown and fragrant. Baking times may vary depending on your oven. Enjoy your adorable homemade piggies!
