
100% Whole Wheat Bread with Cream Cheese
Homemade 100% Whole Wheat Bread: A Delightful Recipe with Cream Cheese

I’ve recently started making 100% whole wheat bread, driven by my family’s preference for simple, wholesome flavors. It’s incredibly rewarding to see them enjoy it, knowing it’s also much better for their health. This time, I’ve added cream cheese to create an even more delightful and interesting flavor profile. This bread is a wonderful option for those managing diabetes and is also a great addition to a healthy diet or weight management journey. This recipe, featured on major portals, is for my wholesome 100% whole wheat bread! Let’s get baking!
Basic Ingredients- 500g 100% Whole Wheat Flour
- 5g Instant Dry Yeast
- 7g Salt
- 150g Warm Milk
- 200g Warm Water
Optional Add-ins (for a Plain 100% Whole Wheat Bread, omit these)- Cream Cheese (to your liking)
- Nuts (as desired, appropriate amount)
- Cream Cheese (to your liking)
- Nuts (as desired, appropriate amount)
Cooking Instructions
Step 1
Let’s start by looking at all the ingredients we’ll need. Among the various 100% whole wheat flours available, I’ve found this particular brand yields the best texture for my bread. The cream cheese I’m using is from Costco.

Step 2
Sift 500g of 100% whole wheat flour through a fine-mesh sieve. Because it’s whole wheat, some fine bran might remain in the sieve. Don’t worry; you can add it all back into the dough.

Step 3
To the sifted flour, add 5g of instant dry yeast and 7g of salt, and gently mix them. For an extra health boost for my family, I’m adding 2g of Truvia, a sugar substitute. This small amount won’t significantly sweeten the bread, so feel free to omit it if you don’t have it; the bread will be perfectly delicious without it.

Step 4
Pour in the mixture of 200g warm water and 150g warm milk into the dry ingredients. Begin by gently mixing with a spatula or scraper until the ingredients just start to come together. Once it forms a shaggy mass, add your desired nuts. Now, it’s time to get your hands in there and knead! Continue kneading until the dough becomes a cohesive ball and feels firm. You don’t need to knead exhaustively; aim for a consistency where the ingredients are well combined and the dough has some elasticity.

Step 5
Next, we’ll proceed with the first rise. This is a simple step: just let the dough rest in a warm place for about 1 hour. To create a warm environment, I place a bowl of hot water in an oven-safe dish, cover my dough bowl with plastic wrap, place it on top, and close the oven door.

Step 6
After an hour, check if the dough has at least doubled in size. If it hasn’t risen sufficiently, keep it in the warm environment for another 20 minutes.

Step 7
Once the first rise is complete, gently punch down the dough to release the gas. Reshape it into a round ball with your hands, cover it with plastic wrap, and let it undergo a second rise for 30 minutes.

Step 8
After the second rise, you can shape the dough into a round loaf as is. However, since I’m adding cream cheese this time, I’ll gently roll out the dough with a rolling pin.

Step 9
Cut the cream cheese into pieces and place them evenly over the rolled-out dough. Then, fold the dough over the cream cheese and shape it to resemble a large pumpkin or sweet potato.

Step 10
Place the shaped dough in the still-warm oven (door closed) without any covering for about 15 minutes to allow for a third rest. (Think of this less as a formal ‘third rise’ and more as a resting period after shaping – 1 hour for the first rise, 30 minutes for the second, and 15 minutes after shaping.)

Step 11
Before baking, let’s add some decorative scoring on top. (Preheat your oven to 200°C / 400°F during this time.) Lightly dust the top with extra whole wheat flour and make cuts with a knife as desired.

Step 12
Bake in the preheated 200°C (400°F) oven for approximately 25 minutes. Oven temperatures can vary, so keep an eye on the bread and adjust the baking time as needed.

Step 13
And voilà, it’s done! To achieve a darker crust, I increased the oven temperature to 230°C (450°F) for the last 3 minutes of baking. The crust turned out a bit darker than I intended, but the taste is fantastic, so I’m happy! 😊

Step 14
Here’s the finished loaf. When you tap the crust, it should sound hollow. Despite the crusty exterior, the inside is surprisingly soft and chewy.

Step 15
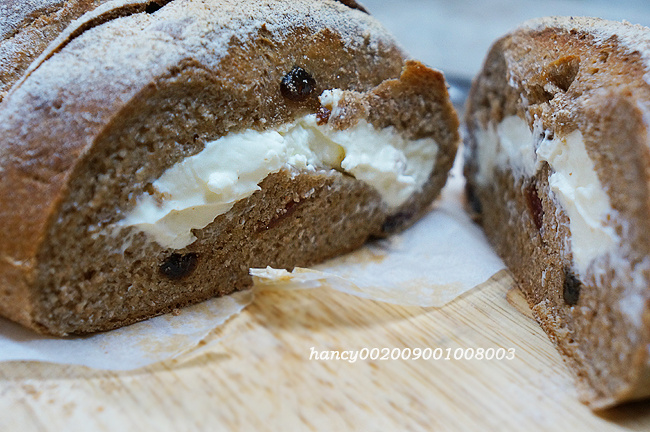
A shot of the finished bread. Adding cream cheese this time resulted in a beautiful, melt-in-your-mouth texture that looks incredibly appetizing.

Step 16
This is the bread after cooling slightly. The aroma is nutty and wholesome. The cream cheese isn’t overly sweet; it adds a subtle tanginess that leaves a refreshing finish.

Step 17
Final look at the finished bread. We’ll enjoy half of it now and slice the rest to freeze for later. If you omit the cream cheese, you’ll have a pure, healthy whole wheat bread. It’s truly not difficult at all! Let’s all make delicious and healthy food at home.^^
