
10-Minute Quick and Delicious Beef Brisket Over Rice (Low Carb)
Simple and Healthy Low-Carb Beef Brisket Rice Bowl Recipe

Today, I’m excited to share a recipe for a one-bowl wonder that you can whip up in just 10 minutes: ‘Beef Brisket Over Rice’ (Woosamgyeop Deopbap)! While this dish is incredibly simple to make, the order of steps is key. Adding allulose to the beef right at the beginning of cooking creates a beautiful coating, allowing the sauce to penetrate deeply and infuse the meat with amazing flavor. It’s a perfect balance of taste and health.
Beef Brisket Rice Bowl Ingredients- Beef brisket 200g
- Green onions 2 stalks
- Cheongyang peppers 3
- Garlic 8 cloves
- Ginger powder 1 tsp
- Allulose 1 tsp
- Low-sugar oyster sauce 1 Tbsp
- Fish sauce 1 Tbsp
- Egg yolk 1
- Toasted sesame seeds (for garnish)
Cooking Instructions
Step 1
First, prepare the fresh green onions. Instead of chopping them finely, cut them into about 3-4cm lengths. This larger cut provides a more satisfying texture that pairs wonderfully with the rice bowl, and it enhances the overall flavor profile.

Step 2
The Cheongyang peppers will add a pleasant kick of spice. Remove the seeds and chop them finely. Thinly slice the garlic cloves. The garlic’s aroma will infuse beautifully as it cooks in the rendered fat.

Step 3
Now, heat a pan over high heat and add the beef brisket. Since beef brisket releases a lot of its own fat, you don’t need to add any extra cooking oil. The sizzle is your cue that it’s ready to start cooking!

Step 4
Cook the beef until it’s about 70% done, meaning most of the pink color has disappeared. Then, reduce the heat to medium-low. If you continue cooking over high heat, the rendered fat can burn, leading to a bitter taste, so managing the heat is crucial.

Step 5
When the beef is about 70% cooked, sprinkle 1 teaspoon of allulose over the meat in the pan. Stir-fry it briefly. Adding allulose at this stage helps create a delicious glaze that coats the beef, enhancing its savory flavor.

Step 6
Continue stir-frying the beef with the allulose for a short while. You’ll notice the beef developing a lovely sheen and a sweet aroma. This step ensures the meat absorbs the delicious flavors beautifully.

Step 7
Now, add the chopped green onions and 1 teaspoon of fragrant ginger powder to the pan. Sauté them with the beef. The sweetness of the scallions and the subtle warmth of the ginger will further elevate the brisket’s deliciousness.

Step 8
For an extra layer of umami, add 1 tablespoon of low-sugar oyster sauce. The rich, complex flavor of the oyster sauce will beautifully round out the entire dish.

Step 9
Toss in the chopped Cheongyang peppers and stir-fry everything together. If you enjoy more heat, feel free to add an extra pepper. The subtle spiciness will cut through any richness and stimulate your appetite.

Step 10
Finally, add 1 tablespoon of ‘Eo-baksa Fish Sauce’. (If you don’t have this specific brand, you can substitute it with tuna extract or another good quality fish sauce.) The deep, savory notes from the fish sauce will perfectly complete the flavor profile of your dish. (Note: I accidentally spilled a bit of the oyster sauce and fish sauce while taking photos, but the result was still delicious! 😊)

Step 11
Nicely arrange the warm konjac brown rice with peas in a bowl. (For detailed instructions on how to cook konjac brown rice with peas, please refer to this link: https://blog.naver.com/oliverneaa/223141341948)

Step 12
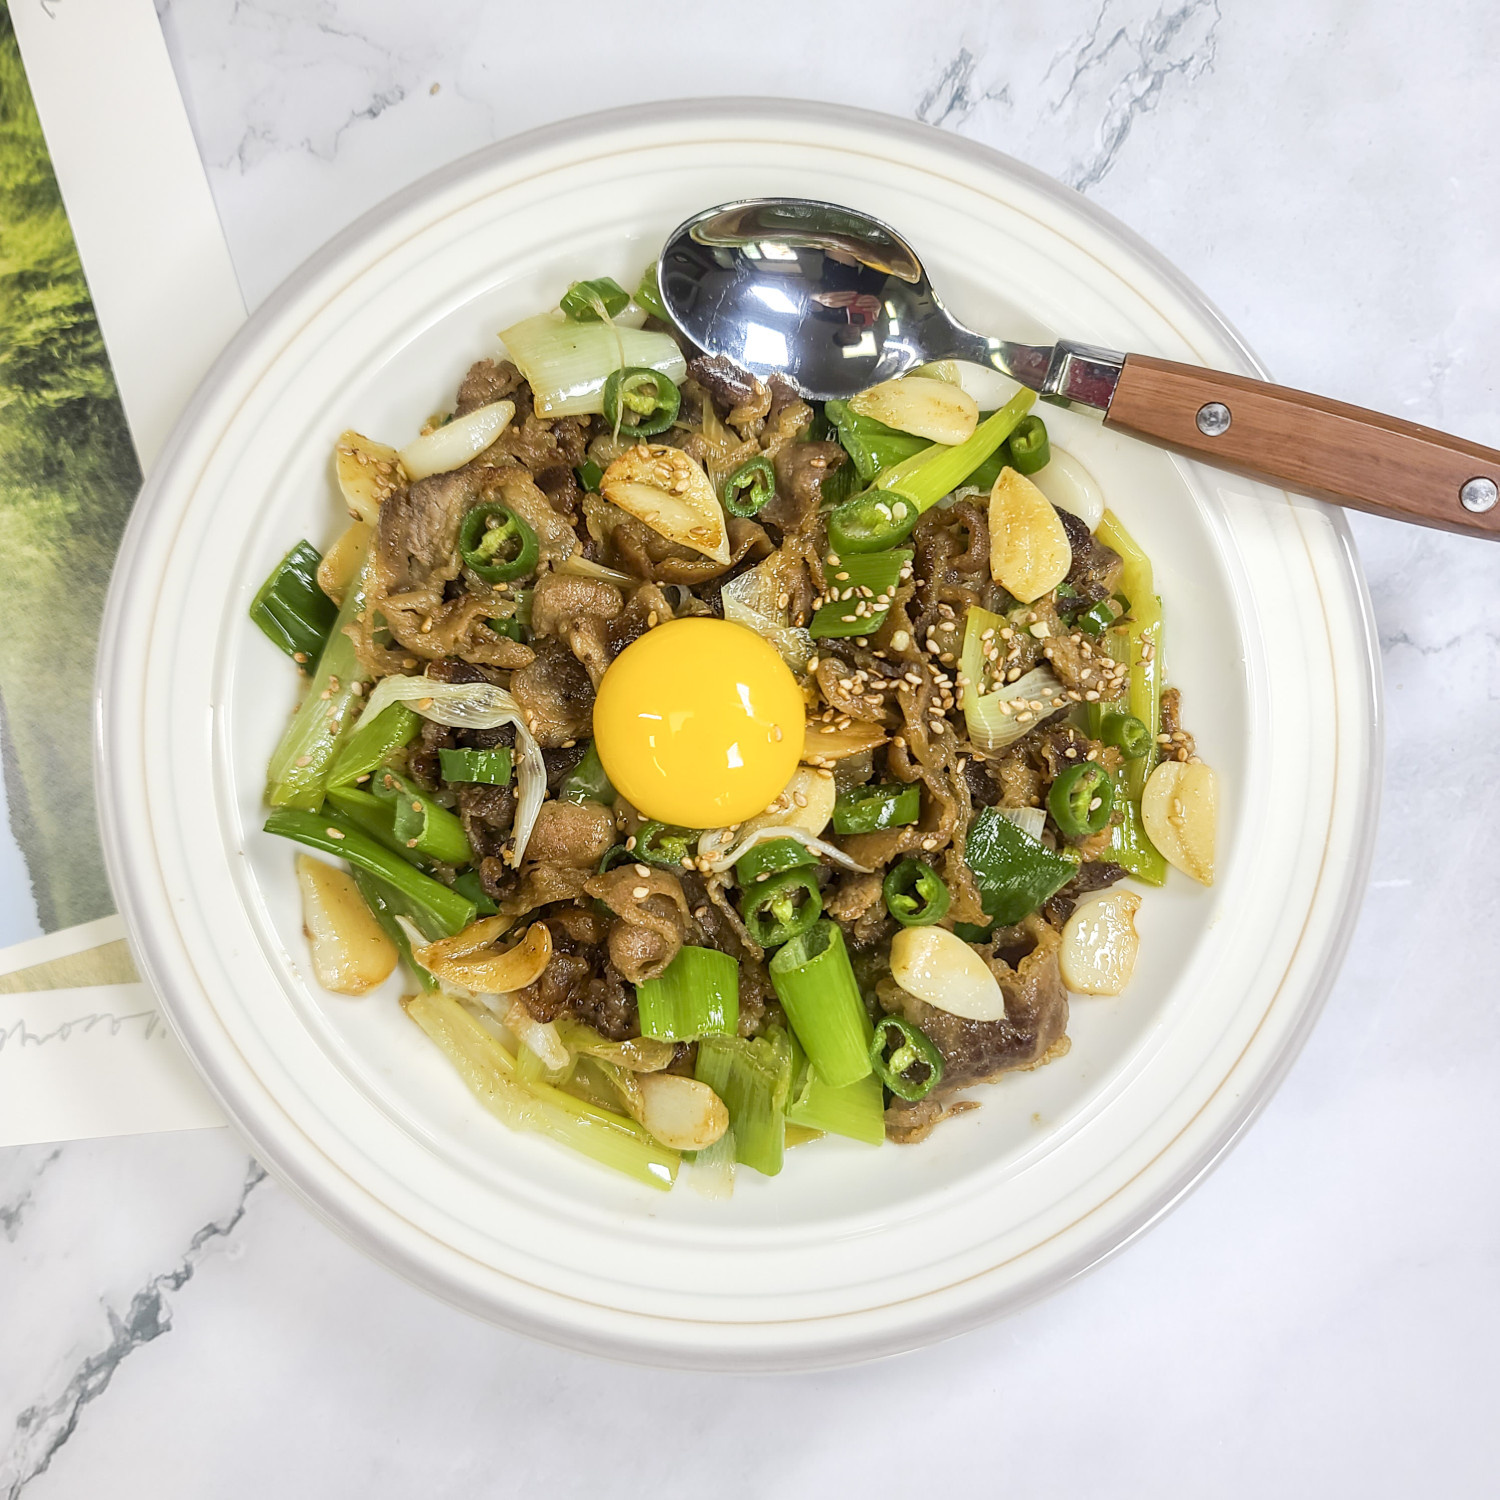
Generously spoon the glistening, stir-fried beef brisket mixture over the rice. Finish with a sprinkle of toasted sesame seeds for a delightful nutty aroma. Your basic Beef Brisket Over Rice is ready, and it’s already incredibly tasty!

Step 13
For an even richer and creamier experience, crack a fresh egg yolk on top and mix it into the rice and beef. The added richness is absolutely delightful! (The egg yolk is optional, so feel free to enjoy it as you prefer.) Although the beef was slightly overcooked due to taking photos, the taste was truly amazing (JMT!) for the minimal effort involved. If you have beef brisket in your freezer, I highly recommend giving this recipe a try. It’s a fantastic meal that’s ready in just 10 minutes with simple ingredients!
