
Homemade Walnut Pie: A Nutty & Healthy Delight
Boost Brain Health & Fight Aging with This Wholesome Walnut Pie! Perfect for Home Baking or Gifting.

Indulge in a delicious walnut pie that’s less sweet and bursting with the rich flavor of nuts! You can easily make this at home, even with a small oven or without special pie molds. Unlike store-bought versions, this pie is perfectly balanced in sweetness, allowing the abundant walnuts to shine. We’ve packed this recipe with a generous amount of walnuts, ensuring a satisfying crunch and nutty aroma in every bite. It makes a wonderful gift and is a hit with all ages, especially seniors. Even with a compact oven, you can bake a generous batch in just two rounds, making it a highly rewarding home baking project!
Pie Dough (for 8 mini pies)- 80g all-purpose flour
- 1/2 large egg (approx. 25g)
- 20g granulated sugar
- 50g cold unsalted butter, cubed
Walnut Pie Filling- 1 cup chopped walnuts (approx. 100g), lightly toasted
- 4 Tbsp brown sugar
- 2 large eggs (approx. 100-110g)
- 8 Tbsp corn syrup or maple syrup
- 1/3 tsp vanilla extract or vanilla essence
- 1/2 tsp ground cinnamon
- 1 cup chopped walnuts (approx. 100g), lightly toasted
- 4 Tbsp brown sugar
- 2 large eggs (approx. 100-110g)
- 8 Tbsp corn syrup or maple syrup
- 1/3 tsp vanilla extract or vanilla essence
- 1/2 tsp ground cinnamon
Cooking Instructions
Step 1
For the pie dough, start by softening the cold butter at room temperature until it reaches a consistency similar to mayonnaise. It should be soft but not melted into a liquid.

Step 2
Place the softened butter in a bowl and use a whisk or spatula to gently cream it until smooth.

Step 3
Add the 20g of granulated sugar for the dough to the butter mixture and mix well.

Step 4
Continue whisking until the mixture turns a pale ivory color and is light and fluffy. Incorporating air at this stage will result in a more tender pie crust.

Step 5
Once the butter and sugar are well combined and ivory-colored, gradually add the egg, whisking continuously. It’s best to add the egg in small increments to prevent the mixture from separating.

Step 6
When the egg is fully incorporated and the mixture resembles mayonnaise, sift the 80g of all-purpose flour directly into the bowl.

Step 7
Add all of the sifted flour to the butter and egg mixture.

Step 8
Using a spatula or scraper, gently cut the flour into the wet ingredients until just combined. Be careful not to overmix, as this can develop gluten and make the pie crust tough.

Step 9
Once the flour is incorporated, gather the dough together, wrap it tightly in plastic wrap, and refrigerate for at least 30 minutes. This chilling period allows the butter to firm up, making the dough easier to handle.

Step 10
While the dough is chilling, prepare the walnut filling. Lightly toast the chopped walnuts in a dry pan for about 5 minutes to enhance their flavor. Watch carefully to prevent burning.

Step 11
Spread the toasted walnuts out on a plate to cool. In a separate bowl, combine all the filling ingredients except for the walnuts. Whisk the eggs first until lightly beaten. (Note: This recipe was doubled, and since the eggs were on the smaller side, 5 were used. One large egg typically weighs about 50-55g.)

Step 12
Once the sugar has dissolved and the eggs are well beaten, add the coarsely chopped toasted walnuts to the filling mixture and stir to combine. While the recipe calls for 1 cup of walnuts, we’ve doubled it for an extra nutty flavor.

Step 13
Before filling the pies, prepare your pie molds. If using mini pie tins with less effective non-stick coating, lightly grease the inside of each tin with butter. This will help the pies release easily. (This step can be skipped if your tins have excellent non-stick properties.)

Step 14
Take portions of the chilled dough and press them thinly into the prepared pie tins. The dough can be a bit sticky due to the high butter content. For small tins, you can often press the dough directly into place. For larger tins, you may need to roll out the dough thinly on a lightly floured surface, being careful to prevent sticking, and then carefully transfer it to the tin.

Step 15
Once the dough is pressed into the tins, carefully spoon the walnut filling into each pie shell, filling them about 70-80% full. Overfilling can cause the filling to bubble over during baking.

Step 16
Bake in a preheated oven at 180°C (350°F) for about 15 minutes. To check for doneness, insert a toothpick into the center; it should come out clean. If the tops start to brown too quickly, you can loosely tent them with aluminum foil.

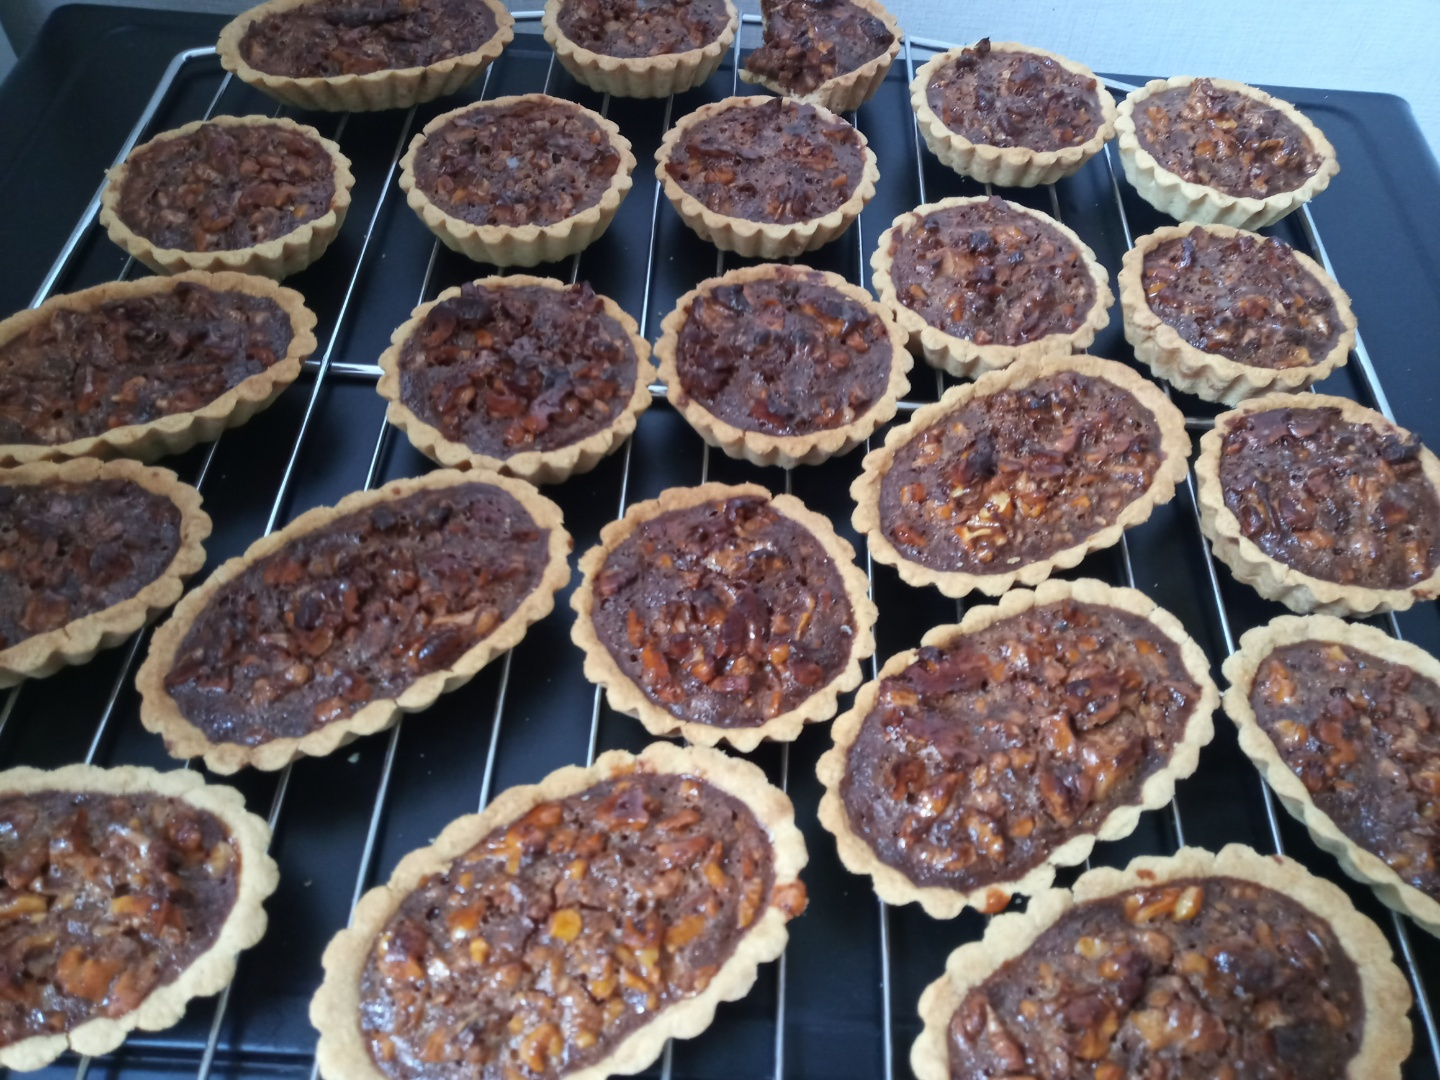
Step 17
Once baked, let the walnut pies cool in their tins for about 10 minutes before carefully removing them. This allows them to set slightly, preventing them from breaking or losing their shape as you remove them.
