
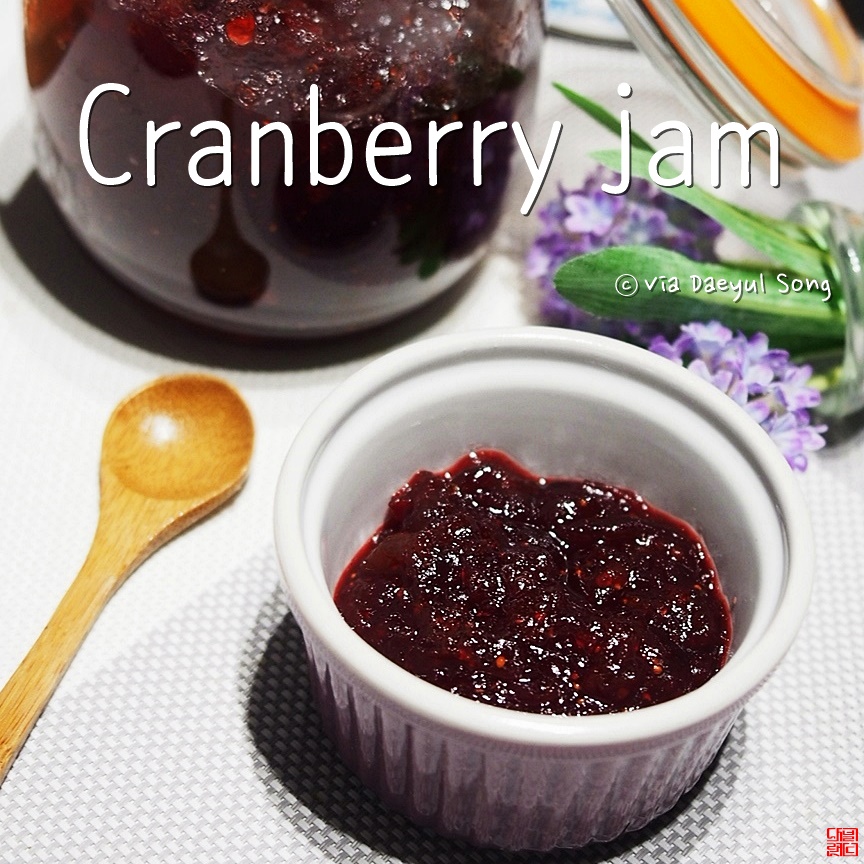
Homemade Tart Cranberry Jam
Easy Homemade Cranberry Jam Recipe

Get ready for a burst of refreshing tartness! Today’s recipe is for a homemade cranberry jam that’s wonderfully simple to make, though it does take a little time. The bright, zesty flavor is incredibly uplifting, making it perfect for gifting or simply enjoying yourself. Let’s dive into creating this delightful cranberry jam together!
Ingredients- Detailed ingredients can be found in the main text.
Cooking Instructions
Step 1
Estimated Time: Approximately 35 minutes

Step 2
Before you begin, wash your hands thoroughly and gather all your ingredients. Having everything prepped will make the cooking process much smoother.

Step 3
Rinse the fresh cranberries under cool running water 2-3 times to remove any dirt or debris. Gentle rinsing is key to keeping the berries intact.

Step 4
After washing, drain the cranberries well in a colander. Ensuring excess water is removed is crucial for achieving the right jam consistency; otherwise, your jam might turn out too watery.

Step 5
To enhance the jam’s vibrant color and add an extra layer of brightness, we’ll use lemon zest. Carefully grate only the yellow part of the lemon peel using a zester or a fine grater. Avoid the white pith, as it can impart a bitter taste.

Step 6
We’ll blend about half of the cranberries in a blender. Using only whole berries can cause them to stick to the bottom of the pot and burn when heated. Blending a portion creates a smoother, more uniform jam texture.

Step 7
Add the lightly blended cranberry purée to the bottom of your jam-making pot. This will form the smooth base of your jam.

Step 8
Sprinkle half of the sugar evenly over the purée. Then, add all the remaining whole cranberries, followed by the rest of the sugar. Gently mix everything together.

Step 9
Place the pot on the stove over medium-high heat to begin cooking. Starting with higher heat helps the cranberries soften and release their juices.

Step 10
After about 4 minutes, the mixture will start to simmer. You don’t need to stir constantly, but give it an occasional stir to prevent sticking. Skim off any foam or impurities that rise to the surface for a cleaner jam.

Step 11
While the jam is cooking, prepare your storage jars. Sterilize them by boiling them in water, including the lids. This sanitation step helps preserve the jam’s freshness for longer.

Step 12
Observe the beautiful ruby color as the jam cooks down. It’s important to stir not only the center but also the edges of the pot, as sugar can sometimes clump or burn on the sides.

Step 13
Once the jam has boiled well and the sugar has mostly dissolved, stir in the prepared lemon zest. The citrus aroma will beautifully complement the cranberry flavor.

Step 14
When the cranberries have released all their liquid and the mixture begins to bubble vigorously, reduce the heat to medium-low. Let it simmer gently for about 20 minutes, stirring occasionally. This slow cooking process develops the perfect jam consistency. Your delicious, tart cranberry jam is almost ready!

Step 15
+Tip: As the jam boils and releases steam, hot splatters can occur. Always reduce the heat to medium-low to ensure safety. Using a splatter screen or a wide spoon can help prevent messes.

Step 16
Allow the finished jam to cool completely at room temperature before transferring it to your sterilized jars. As it cools, it will thicken to the ideal jam consistency. Once cooled and jarred, you’ll have a wonderful homemade cranberry jam ready to be enjoyed on toast, yogurt, with cheese, and more!
