
Crispy Cucumber Kimchi (Oi Sobagi): A Healthy and Easy Side Dish
How to Make Delicious Oi Sobagi: Achieve a Satisfying Crunch with Flavorful Seasoning

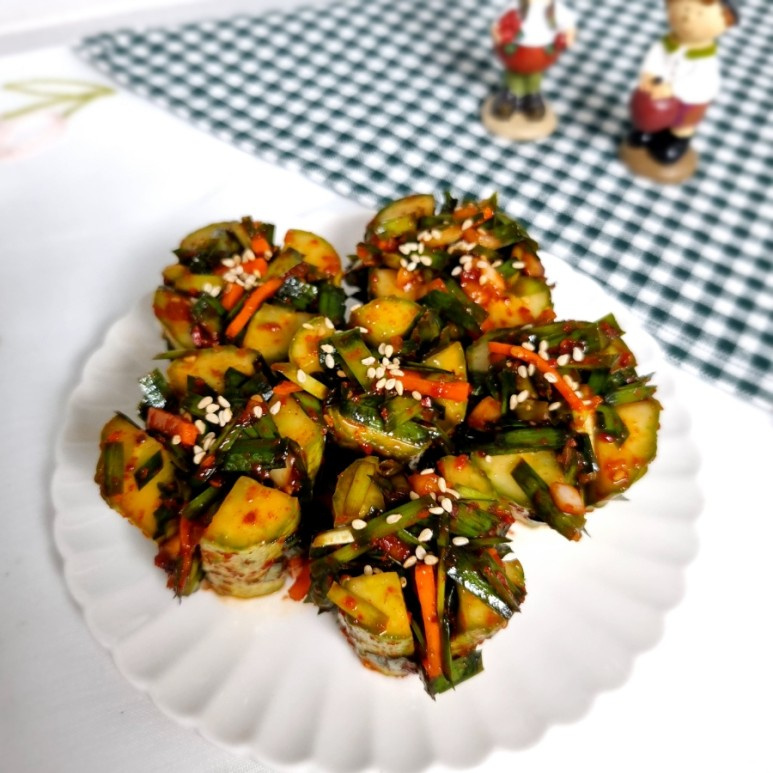
Now that cucumbers are in season and affordable, let’s make some delicious Oi Sobagi! While delicious eaten fresh, homemade Oi Sobagi makes a satisfying side dish for any meal. Let’s create this cost-effective and delightful cucumber kimchi with detailed instructions.
Main Ingredients- 6 cucumbers
- 300g chives
Additional Vegetables- 1/2 carrot
- 1/2 onion
Seasoning Ingredients- 1 Tbsp minced garlic
- 6 Tbsp chili powder (gochugaru)
- 6 Tbsp fish sauce (e.g., Kkanari)
- 3 Tbsp plum extract (maesilcheong)
- 3 Tbsp corn syrup (oligosaccharide)
- 2 Tbsp ginger extract (saenggangcheong)
- 1 Tbsp toasted sesame seeds
Brining Ingredients- 2 Tbsp coarse sea salt
- 600ml water
- 1/2 carrot
- 1/2 onion
Seasoning Ingredients- 1 Tbsp minced garlic
- 6 Tbsp chili powder (gochugaru)
- 6 Tbsp fish sauce (e.g., Kkanari)
- 3 Tbsp plum extract (maesilcheong)
- 3 Tbsp corn syrup (oligosaccharide)
- 2 Tbsp ginger extract (saenggangcheong)
- 1 Tbsp toasted sesame seeds
Brining Ingredients- 2 Tbsp coarse sea salt
- 600ml water
- 2 Tbsp coarse sea salt
- 600ml water
Cooking Instructions
Step 1
First, wash the cucumbers thoroughly under running water.

Step 2
Gently scrape off any prickly parts on the cucumber skin using the back of a knife or a similar tool. Be careful not to damage the cucumber’s surface as you clean it.

Step 3
Trim off the ends of the cucumbers, as they can sometimes taste bitter. Then, cut the cucumbers into manageable pieces, about 6cm (approximately 2.5 inches) in length.

Step 4
A crucial step for Oi Sobagi is making the cuts. Carefully slice into the cucumbers in a cross shape (like an ‘X’). If you’re new to this, a helpful trick to prevent cutting all the way through is to place two chopsticks parallel to each other on the cutting board and lay the cucumber in between them before making the cut. This provides a natural depth guide.

Step 5
This method allows you to make precise cuts quickly and without mistakes, making the process of preparing your cucumbers much easier.

Step 6
Now, let’s prepare the brine for pickling the cucumbers. Pour 600ml of water into a pot and bring it to a boil. Add 2 tablespoons of coarse sea salt and stir until it’s completely dissolved.

Step 7
Pour the hot saltwater mixture over the prepared cucumbers while it’s still hot. This helps to tenderize the cucumbers while keeping them crisp.

Step 8
Let the cucumbers brine for about 30 minutes. Avoid over-brining, as this can make them too soft. During this time, flip the cucumbers once or twice to ensure even pickling. Once brined, drain the cucumbers well in a colander and set them aside. While they drain, prepare the filling ingredients.

Step 9
Julienne the carrot (cut into thin matchsticks), then chop it into pieces about 1cm (about 0.4 inches) long.

Step 10
Similarly, julienne the onion and then chop it into pieces about 1cm long.

Step 11
Wash the chives and drain them thoroughly, then cut them into pieces about 1cm long.

Step 12
Now it’s time to mix the filling! In a bowl, combine the chopped carrots, onions, and chives. Add 6 tablespoons of fish sauce. Accurate measurement here is important for seasoning.

Step 13
Next, add 6 tablespoons of chili powder (gochugaru) for a pleasant spiciness. You can adjust the amount of chili powder to your preference.

Step 14
Stir in 1 tablespoon of minced garlic for a pungent aroma.

Step 15
Add 2 tablespoons of ginger extract for a clean, sweet flavor and aroma.

Step 16
Pour in 3 tablespoons of plum extract (maesilcheong) for a sweet and tangy note.

Step 17
Mix all the seasoning ingredients thoroughly. Because the cucumbers will release moisture, it’s best to make the seasoning slightly saltier than you think you need; it will balance out as the kimchi ferments.

Step 18
Finally, add 3 tablespoons of corn syrup (oligosaccharide) for gloss and a subtle sweetness, and 1 tablespoon of toasted sesame seeds. Mix well. Let the mixture sit for about 10 minutes; this allows the chives to soften slightly and the flavors to meld beautifully.

Step 19
Take the drained, brined cucumbers and prepare to fill them with the delicious chive mixture you just made.

Step 20
Gently open each cucumber along the cut lines and carefully stuff the filling into the crevices. Be mindful not to overfill, as the kimchi will expand as it ferments.

Step 21
After filling the inside, lightly spread some of the seasoning mixture on the outside of the cucumbers. This adds color and enhances the overall flavor.

Step 22
Arrange the filled cucumbers snugly in a fermentation container, such as a kimchi jar.

Step 23
Finally, cover the top of the cucumbers with any remaining filling. This helps to seal them from air exposure, ensuring a fresher fermentation. Press down gently, close the lid tightly, and let your delicious Oi Sobagi ferment!

Step 24
Say goodbye to heavy kimchi during the warmer months! Revitalize your appetite with crisp Oi Sobagi for a refreshing and healthy meal.
