
Aromatic Chwinamul (Aster Scaber) Rice Rolls
Crafting a Special Lunchbox with Spring’s Finest: Chwinamul Kimbap

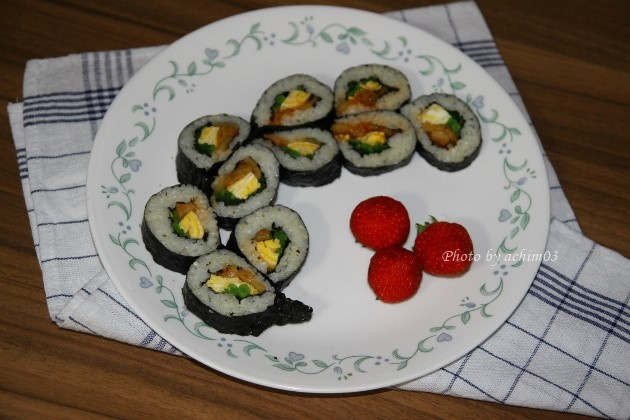
Our tables are truly abundant these days with the arrival of various spring greens! Today, we’re making a special kimbap by adding the fragrant chwinamul. These chwinamul kimbap rolls are perfect for a delightful picnic lunchbox.
Kimbap Ingredients- 300g fresh Chwinamul (Aster Scaber)
- 1 head Napa Cabbage Kimchi (seeds removed and squeezed dry)
- 6 Eggs
- 12 sheets of Gim (seaweed for kimbap)
Seasoning & Flavoring- 1/3 Tbsp Salt (for seasoning greens and eggs)
- 1 Tbsp Toasted Sesame Seeds
- 1/2 Tbsp Sesame Oil
- 1/3 Tbsp Salt (for seasoning greens and eggs)
- 1 Tbsp Toasted Sesame Seeds
- 1/2 Tbsp Sesame Oil
Cooking Instructions
Step 1
Chwinamul, a representative spring vegetable, is in season from March to May. Bring a pot of water to a boil with a pinch of salt. Briefly blanch the chwinamul for about 1 minute. Immediately rinse it under cold running water to cool it down; this helps preserve its fresh, crisp texture.

Step 2
Since the chwinamul will be used as a filling, keep it in long strands without cutting. In a bowl, combine the blanched chwinamul with salt, toasted sesame seeds, and sesame oil. Gently mix and massage the ingredients into the greens to ensure they are well-coated and seasoned, bringing out their natural fragrance.

Step 3
Carefully remove the spicy filling from the napa cabbage kimchi. Squeeze out as much liquid as possible to prevent the kimbap from becoming soggy. To enhance its flavor, lightly toss the kimchi with a bit of sesame oil and sesame seeds. Using only the kimchi leaves can help prevent the kimbap from bursting when rolled.

Step 4
We’ll make a thick egg omelet for the kimbap filling. Whisk the eggs in a bowl with a pinch of salt. Heat a lightly oiled pan and pour a thin layer of egg mixture. Repeat this process about 4 times to create a satisfyingly thick egg omelet.

Step 5
Let the freshly made egg omelet cool slightly before slicing it into strips suitable for kimbap filling. Slicing it while it’s still warm but not hot will make it easier to handle. Avoid slicing too thinly, as it might crumble.

Step 6
Now that all our ingredients are prepped, let’s roll the kimbap! The rice for kimbap is cooked with a piece of dried kelp (dashima) for a fluffy texture. Season the hot rice with salt; this prevents the rice grains from clumping and ensures delicious flavor. Today, we’ll try making decorative shaped kimbap. Place a sheet of gim, shiny side down, on a rolling mat. Spread a thin layer of seasoned rice evenly across the gim, leaving about 1-2 cm borders at the top and bottom.

Step 7
Arrange the prepared chwinamul, kimchi, and egg omelet strips evenly over the rice. (Photo for this step is missing.) Starting from the bottom edge, gently roll the gim upwards, pressing firmly to secure the filling. Once rolled, press the seam to seal the kimbap tightly.

Step 8
Shaping decorative kimbap requires a specific cutting technique. First, trim off the ends of the rolled kimbap for a clean finish. Then, carefully align the kimbap rolls and cut them into 8 equal pieces per roll, ensuring uniform size. This creates beautifully shaped and delicious chwinamul kimbap for you to enjoy!
