
Easy Homemade Red Bean Porridge (Patjuk)
How to Make Patjuk with Rice Grains (Without Rice Balls)

There are various ways to make Patjuk (red bean porridge), some include chewy rice balls (saealshim) or cooked rice grains (maepssal). Today, I’m sharing a simple and delicious recipe for Patjuk that uses rice grains instead of rice balls. Using an electric pressure cooker’s multigrain setting makes cooking the red beans incredibly easy and hands-off, so you don’t have to stand by the stove. This method results in a wonderfully smooth and nutty red bean porridge that’s perfectly suited to your taste. Enjoy a comforting bowl of homemade Patjuk for a hearty meal or a delightful treat!
Patjuk Ingredients- 2 cups red beans
- 1 cup short-grain rice (maepssal)
- 1.5 liters water
- Salt to taste
- Sugar to taste
Cooking Instructions
Step 1
First, prepare 1 cup of short-grain rice. Rinse the rice thoroughly and let it soak for at least 1 hour. Soaking ensures the rice grains will cook evenly and become soft without clumping.

Step 2
For the red beans, we’ll use 2 cups (using a standard 200ml measuring cup). This amount will yield a generous pot of Patjuk, enough for about 4-5 servings.

Step 3
Rinse the red beans several times under running water until the water runs clear. This step helps remove any dust or impurities from the beans.

Step 4
As you rinse, you might notice some red beans floating on the surface. These are often empty or of lower quality, so discard them along with the water during rinsing.

Step 5
After washing, drain the red beans using a sieve. Letting them drain briefly before cooking is a good practice.

Step 6
Before boiling the red beans fully, it’s beneficial to blanch them in the first water. This helps remove any bitterness and can aid digestion, preventing stomach discomfort.

Step 7
In a pot, add enough water to generously cover the red beans. Bring the water to a rolling boil, then let it boil for just 1-2 minutes before discarding the water.

Step 8
Drain the blanched red beans and rinse them lightly under cold running water 2-3 times. This rinsing step further helps to eliminate any remaining bitterness.

Step 9
Now, we’ll cook the red beans for the second time. Boiling them in a pot until soft can take about an hour, but using an electric pressure cooker significantly simplifies the process. You can use the ‘multigrain’ or ‘mixed grains’ setting, which usually takes around 40 minutes, and you don’t have to monitor it constantly. Add all the blanched red beans to your pressure cooker pot.

Step 10
Add 1 liter of water for every 2 cups of red beans. Ensure the beans are well submerged.

Step 11
Close the pressure cooker lid and select the ‘multigrain’ (or ‘mixed grains’) cooking mode. The cooking cycle typically takes about 40 minutes.

Step 12
After 40 minutes, open the pressure cooker to find the red beans perfectly tender and cooked through. Tasting a few reveals a delightful nutty and soft texture!

Step 13
Check if the red beans are cooked until very soft by pressing them with a spoon; they should easily mash. Properly cooked beans are key to achieving a smooth Patjuk texture.

Step 14
Transfer all the cooked red beans to a stainless steel pot. We’ll be blending them now. I’m using an immersion blender for convenience. If you’re using a regular blender, make sure to let the beans cool down considerably before blending for safety.

Step 15
Add another 1 liter of water to the pot with the blended beans. The exact amount of water can be adjusted later as the porridge simmers, so start with this quantity.

Step 16
Use the immersion blender to process the beans. I prefer not to blend them completely smooth; leaving some texture from the red bean skins adds a nice bite. Since the beans are well-cooked, a little texture is perfectly fine and delicious.

Step 17
Once the mixture starts to simmer, add the soaked short-grain rice (1 cup). Stir well to ensure the rice grains don’t clump together.

Step 18
Add an additional 500ml of water. Now, reduce the heat to medium-low and stir constantly to prevent the bottom from scorching. Cook until the rice grains are tender and the porridge reaches your desired consistency. It’s best to add water gradually rather than all at once to achieve the perfect thickness.

Step 19
Even if the amount of rice seems small initially, it will expand and thicken the porridge as it cooks. *Important Tip: Constant stirring is crucial! If you stop stirring, the Patjuk can easily stick to the bottom of the pot and burn, giving it an unpleasant taste. If you find constant stirring difficult, consider adding the soaked rice to the pot with water first and cooking it until partially tender, then adding the blended red beans later.

Step 20
As the Patjuk heats up, skim off any foam that rises to the surface with a ladle. This helps create a cleaner and more appealing final dish.

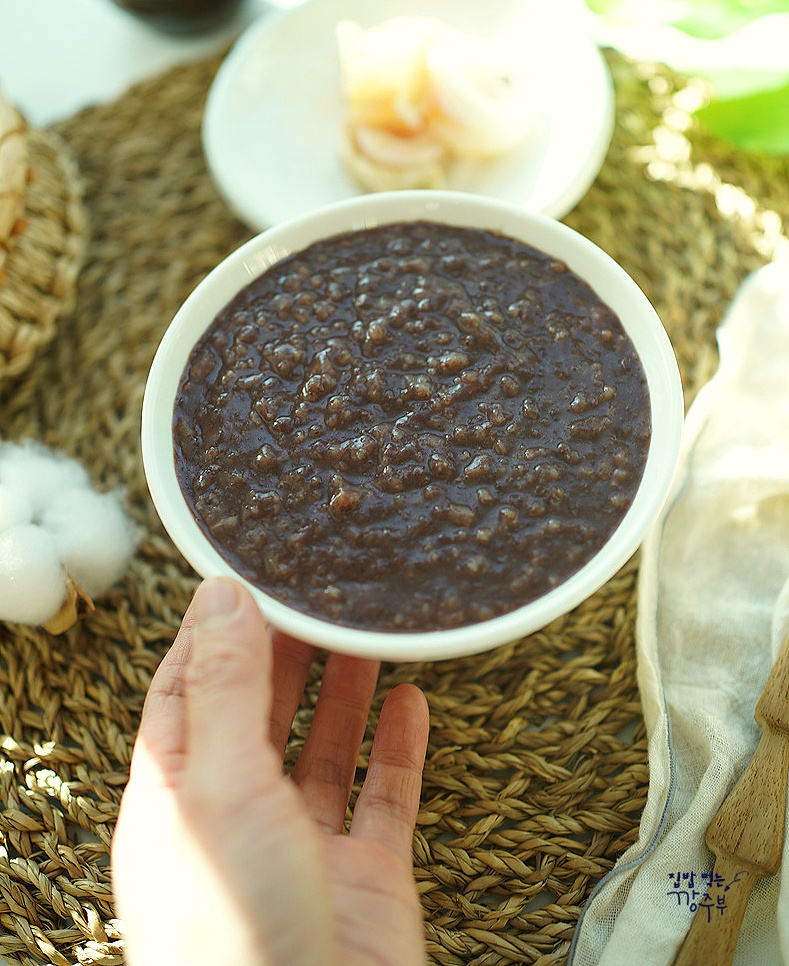
Step 21
Continue to simmer over medium-low heat, stirring frequently, until the Patjuk reaches your desired thickness. Remember, frequent stirring is key to preventing sticking. Finally, season with salt and sugar to your taste. I personally prefer to add seasoning just before serving. Enjoy your delicious, homemade Patjuk while it’s warm!
