
Spring Delight: Tender ‘Sogeum-Baechu’ (Inner Cabbage) Kimchi
Spring Kimchi Recipe: Delicious and Refreshing ‘Sogeum-Baechu’ and Yeolmu Kimchi

As winter kimchi gives way to warmer weather, it’s time for a refreshing spring kimchi! In April, the desire for a cool bowl of rice mixed with kimchi and a drizzle of sesame oil becomes irresistible. This recipe elevates the traditional ‘yeolmu kimchi’ by using ‘sogeum-baechu’ or ‘sogeum-mu’ (inner young cabbage or radish) instead of regular yeolmu or ‘eolgari’ (young radish greens). These special vegetables are sweeter, more tender, and have a richer, nuttier flavor. While they might be slightly more expensive, the delightful taste is well worth it for your family. Let’s make some delicious spring kimchi today!
Main Ingredients- 3kg Sogeum-baechu (or Eolgari-bae) (Inner young cabbage)
- 1kg Yeolmu (Young radish greens)
- 3 medium Onions
- 40-50 Scallions (Green onions)
- 3 cups Coarse sea salt (approx. 450g), for brining
Kimchi Seasoning- 1 thumb-sized piece Ginger (about 1 Tbsp minced)
- 4 Tbsp Minced garlic
- 16 Tbsp Fish sauce (anchovy or similar)
- 4 Tbsp Salted fermented shrimp (minced)
- 12 Tbsp Korean plum extract (Maesil-cheong)
- 1 Tbsp Sugar
- 4 cups Cooked glutinous rice paste (starch slurry: 4 Tbsp glutinous rice flour with 4 cups water)
- 4 cups Gochugaru (Korean chili flakes)
- 4 cups Dashi broth (made with kelp, dried anchovies, etc.)
- 1 thumb-sized piece Ginger (about 1 Tbsp minced)
- 4 Tbsp Minced garlic
- 16 Tbsp Fish sauce (anchovy or similar)
- 4 Tbsp Salted fermented shrimp (minced)
- 12 Tbsp Korean plum extract (Maesil-cheong)
- 1 Tbsp Sugar
- 4 cups Cooked glutinous rice paste (starch slurry: 4 Tbsp glutinous rice flour with 4 cups water)
- 4 cups Gochugaru (Korean chili flakes)
- 4 cups Dashi broth (made with kelp, dried anchovies, etc.)
Cooking Instructions
Step 1
We’re making a special spring kimchi today! Instead of regular young radish greens, we’ll use the sweeter and more tender ‘sogeum-baecha’ (inner young cabbage) or ‘sogeum-mu’ (inner young radish) to make it like traditional ‘yeolmu kimchi’. The boxed ‘sogeum’ vegetables available at markets nowadays are particularly fresh and clean, making them a great choice.

Step 2
Trim the ‘sogeum-baecha’ (or ‘sogeum-mu’). Cut the longer outer leaves in half lengthwise, but leave the shorter inner parts as they are. If using ‘sogeum-mu’, don’t discard the roots; clean them well and use them.

Step 3
Since the vegetables are quite clean, we’ll only rinse them gently. Fill a large basin with water and let the vegetables soak for a short while. Handle them gently as they are very tender and can bruise easily.

Step 4
After soaking, rinse the vegetables under running water. Now, let’s brine them. Dissolve 1 cup of coarse sea salt in 4 cups of water to make a saltwater solution. Sprinkle the remaining 2 cups of salt layer by layer over the rinsed vegetables. Then, evenly pour the dissolved saltwater over the top. This ensures the vegetables are brined uniformly. After about an hour, they should be wilted and submerged in the brine, indicating they are ready. Flip them halfway through the brining process.

Step 5
While the vegetables are brining, let’s make the glutinous rice paste. In a pot, combine 4 Tbsp of glutinous rice flour with 4 cups of cold water and stir until smooth. Then, cook over medium-high heat, stirring constantly to prevent sticking.

Step 6
As the paste thickens and starts to bubble, reduce the heat to medium-low and simmer for another minute. Turn off the heat and let it cool completely. This will result in a smooth and slightly viscous paste.

Step 7
Prepare a flavorful dashi broth. Simmer 4 cups of water with a typical dashi pack (containing kelp, dried anchovies, etc.) until the broth is richly flavored.

Step 8
Allow the dashi broth to cool down completely, just like the rice paste.

Step 9
Now, let’s prepare the other ingredients. For the scallions, about 10-15 stalks per kg of main vegetable is standard, but spring scallions are so aromatic, you can add more! Aim for about 40-50 stalks.

Step 10
Thinly slice the 3 onions. Slicing them thinly will help them meld beautifully with the kimchi seasoning.

Step 11
Cut the prepared scallions into roughly 4-5 cm lengths.

Step 12
It’s time to mix the seasoning! In a large bowl, combine 16 Tbsp fish sauce, 4 Tbsp finely minced salted fermented shrimp, 12 Tbsp plum extract, 4 Tbsp minced garlic, 1 Tbsp minced ginger (about the same amount as 1 Tbsp garlic), and 1 Tbsp sugar. Mix well. (You can adjust the sweetness from plum extract or sugar to your preference.)

Step 13
Add the cooled glutinous rice paste (4 cups) and dashi broth (4 cups) to the seasoning bowl. Stir everything together thoroughly. Finally, add 4 cups of gochugaru and mix until well combined.

Step 14
Here’s what the mixed seasoning looks like. The gochugaru will absorb moisture and the paste will thicken further. Aim for a consistency that’s neither too thick nor too thin.

Step 15
Rinse the brined cabbage (or radish) in plenty of water to wash away the excess salt. Rinse gently, don’t scrub too hard, and drain well but don’t squeeze out all the moisture.

Step 16
In a large kimchi tub or bowl, combine the drained cabbage (or radish), sliced onions, and scallions. Pour the prepared seasoning over them. Since spring vegetables can develop a ‘green’ flavor if handled too roughly, it’s best to mix the onions and scallions first, then gently incorporate the seasoning by lifting from the bottom up.

Step 17
It looks like a lot, doesn’t it? This generous batch is perfect for sharing with family and friends.

Step 18
Be careful not to pack the kimchi down too firmly or rub it excessively. Gently mixing will preserve the fresh flavor and aroma of the spring vegetables, preventing any raw taste. This is the essence of spring kimchi!

Step 19
If the kimchi tastes a bit bland, resist the urge to add more salt. My mother always said that spring kimchi is best when it’s slightly mild; the natural flavors of the ingredients shine through. This subtle seasoning is key.

Step 20
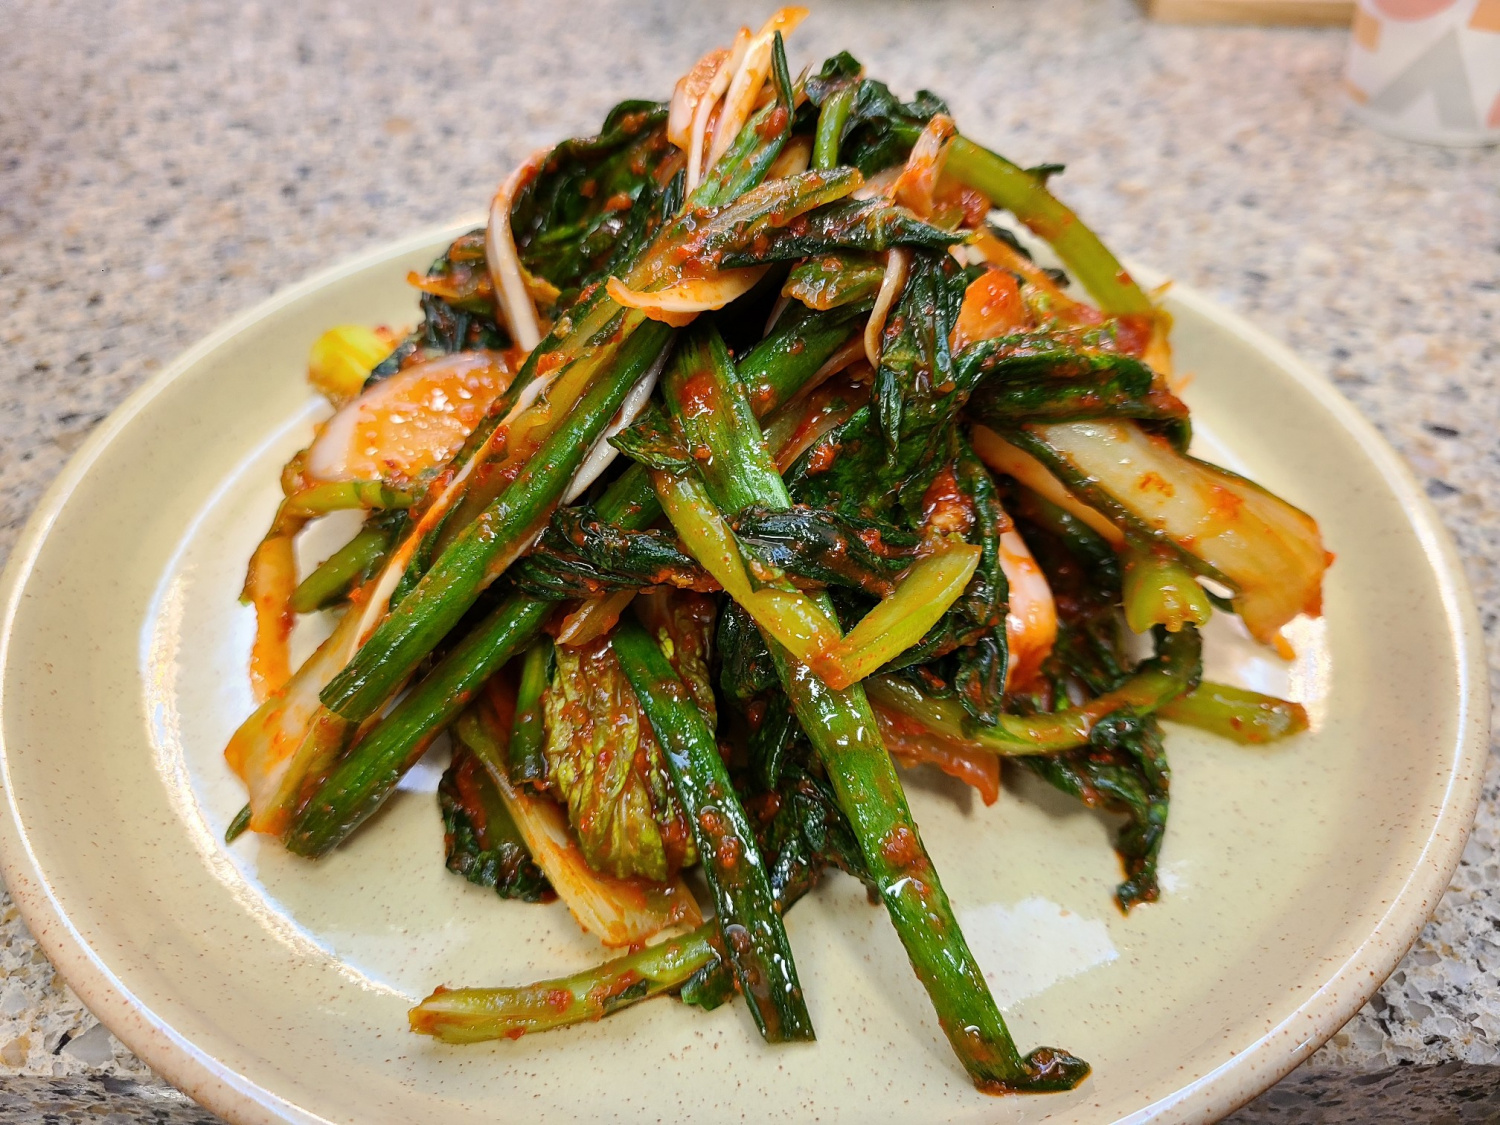
Even right after making it, this kimchi is delicious to eat, with a fresh and nutty flavor.

Step 21
With a total yield of about 4kg, you’ll have plenty to divide into multiple containers for sharing.

Step 22
The irresistible aroma of the freshly made kimchi was too much, so I decided to have a late-night snack right away.

Step 23
Mixing some of this kimchi with a spoonful of sesame oil over a bowl of warm rice is pure bliss! I can’t wait to see how delicious it will be tomorrow.
