
Whole Wheat Spinach Cookies for Dogs
Healthy Whole Wheat Spinach Cookies for Your Furry Friend

Discover a delightful way to treat your dog with these homemade, healthy whole wheat spinach cookies! These cookies are packed with wholesome ingredients, including spinach powder and chicken, making them both nutritious and delicious. They bake up wonderfully crispy, perfect for a satisfying crunch. I used pre-ground chicken for convenience, which I had prepared by boiling 1kg of chicken, chilling it, and then finely grinding it in a blender. These cookies are a fantastic way to use up small portions of chicken and can be shaped into fun forms your dog will adore.
Main Ingredients- Spinach powder 45g
- Ground chicken (or boiled & ground chicken breast) 300g
- Anchovy powder 10g
- Whole wheat flour 300g
- Soft rice flour 30g
- Whole eggs 5 (room temperature)
- Honey 150g (or adjust to taste)
Cooking Instructions
Step 1
You’ll notice these spinach cookies share many ingredients with the carrot cookies we made previously! The main difference is the addition of spinach powder. Let’s get started with preparing our ingredients!

Step 2
First, carefully sift the whole wheat flour and soft rice flour about three times into a bowl. This step ensures a lighter texture and prevents lumps in your cookie dough. Set aside the sifted flours.

Step 3
In a separate bowl, combine the ground chicken (or your pre-prepared boiled and ground chicken breast) with the spinach powder.

Step 4
Add the anchovy powder to this mixture and stir everything together thoroughly. The anchovy powder adds a wonderful depth of flavor.

Step 5
Next, whisk the whole eggs in a bowl until well combined. Then, stir in the honey until fully incorporated. Honey not only adds a touch of sweetness but also helps bind the dough. Gradually add this wet mixture to your dry ingredients, mixing as you go.

Step 6
Using a spatula, gently fold the ingredients together until a dough starts to form. The dough might be quite stiff, so using a sturdy wooden spoon or spatula will make this process much easier.

Step 7
Once the dough is formed, place it inside a plastic bag. Use a rolling pin to evenly flatten the dough to about 5-7mm thickness. Once flattened, refrigerate the dough to chill.

Step 8
Chilling the dough allows the moisture to distribute evenly and helps all the ingredients meld together. This step makes the dough much easier to handle and cut with cookie cutters.

Step 9
After the dough has chilled for at least half a day, carefully cut open the plastic bag. Use your favorite cookie cutters to shape the dough. Arrange the cut-out cookies on a baking sheet, leaving a little space between each one.

Step 10
For the cookie cutters, I reused some flexible metal shapes that were originally intended for something else. You can easily shape them into stars, hearts, or other fun designs by bending them.

Step 11
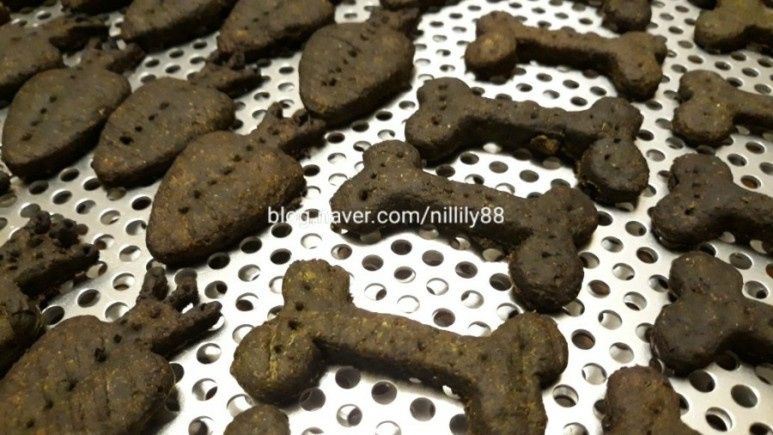
Shaping the cookies into fun forms can make baking even more enjoyable, especially if your dog has a favorite shape! I used a carrot-shaped cutter, but honestly, they looked more like octopuses once baked! (Haha)

Step 12
Consider using bone shapes, fish shapes, or any other fun cutters to spark your dog’s interest. Get your dog involved in the process by letting them choose the shapes!

Step 13
Preheat your oven to 180°C (350°F). Once preheated, bake the cookies for about 10 minutes. Baking time can vary depending on your oven and the thickness of your cookies.

Step 14
If you’re using a convection oven with multiple racks, or baking several trays at once, remember to rotate the trays halfway through baking to ensure even cooking. Typically, switching positions every 8-9 minutes is a good strategy.

Step 15
In this instance, I rolled the dough a bit thicker than usual because I was short on time. This resulted in thicker cookies that required about 15 minutes of baking. They ended up being slightly overbaked. If you roll the dough thinner, 10 minutes should be sufficient.

Step 16
The final yield was 700g. Because they were baked for a bit longer, a lot of the moisture evaporated, resulting in quite hard cookies. Unlike the previous whole wheat carrot cookies, these have a firmer texture. Adjust your baking time and thickness to achieve your desired cookie crispness!
