
Homemade Pear and Bellflower Root Syrup: Your Seasonal Wellness Elixir
Crafting Your Own Pear and Bellflower Root Syrup for Soothing Tea

As the seasons change and the air turns crisp, there’s nothing quite like a warm cup of tea to soothe a ticklish throat or ward off a hint of a cold. This year, why not create your own health-boosting elixir with homemade Pear and Bellflower Root Syrup? Using fresh bellflower root from our parents’ garden and succulent pears, this syrup is not only a delicious treat but also a wonderful way to support your respiratory health. Bellflower root is renowned for its ability to help clear phlegm and support lung function, thanks to its rich saponin content, which also offers antioxidant benefits. Pears, composed of over 90% water, aid in hydration and help regulate blood pressure with their abundant potassium. Together, they create a harmonious blend of flavor and nourishment. Much like ‘Baesook’ (steamed pear), a traditional Korean remedy often made for winter coughs, this syrup is a natural powerhouse for respiratory well-being. As the cooler weather approaches, let’s learn how to make this revitalizing Pear and Bellflower Root Syrup step-by-step to boost your family’s immunity.
Ingredients- 500g Bellflower root (Platycodon grandiflorus), cleaned and prepped
- 500g Pear, cleaned and prepped
- 500g Honey
- 300g Sugar (can be adjusted to taste)
- 2-3 Tbsp Lemon juice
Cooking Instructions
Step 1
First, we’ll prepare the fresh bellflower root, which was recently harvested. Since it’s fresh from the garden, it will be covered in soil. Begin by thoroughly washing off all the dirt under running water.

Step 2
Peeling the bellflower root can be a bit tedious, but because it’s so fresh, it wasn’t dry and was relatively easier to peel. After thoroughly washing off the soil, soaking the roots in water for about 30 minutes will help soften the skin, making it easier to peel. Trim the bottom end, then make a shallow incision along the skin with a knife and gently twist to peel it off. For the thinner stem parts, you can lay them on a cutting board and use the side of your knife to scrape off the skin. It’s crucial to submerge the peeled roots in water immediately to prevent them from turning brown. If you plan to store them for a few days, you can pack them in a plastic bag with a little water and seal tightly before refrigerating. For this recipe, I’ve roughly chopped them for immediate use in the syrup.

Step 3
Next, we prepare the pears, which are full of moisture and beneficial for throat health. Peel the pears, remove the core, and chop them into roughly chopped pieces, similar to the bellflower root, to make blending easier. It’s important to use equal weights of bellflower root and pear. While you can make the syrup by simply chopping both ingredients finely, I prefer to blend them for a smoother texture, especially for children as a natural remedy. So, we’ll be using a blender for a velvety finish.

Step 4
When blending, it’s best to add the ingredients with higher water content first to ensure smooth blending. Therefore, place the chopped pear pieces into the blender at the bottom, followed by the chopped bellflower root. Depending on the capacity of your blender, you might need to blend in two or three batches.

Step 5
Blend the mixture until it becomes a smooth, fine paste. Thanks to the water content of the pears, all the ingredients blend together beautifully and effortlessly.

Step 6
To ensure the syrup stays fresh and free from mold, it’s essential to sterilize your glass jars using boiling water. To prevent the glass from cracking due to a sudden temperature change, place the jars in cold water and bring it to a boil. Once it starts boiling, turn off the heat and let the jars sit for a moment. This helps to evaporate the moisture inside, allowing the jars to dry quickly, which is beneficial while the syrup is simmering.

Step 7
Add the prepared bellflower root (500g) and pear (500g) into the sterilized jar. Now, add an equal amount of honey, which is 500g. You can also add an equal amount of sugar (500g), but I’ve reduced the sugar to 300g for a healthier option.

Step 8
Now, we’ll gently simmer the mixture over medium-low heat. Stir occasionally to prevent sticking and cook for about 1 hour. Be aware that the syrup may splatter during simmering, so it’s advisable to use a deep pot.

Step 9
After about an hour of simmering, the syrup will thicken to a delicious consistency. For a touch of brightness and enhanced preservation, stir in 2-3 tablespoons of fresh lemon juice.

Step 10
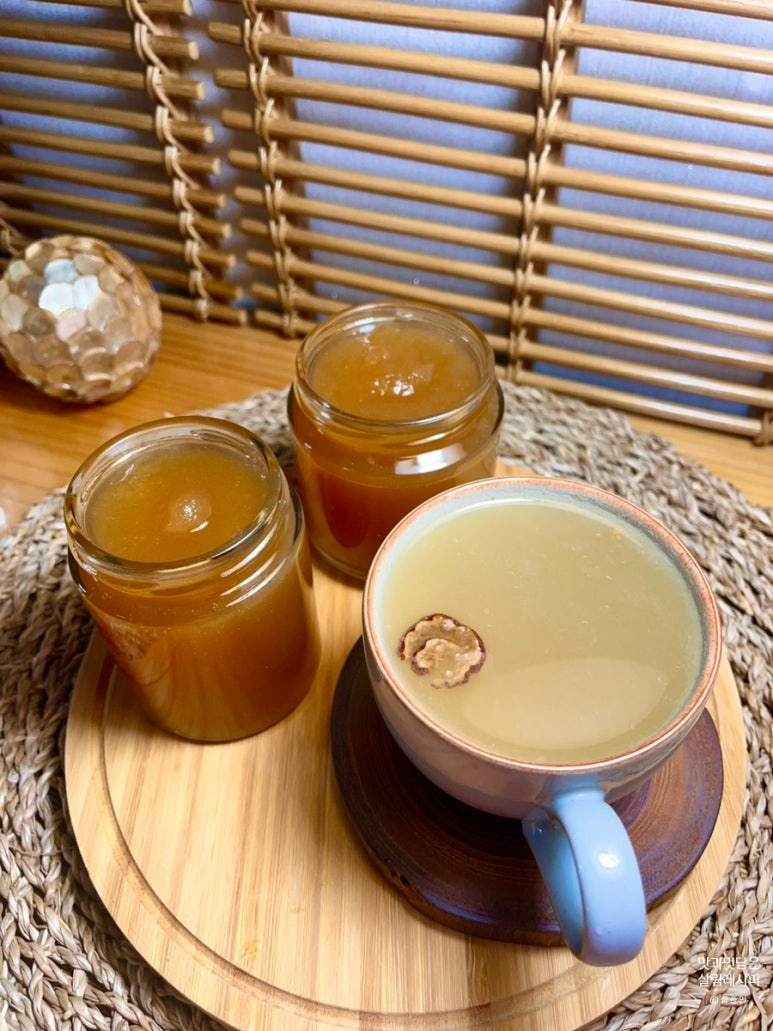
The syrup might seem a little thin while hot, but it will thicken considerably as it cools. Don’t worry if it still seems a bit liquid; it will reach the perfect consistency once cooled. The aroma filling your kitchen as you make this syrup is a testament to its healthfulness. You’ve created a wonderful Pear and Bellflower Root Syrup! A spoonful stirred into a teacup of warm water creates a perfectly balanced and delightful drink. Store it in the refrigerator and enjoy its freshness. As the weather grows cooler, embrace the season with a warm cup of this homemade syrup. It’s a perfect way to support your respiratory health and cardiovascular well-being throughout the winter months. Enjoy!
