
Delicious and Springy Cheongpomuk Salad (Korean Jelly Noodle Salad)
Easy Cheongpomuk Salad Recipe with Flaked Seaweed

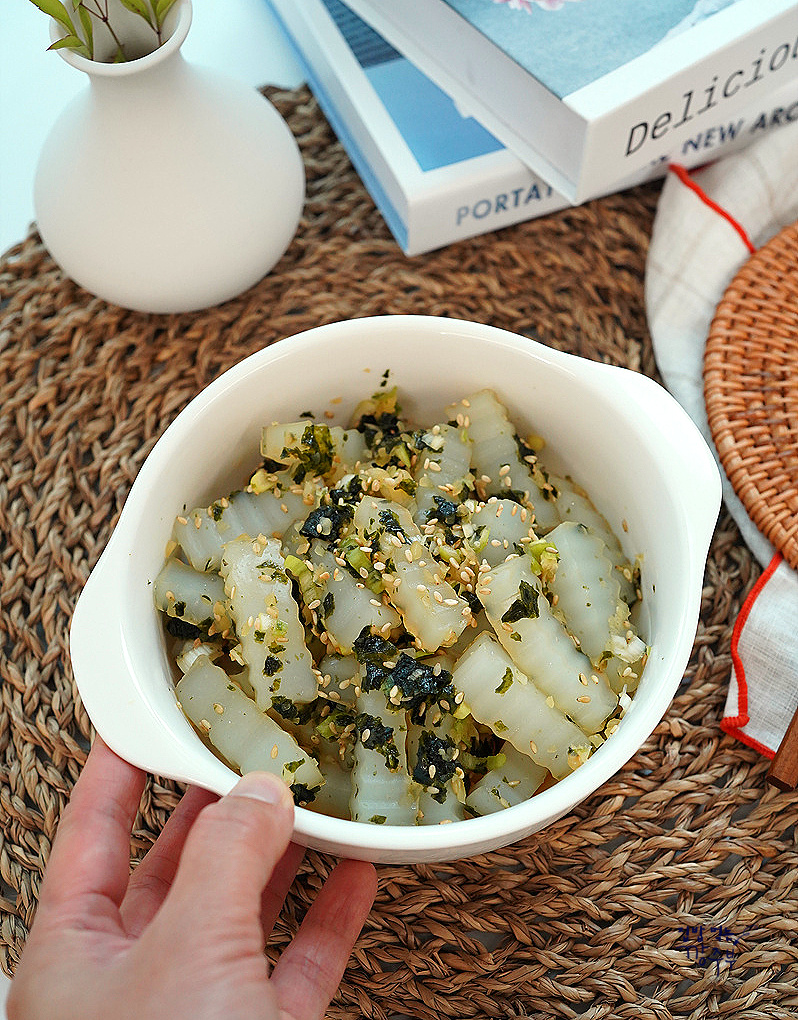
Introducing Cheongpomuk Salad, a delightful dish featuring the uniquely springy, jelly-like texture of cheongpomuk! This recipe is designed for simplicity, using common ingredients and requiring minimal cooking time, making it perfect for beginners. We’ll briefly blanch the cheongpomuk, cut it into bite-sized pieces, and then toss it with a savory dressing made from soy sauce, tuna extract, plum extract, and sesame oil. Fresh scallions, chives, crispy seaweed flakes, and even egg add layers of flavor and texture. Beyond its delightful taste and texture, cheongpomuk is low in calories and satisfying, making it an excellent choice for those mindful of their diet. Enjoy a healthy and delicious meal with this easy-to-follow recipe!
Main Ingredients- 1 pack Cheongpomuk (approx. 300g)
- 2 Tbsp minced scallions
- 1 packet seasoned seaweed (gim)
Dressing Ingredients- 1.5 Tbsp soy sauce
- 1 Tbsp tuna extract
- 0.5 Tbsp minced garlic
- 1 Tbsp plum extract
- 0.5 Tbsp sugar
- 0.5 Tbsp sesame oil
- 0.5 Tbsp toasted sesame seeds
- 1.5 Tbsp soy sauce
- 1 Tbsp tuna extract
- 0.5 Tbsp minced garlic
- 1 Tbsp plum extract
- 0.5 Tbsp sugar
- 0.5 Tbsp sesame oil
- 0.5 Tbsp toasted sesame seeds
Cooking Instructions
Step 1
Start by preparing one pack of Cheongpomuk, which weighs approximately 300g. The key to enjoying Cheongpomuk is its wonderfully springy, jelly-like texture, so we’ll cut it into manageable pieces and briefly blanch it to enhance this quality.

Step 2
Next, cut the Cheongpomuk into bite-sized pieces. First, cut the block in half lengthwise, then slice it again lengthwise into strips about 1cm wide.

Step 3
Finally, cut these strips into approximately 1cm thick, bite-sized pieces. All the cheongpomuk is now ready to be cooked.

Step 4
Finely chop the scallions after slicing them. You’ll need about 2 tablespoons of minced scallions.

Step 5
Place the seasoned seaweed (gim) into a plastic bag and gently crush it with your hands to create seaweed flakes. Set aside.

Step 6
In a pot, bring enough water to fully submerge the cheongpomuk to a rolling boil. Once boiling, carefully add the prepared cheongpomuk to the water to blanch.

Step 7
You don’t need to time this precisely. You’ll notice the cheongpomuk change from opaque to a clearer, more translucent state as it cooks. Blanch it just until it becomes transparent.

Step 8
Immediately drain the blanched cheongpomuk and rinse it under cold running water. This step is crucial for achieving that signature springy and chewy texture that Cheongpomuk is known for.

Step 9
Place the drained cheongpomuk in a mixing bowl. Add the minced scallions you prepared earlier and mix them gently with the noodles.

Step 10
Now, let’s add the dressing ingredients. Combine 1.5 tablespoons of soy sauce, 1 tablespoon of tuna extract, 0.5 tablespoon of minced garlic, 1 tablespoon of plum extract, and 0.5 tablespoon of sugar in the bowl.

Step 11
Gently toss the cheongpomuk and scallions with the dressing until everything is evenly coated.

Step 12
Finally, drizzle in 0.5 tablespoon of sesame oil and sprinkle 0.5 tablespoon of toasted sesame seeds for added aroma and flavor.

Step 13
Generously sprinkle the prepared seaweed flakes over the salad. Feel free to adjust the amount of seaweed to your preference.

Step 14
Give everything one last gentle toss to combine the cheongpomuk, dressing, and seaweed flakes. Your delicious Cheongpomuk Salad is now ready!

Step 15
And there you have it – a fun, springy Cheongpomuk Salad! The combination of the savory-sweet dressing and the abundant seaweed flakes is truly delightful. It’s also a great low-calorie option for a healthy meal. Enjoy your homemade creation!
