
Chewy and Sweet Braised Burdock Root
Homemade Delicious Braised Burdock Root: A Perfect Blend of Sweet and Savory

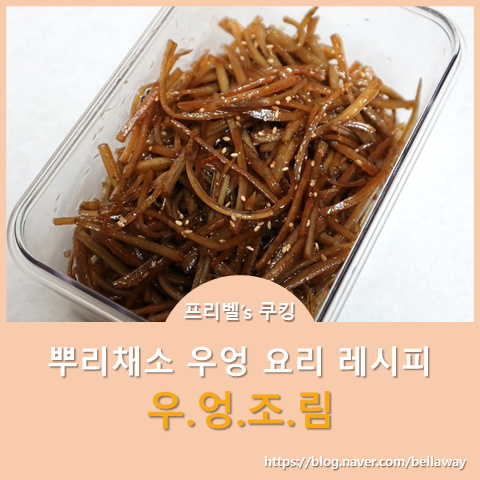
Introducing a recipe for exquisitely chewy braised burdock root with a deep, savory flavor. The sweetness from corn syrup and oligosaccharide enhances its deliciousness, making it an irresistible side dish for rice and a favorite for kids! Detailed steps and tips are included to ensure anyone can easily follow along.
Main Ingredients- 4 burdock roots (thoroughly cleaned)
- 2 Tbsp vinegar
- 1 Liter water (for blanching burdock)
- 2 Tbsp cooking oil
Braising Sauce- 4 Tbsp soy sauce
- 3 Tbsp soju (to remove gaminess)
- 8 Tbsp water
- 3 Tbsp oligosaccharide (for shine and sweetness)
- 1 Tbsp corn syrup (for thickness and sweetness)
- 1/2 Tbsp sesame oil
- Sesame seeds, to garnish
- 4 Tbsp soy sauce
- 3 Tbsp soju (to remove gaminess)
- 8 Tbsp water
- 3 Tbsp oligosaccharide (for shine and sweetness)
- 1 Tbsp corn syrup (for thickness and sweetness)
- 1/2 Tbsp sesame oil
- Sesame seeds, to garnish
Cooking Instructions
Step 1
First, wash the fresh burdock root thoroughly under running cold water to remove all dirt. A meticulous wash will contribute to a clean flavor in the final dish.

Step 2
Using a peeler or knife, thinly peel the skin off the burdock root. Removing the skin will result in a softer texture.

Step 3
Gently pat dry the peeled burdock root and arrange it on a cutting board for easy preparation.

Step 4
Trim off the thicker ends of the burdock root, then cut it into approximately 6cm lengths. You can adjust the length, but excessively long pieces may not absorb the sauce as well.

Step 5
Slice the 6cm burdock pieces thinly, about 0.2cm thick, into even planks. Slicing thinly allows the sauce to penetrate better for a more flavorful dish.

Step 6
Next, julienne the thinly sliced burdock root into strips, again about 0.2cm thick. Aim for uniform thickness. (Note: If julienning is too time-consuming, you can proceed directly to the next step after thinly slicing into planks.)

Step 7
Place the julienned burdock root in a large bowl. Add 1 liter of water and 2 Tbsp of vinegar, stir gently to ensure the burdock is submerged, and let it soak for about 5 minutes. This step helps remove any bitterness and impurities.

Step 8
Prepare the braising sauce in advance. Combine 4 Tbsp soy sauce, 3 Tbsp soju, and 8 Tbsp water in a bowl. Whisk well with a whisk or spoon until fully mixed. The soju helps to eliminate any gamey flavor from the burdock.

Step 9
Fill a deep pot or pan with water about halfway and bring it to a rolling boil over high heat. This water is for blanching the burdock.

Step 10
Drain the burdock that was soaking in the vinegar water and rinse it thoroughly under cold running water. This rinses away any remaining vinegar solution.

Step 11
Add the rinsed burdock to the boiling water and blanch for about 10 minutes, or until tender. Adjust the blanching time based on the burdock’s tenderness.

Step 12
Drain the blanched burdock using a sieve, letting any excess water drip off. Transfer it to a large bowl and let it cool slightly. Blanching makes it more fragile, so allow it to cool before stir-frying.

Step 13
Now, for the stir-frying. Heat 2 Tbsp of cooking oil in a deep pan over medium-low heat. Add the slightly cooled burdock and stir-fry for about 1 minute. This step lightly coats the burdock with oil, helping the sauce adhere better.

Step 14
Pour the pre-made soy sauce mixture over the stir-fried burdock. Gently stir to coat the burdock evenly with the sauce and continue to cook.

Step 15
Continue to cook over medium-low heat, allowing the sauce to reduce and penetrate the burdock. Cook until the sauce has reduced by about half.

Step 16
Once the sauce has reduced somewhat, add 3 Tbsp of oligosaccharide to add shine and sweetness. Stir well to incorporate the oligosaccharide and continue to cook until the sauce thickens slightly.

Step 17
Finally, add 1 Tbsp of corn syrup to achieve a glossy, slightly sticky consistency. Cook for another minute after adding the corn syrup to complete the base of the delicious braised burdock.

Step 18
Turn off the heat. Drizzle 1/2 Tbsp of sesame oil around the edges of the pan. Stir to distribute the sesame oil evenly throughout the dish, adding a fragrant aroma.

Step 19
Garnish with a sprinkle of sesame seeds to your liking. Sesame seeds add a nutty flavor and visual appeal.

Step 20
After mixing everything gently, let it rest in the pan with the residual heat for about 1 minute. This allows the flavors to meld and the sauce to fully absorb into the burdock, resulting in a richer taste.

Step 21
The delicious braised burdock, with its savory soy sauce base and delightful sweetness, is complete! This addictive side dish is perfect for a hearty meal and is sure to be a hit. Give it a try! ^^
