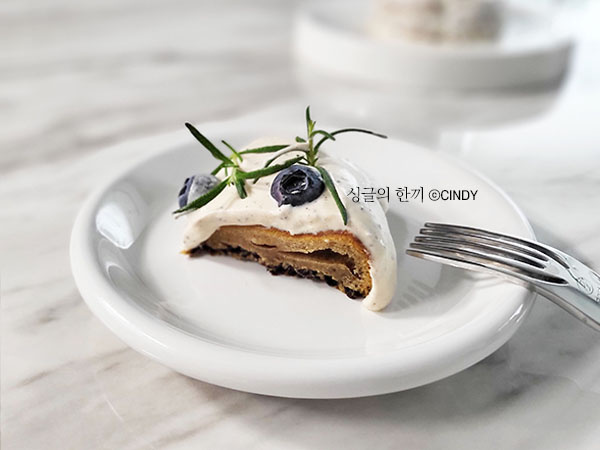
Fragrant Earl Grey Blueberry Cake
[Earl Grey Cake] Rich Earl Grey Aroma and Soft Texture for a Luxurious Dessert

In my younger days, I was drawn to Earl Grey tea by its sophisticated name. Now, you can enjoy that delightful aroma captured perfectly in a cake. The soft Earl Grey cream combined with tart blueberries creates a heavenly taste that fills your mouth. Make this Earl Grey cake yourself, perfect for special occasions or as a treat for yourself!
Cake Batter Ingredients- Cake flour 40g
- Unsalted butter 50g
- White couverture chocolate 60g
- 1 Egg (room temperature)
- Sugar 20g
- Salt 1g
Cooking Instructions
Step 1
First, prepare and measure all the ingredients needed for the cake batter. Melt 50g of unsalted butter in the microwave, then add 60g of white couverture chocolate and melt them together. (If white couverture chocolate is unavailable, you can use chocolate containing cookies, but it might slightly alter the taste.)

Step 2
Mix the butter and chocolate until completely melted. Continue melting in the microwave in short intervals of 10-20 seconds, stirring well between each interval to ensure a smooth consistency. Be careful not to overheat, as it can burn.

Step 3
In a small, microwave-safe bowl, combine 30g of heavy cream and 2g of Earl Grey leaves. Heat in the microwave for about 20-30 seconds. Be extremely careful to prevent the cream from boiling over! Heating in 20-second increments and checking frequently is the safest approach. Pour the warmed Earl Grey cream into the chocolate-butter mixture and stir well.

Step 4
Add 10g of sweetened condensed milk and 1g of salt to the mixture. This will create a smooth cream base.

Step 5
Pour the prepared Earl Grey cream base into the chocolate-butter mixture and combine. While mixing, occasionally check the temperature to ensure it stays between 45-55°C. Maintaining a warm temperature helps the ingredients blend smoothly.

Step 6
In a separate bowl, lightly beat 1 egg yolk. Set the egg white aside in a clean bowl, ready for whipping into meringue. (The picture shows two eggs because two cakes were prepared for visiting nieces.)

Step 7
Sift 40g of cake flour into the batter. Gently fold it in until just combined, ensuring there are no lumps.

Step 8
Whip the egg whites in a clean, grease-free bowl. Gradually add 20g of sugar in 2-3 additions, whipping until stiff peaks form. It’s best to use chilled egg whites for whipping. Aim for a meringue that holds its shape firmly.

Step 9
This image serves as an example of the meringue-whipping process. (In the actual recipe, achieving a firmer, more cohesive meringue is crucial.)

Step 10
Gently fold in about one-third of the meringue into the batter to lighten it. Then, add the remaining meringue in two batches, carefully folding to avoid deflating the mixture. Use a spatula with a sharp edge and fold from the bottom up, as if scooping.

Step 11
Line a mini cake pan with parchment paper and fill it with the batter until about 80% full. Tap the pan firmly on the counter several times to release any large air bubbles trapped inside.

Step 12
Bake in a preheated oven at 170°C (338°F) for 25 minutes. Baking time may vary depending on your oven’s specifications.

Step 13
Once removed from the oven, let the cake cool on a wire rack for about 30 minutes to 1 hour. The cake will naturally deflate slightly as it cools, resulting in a moist and tender crumb. (Resist the urge to eat it while it’s hot!)

Step 14
Once completely cooled, wrap the cake tightly in plastic wrap and refrigerate for at least 6 hours, or preferably overnight. This resting period allows the flavors to meld and the texture to improve.

Step 15
Using a cake storage container helps keep the cake fresh and prevents it from absorbing odors from the refrigerator.

Step 16
While the cake is chilling, prepare the Earl Grey cream. In a small microwave-safe bowl, combine 25g of heavy cream and 2g of Earl Grey leaves. Heat for 30 seconds in the microwave. Then, add 10g of sweetened condensed milk and the remaining 50g of heavy cream. Mix well and refrigerate together to chill and develop flavors.

Step 17
Remove the chilled cake sponge from the refrigerator. Trim the top to create a flat surface. You can slice the cake into 2-3 layers horizontally, depending on its height.

Step 18
Since the cake is quite small, don’t worry too much about achieving perfect horizontal cuts; aim for even layers that are easy to work with.

Step 19
Take the chilled Earl Grey cream out and whip it until it reaches a smooth and spreadable consistency. (Be cautious if using a mini whisk, as cream may splatter on the floor.) While achieving a perfectly stiff whipped cream might be challenging with a mini whisk, the taste will still be delightful!

Step 20
Generously spread the Earl Grey cream over the cake layers. Decorate with fresh blueberries and rosemary to complete your beautiful cake. Even if it looks simple, the combination of Earl Grey and blueberries guarantees a wonderful taste!


