
Crunchy Kkakdugi Kimchi Fried Rice: A Delicious Homemade Dish!
Special Fried Rice Using Overripe Kkakdugi Kimchi

Don’t throw away your well-fermented kkakdugi kimchi anymore! Now you can easily make the crunchy and flavorful kkakdugi kimchi fried rice at home, reminiscent of the side dish often served after meat at Korean BBQ restaurants. This recipe focuses on highlighting the original taste of kkakdugi by using only kimchi and rice. Feel free to customize it by adding your favorite ingredients like ham, bacon, potatoes, or imitation crab meat.
Main Ingredients- Well-fermented Kkakdugi kimchi: 2/3 cup (slightly less than the rice amount; adjust if it’s too salty)
- Cold cooked rice: 1 cup (cold rice is better for fried rice than warm rice)
Seasoning and Other Ingredients- Kkakdugi kimchi juice: 2 Tbsp (adds depth of flavor to the fried rice)
- Sugar: 2 pinches (balances the sourness of kkakdugi and enhances umami)
- Cooking oil: 3 Tbsp (for stir-frying garlic and kkakdugi)
- Minced garlic: 1/2 Tbsp (garlic aroma adds richness)
- Soy sauce: 1/4 Tbsp (for added umami at the end)
- Sesame oil: 1/4 Tbsp (for a nutty aroma)
- Mini seasoned seaweed sheets (gim): 3 sheets (cut into thin strips as a topping)
- Toasted sesame seeds: a pinch (for garnish)
- Kkakdugi kimchi juice: 2 Tbsp (adds depth of flavor to the fried rice)
- Sugar: 2 pinches (balances the sourness of kkakdugi and enhances umami)
- Cooking oil: 3 Tbsp (for stir-frying garlic and kkakdugi)
- Minced garlic: 1/2 Tbsp (garlic aroma adds richness)
- Soy sauce: 1/4 Tbsp (for added umami at the end)
- Sesame oil: 1/4 Tbsp (for a nutty aroma)
- Mini seasoned seaweed sheets (gim): 3 sheets (cut into thin strips as a topping)
- Toasted sesame seeds: a pinch (for garnish)
Cooking Instructions
Step 1
First, prepare the kkakdugi kimchi. Use slightly less kkakdugi than rice. If the kimchi is very salty, reduce the amount. If it’s too spicy or sour, you can adjust the sugar accordingly.

Step 2
The kkakdugi needs to be finely chopped. Use a knife or scissors to chop the kkakdugi into very small pieces. If chopping with a knife is difficult, wear kitchen gloves, cut off the fingertips, and use tongs to chop the wider parts of the kkakdugi. The smaller the pieces, the better the crunchy texture in the fried rice.

Step 3
Heat 2 Tbsp of cooking oil in a frying pan over medium-low heat. Add 1/2 Tbsp of minced garlic. Stir-fry until the garlic is fragrant and turns a pale white color. This process removes the raw garlic taste and develops its flavor.

Step 4
Once the garlic is well-fried, add the finely chopped kkakdugi to the pan. Add the remaining 1 Tbsp of cooking oil, 2 Tbsp of kkakdugi juice, and 2 pinches of sugar. Mix everything well to combine.

Step 5
After mixing the kkakdugi with the seasonings, spread it evenly in the pan. Stir-fry over medium-high heat until it starts to bubble, then reduce the heat to medium-low. Continue to cook until the kkakdugi softens slightly, stirring occasionally to prevent burning.

Step 6
Add 1 cup of cold cooked rice on top of the stir-fried kkakdugi. Ensure there is very little liquid visible at the bottom of the pan to prevent the rice from becoming mushy. If you’re experienced, maintain medium heat while mixing the rice and kkakdugi. If you’re new to making fried rice, you can turn off the heat temporarily, thoroughly mix the rice and kkakdugi, and then turn the heat back on.

Step 7
Once the rice and kkakdugi are well combined, reduce the heat to low. Add 1/4 Tbsp of soy sauce and 1/4 Tbsp of sesame oil for enhanced flavor, and mix again until evenly distributed. Keep the heat on low, spread the rice mixture thinly in the pan, and gently press with your spatula to make the rice grains fluffy.

Step 8
Finally, let’s prepare the garnish. Take 3 mini seasoned seaweed sheets, about palm-sized. Cut the seaweed into long, thin strips with scissors. Turn off the heat and sprinkle the cut seaweed strips over the fried rice. Add a pinch of toasted sesame seeds as well.

Step 9
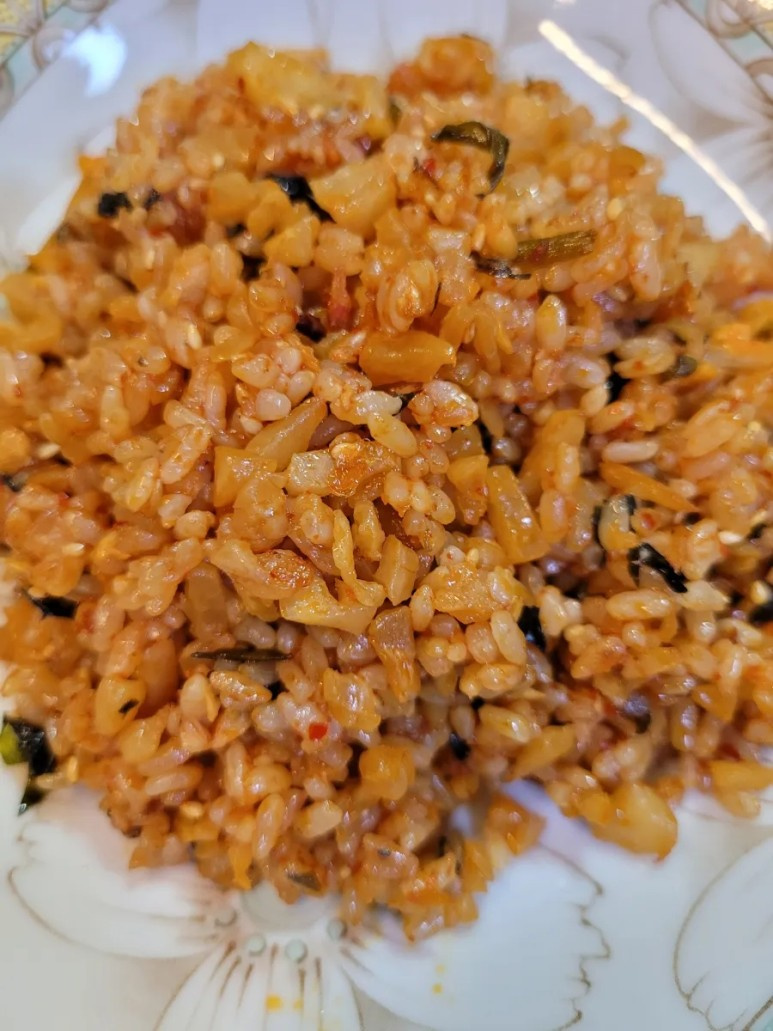
Gently mix the seaweed and sesame seeds into the fried rice. Your delicious kkakdugi kimchi fried rice is now complete! Serve it beautifully in a bowl. Enjoy the delightful crunchy texture of the finely chopped kkakdugi and its spicy-sweet flavor. Enjoy your meal!
