
Delicious Kimchi Fried Rice Recipe
The Best Kid-Friendly Kimchi Fried Rice for School Holidays!

Introducing Kimchi Fried Rice, perfect as a holiday treat for kids or a satisfying solo meal. This recipe is incredibly simple yet guarantees a delicious outcome. Let’s make a fantastic meal using your aged kimchi!
Ingredients- 2 bowls of warm rice
- 250g of well-fermented aged kimchi (chopped)
- 2 eggs
- 3 tsp cooking oil
- 1 tsp gochugaru (Korean chili flakes, optional, for added spiciness)
- 2 tsp kimchi brine
- 1 tsp sesame oil
- 1 tsp oyster sauce (for an umami boost!)
Cooking Instructions
Step 1
Kimchi fried rice is a go-to dish for kids’ holiday snacks, a quick solo meal, or whenever you’re wondering what to cook! It’s so easy to whip up and makes a complete meal without needing any side dishes. Shall we make it together right now?

Step 2
First, lightly rinse the well-fermented aged kimchi under running water to mellow its sourness. Drain it and chop it into bite-sized pieces, about 1-2 cm. Heat 3 teaspoons of cooking oil in a deep pan or wok over medium heat. Add the chopped kimchi and stir-fry gently, making sure it doesn’t burn. Cook for about 3-5 minutes until the kimchi softens and becomes fragrant.

Step 3
Once the kimchi is partially stir-fried, add 2 teaspoons of kimchi brine. The brine will deepen the kimchi’s flavor during cooking and prevent the rice from clumping. Continue to stir-fry for about 1 more minute with the brine.

Step 4
Now it’s time to add 2 bowls of warm rice. Use a spatula to break up any clumps of rice and stir-fry thoroughly, ensuring the rice and kimchi are evenly mixed. Keep stir-frying for about 2-3 minutes, allowing the flavor of the kimchi to coat every grain of rice.

Step 5
When the kimchi and rice are well combined, add 1 teaspoon of oyster sauce for an extra layer of umami. You can use soy sauce instead of oyster sauce, but oyster sauce really elevates the flavor of kimchi fried rice. Stir well after adding the oyster sauce. If you like it spicy, you can add 1 teaspoon of gochugaru at this stage and stir-fry together.

Step 6
A fried egg is essential to make your kimchi fried rice even more satisfying and delicious! Heat a little cooking oil in a separate pan and fry 2 eggs to your liking. A runny yolk, when broken and mixed in, is incredibly tasty!

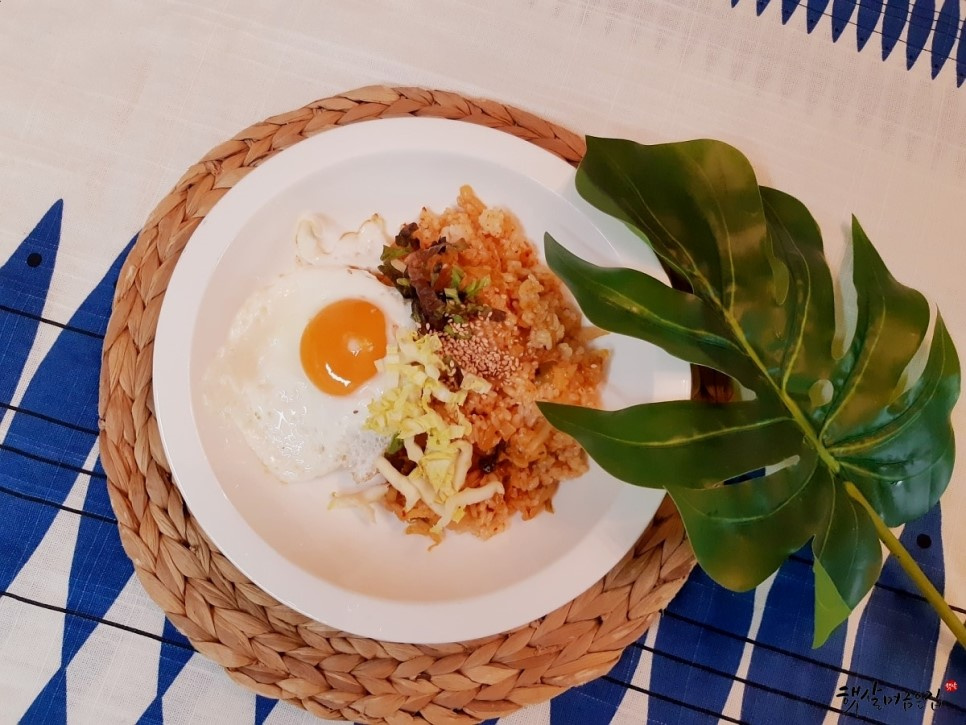
Step 7
Transfer the finished kimchi fried rice to a serving plate. Top it with the freshly fried egg, and your kimchi fried rice transformation is complete! I thinly sliced some raw cabbage (or lettuce) from my fridge and used it as a garnish. The added crunch made it even more delicious. You can also sprinkle with seaweed flakes or sesame seeds according to your preference.
