
Easy Pan-Fried Banana Cake
Whip up a Moist and Sweet Banana Cake on the Stovetop! No Oven Needed (+Video Tips)

Hello everyone! For all you home baking enthusiasts, today I’m sharing a fantastic recipe for making a delightful banana cake using just a frying pan – no oven required! This recipe is perfect for using up 4-5 ripe bananas that might otherwise be destined for smoothies. Instead, let’s transform them into this incredibly flavorful and moist no-bake banana cake. Shall we get started?
Cake Batter Ingredients- 150g ripe bananas (about 1.5 bananas)
- 200g all-purpose flour
- 3g salt
- 2g baking powder
- 2g baking soda
- 70g peanut butter
- 30g vegetable oil (use a neutral-flavored oil)
- 135g sugar
- 2 large eggs (room temperature)
- 4g vanilla extract (optional)
- 100g milk (warmed slightly)
Banana Topping Ingredients- 2.5 – 3 bananas
- 25g butter
- 30g sugar
- 2.5 – 3 bananas
- 25g butter
- 30g sugar
Cooking Instructions
Step 1
First, prepare 150g of bananas for the cake batter. Mash them thoroughly with a fork until smooth, ensuring there are no large lumps. This amount is roughly equivalent to 1.5 bananas. The remaining bananas will be sliced for the topping.

Step 2
Mashed with a fork, it should look like a smooth banana puree, as pictured. It’s important to mash it thoroughly to avoid lumps in the batter.

Step 3
In a separate bowl, combine the all-purpose flour (or cake flour), baking powder, baking soda, and salt. Whisk them together using a whisk or spatula until well combined. Pre-mixing the dry ingredients helps prevent clumps of baking powder and soda, ensuring a more even rise for your cake.

Step 4
Now, let’s create the batter that will give our cake its moistness. In a large bowl, combine the peanut butter, neutral vegetable oil, and sugar. If you prefer not to use peanut butter and oil, you can substitute with 80g of melted butter. For added flavor, consider using peanut butter with a mild nutty taste.

Step 5
Using a whisk, beat the mixture until the sugar granules are no longer gritty and all the ingredients are smoothly incorporated. This step helps dissolve the sugar and emulsify the ingredients, leading to a better batter texture.

Step 6
The sugar, peanut butter, and oil are now well combined and have a creamy consistency.

Step 7
Crack the 2 room-temperature eggs into the bowl and add the vanilla extract. Vanilla extract helps to neutralize any eggy smell and enhances the cake’s overall flavor. If you don’t have vanilla extract, it’s perfectly fine to omit it.

Step 8
Whisk in the eggs until the yolks are broken and fully incorporated into the mixture. Continue whisking until the batter is smooth and homogenous.

Step 9
Sift the pre-mixed dry ingredients (flour, baking powder, baking soda, salt) into the wet ingredients. Sifting helps to break up any lumps and aerates the flour, contributing to a lighter, more tender cake crumb.

Step 10
Now, using a spatula, gently fold the dry ingredients into the wet ingredients until just combined. Avoid overmixing; vigorous stirring can develop too much gluten, resulting in a tough cake. The key is to use a gentle cutting motion with the spatula, scraping along the side of the bowl. (Watching the video demonstration for this step would be very helpful!)

Step 11
Once most of the flour streaks have disappeared, add the milk that has been gently warmed. To warm the milk, I microwaved it for about 15 seconds – just enough to make it lukewarm. Avoid using hot milk, as it can cook the eggs. Stir gently until just combined.

Step 12
Finally, add the mashed banana puree to the batter. Gently fold it in just until evenly distributed. Overmixing at this stage can negatively impact the cake’s texture, so mix minimally. A few quick folds are all you need!

Step 13
Your cake batter is ready when it has a pourable consistency, like the one shown – it should flow smoothly. It shouldn’t be too thick or too thin.

Step 14
Time to prepare the topping. Use a frying pan, approximately 23cm in diameter. A pan with a lid is ideal. Heat the pan over medium heat, then add the butter and sugar for the topping. If you’re using a larger diameter pan, you’ll need to slightly reduce the cooking time as the cake will be thinner.

Step 15
Stir with a spatula or chopstick as the butter and sugar melt. The sugar will begin to caramelize slightly, creating a lovely aroma.

Step 16
Once the butter and sugar mixture turns a light golden brown, reduce the heat to low. Arrange the sliced bananas, cut side down, on top of the melted butter and sugar mixture in the pan.

Step 17
I’ve sliced the bananas about 0.5cm thick. Feel free to adjust the thickness or cut them into different shapes according to your preference. Arrange them attractively in the pan, filling any gaps.

Step 18
Carefully pour the prepared cake batter over the banana topping in the pan.

Step 19
Gently spread the batter evenly to the edges of the pan. This ensures the cake cooks uniformly and results in a beautiful presentation.

Step 20
Cover the pan with a lid and cook over very low heat. The recommended cooking time is about 18 to 23 minutes, but this can vary depending on your pan’s thickness and heat level, so check periodically.

Step 21
In my experience, the cake was perfectly cooked after exactly 21 minutes!

Step 22
To check for doneness, insert a wooden skewer or toothpick into the very center of the cake. If it comes out clean with no batter attached, the cake is fully cooked.

Step 23
Once the skewer comes out clean, your pan-fried banana cake is ready! Remove it from the heat.

Step 24
Let the cake cool in the pan for just 2-3 minutes after removing it from the heat. During this short time, the edges of the cake will slightly pull away from the sides of the pan, making it easier to invert later.

Step 25
When the edges have slightly loosened, place a plate larger than the pan over the cake, and with a swift motion, flip the pan and plate together. The key is to do it in one quick movement!

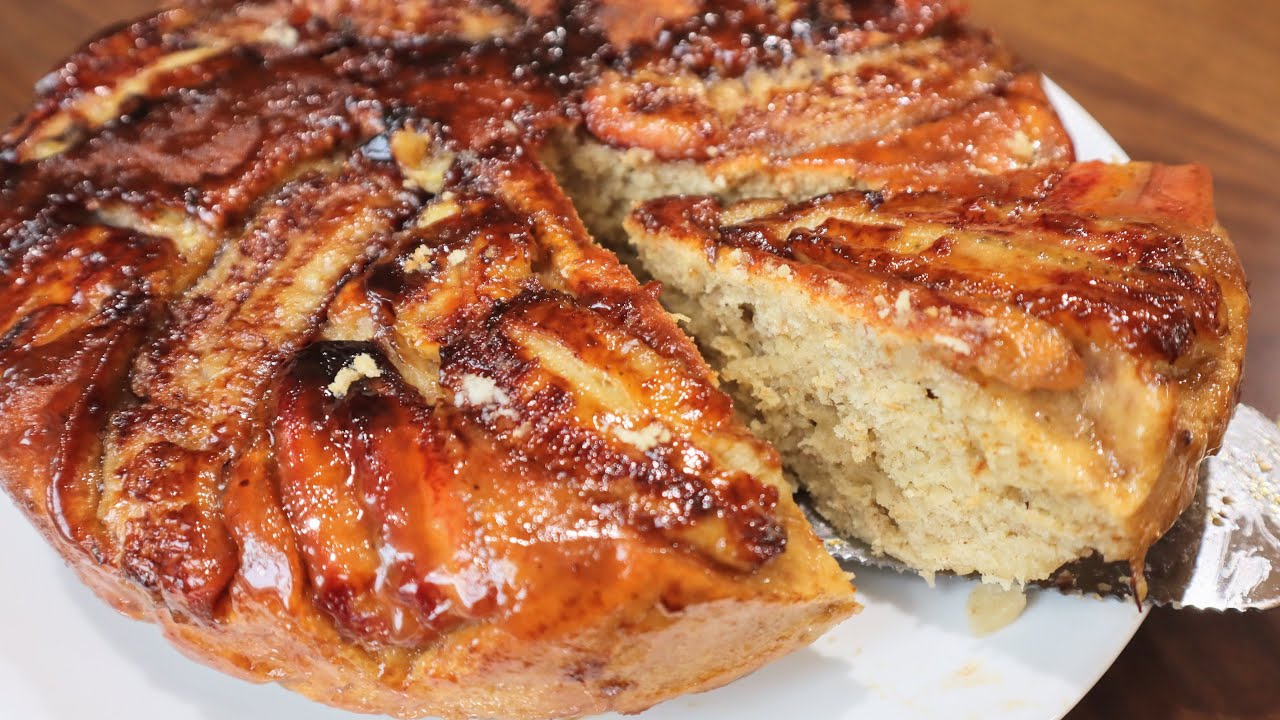
Step 26
Voila! Your wonderfully appetizing banana cake is complete! You can enjoy it warm right away, or let it cool slightly before slicing. For an even more moist and flavorful experience, cool it completely, wrap it, and let it rest in the refrigerator. I personally prefer it after it has rested a bit!
