
Whole Wheat Morning Buns
Delicious 100% Whole Wheat Morning Buns Recipe

Introducing a recipe for 100% whole wheat morning buns that guarantees success with accurate measuring and easy steps. Instead of the usual rough texture of whole wheat, these buns offer a wonderfully nutty and rich flavor, making them perfect for children’s snacks! Enjoy a hearty breakfast or a satisfying snack with these warm, freshly baked whole wheat morning buns, perhaps with a touch of butter. Follow along slowly and discover the delightful charm of whole wheat bread!
Ingredients (Makes approx. 10 buns)- 310g Whole Wheat Flour
- 160ml Warm Milk (around 40°C / 104°F)
- 5g Instant Dry Yeast
- 40g Sugar
- 5g Salt
- 1 Large Egg, room temperature
- 35g Cold Unsalted Butter, cubed
- Melted Butter for brushing (optional)
Cooking Instructions
Step 1
First, gently warm the 160ml of milk in the microwave for about 20 seconds. It should feel comfortably warm to the touch, similar to body temperature (around 40°C or 104°F). Pour the warmed milk into your stand mixer bowl.

Step 2
After adding the milk, add the 310g of whole wheat flour, 1 large room-temperature egg, 40g of sugar, and 5g of salt around the edges of the bowl. Make a small well in the center of the flour and add the 5g of instant dry yeast, then cover it lightly with the flour. This helps protect the yeast from direct contact with the liquid initially, preserving its vitality.

Step 3
Attach the dough hook to your stand mixer and knead on the ‘dough’ setting for about 10 minutes. Due to the nature of whole wheat flour, gluten development might be slower, so ensure you knead thoroughly until the dough starts to become smoother.

Step 4
After 10 minutes of kneading, add the 35g of cold unsalted butter, cut into cubes (should have a consistency similar to mayonnaise), to the dough. Continue kneading for an additional 10 minutes. It’s crucial to knead until the butter is fully incorporated and the dough becomes smooth and elastic.

Step 5
Transfer the finished dough to a clean bowl, cover it with plastic wrap, and let it undergo its first fermentation (proofing) in a warm place for about 1 hour. An ideal proofing temperature is around 25-28°C (77-82°F). Let the dough rise until it has increased in volume by 1.5 to 2 times its original size.

Step 6
This is what the dough looks like after a successful 1-hour first fermentation. You can see that it has puffed up nicely.

Step 7
To release the gases accumulated during fermentation, gently punch down the dough with your fist or use a rolling pin to press out the air thoroughly. This step, known as ‘degassing,’ helps create a softer texture in the final bread.

Step 8
Weigh the degassed dough and divide it into 10 equal portions (approximately 60-70g each). Shape each portion into a round ball. Place the shaped dough balls onto a baking sheet, leaving some space between them. Cover with a damp cloth or plastic wrap and let them undergo a second fermentation for about 1 hour. Ensure they are kept in a warm environment during this stage.

Step 9
Tip: Whole wheat flour, compared to all-purpose flour, has less gluten, which can sometimes lead to slower fermentation or less rise. If your dough doesn’t seem to be rising as much as you’d like, feel free to extend the proofing time. Fermentation times can vary depending on temperature and humidity, so always judge by the dough’s appearance rather than the clock.

Step 10
After the second fermentation, the dough balls should have increased in size by about 1.5 times. Bake in a preheated oven at 170°C (340°F) for approximately 10-12 minutes. They are done when the tops are golden brown.

Step 11
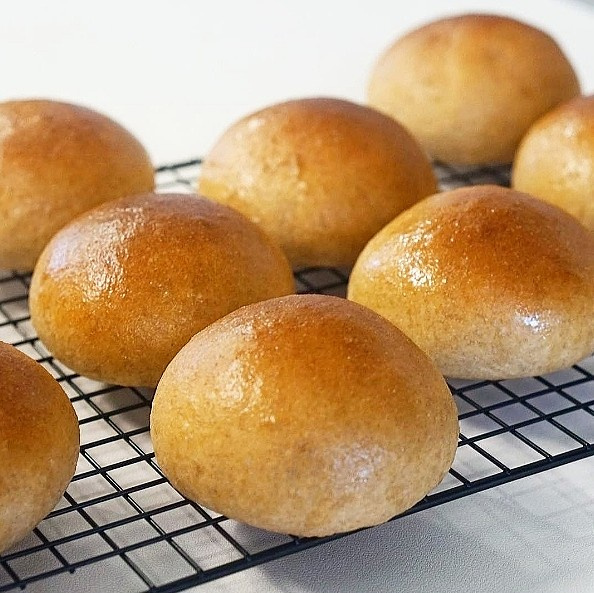
Here are the whole wheat morning buns, freshly baked and taken out of the oven. They have a lovely golden-brown color and look delicious.

Step 12
While the buns are still warm, brush the tops with melted butter for an extra layer of moisture and flavor. This step is optional but highly recommended for enhanced taste.

Step 13
Your delicious 100% whole wheat morning buns, boasting a wonderful nutty aroma and soft texture, are now complete! Enjoy your baking! 🙂
