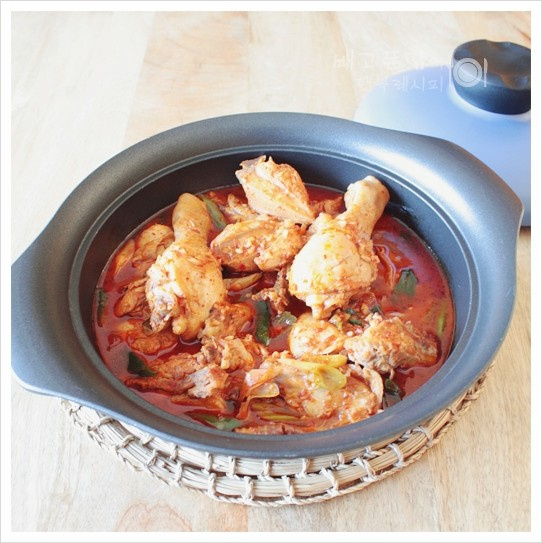
Spicy and Sweet Dakbokkeumtang (Korean Braised Chicken)
Delicious Dakbokkeumtang Recipe: It’s simpler than you think!

This is a dakbokkeumtang recipe we make at least once a week without fail! Recently, the quality of chicken sold at the supermarket has improved, making our homemade dakbokkeumtang even tastier. You’ll be surprised at how delicious it turns out with such simple ingredients and minimal effort. The rich broth and tender chicken are incredibly satisfying, making it a perfect side dish for any meal. Chicken is also a cost-effective protein, so this dish is a great way to enjoy a hearty and flavorful meal.
Main Ingredients- 1 kg Chicken cut for braising (Dakbokkeumtang cut)
- 1 stalk Scallion (Green onion)
- 2 pcs Korean chili peppers (Cheongyang pepper)
Cooking Instructions
Step 1
First, prepare 1kg of chicken specifically cut for dakbokkeumtang. Rinse the chicken thoroughly under cold running water. It’s important to clean off any blood clots or impurities attached to the bones and meat to ensure a clean flavor without any gamey taste. After washing, drain the chicken well in a colander, removing as much excess water as possible.

Step 2
Place the drained chicken directly into a stew pot or a wide, shallow pot (jeongol-nam. Do not parboil the chicken. We will season and cook it directly. This method helps to seal in the chicken’s juices, resulting in a more tender and moist texture.

Step 3
Now, let’s make the flavorful sauce. Add 5 Tbsp soy sauce, 1 Tbsp gochujang, 1.5 Tbsp gochugaru, 3 Tbsp cheongju (or mirin), 1 Tbsp sesame oil, 1 Tbsp maesilcheong, 1 Tbsp oligodang, and 1 Tbsp minced garlic directly to the pot with the chicken. Gently mix and massage the chicken with your hands or a spatula until all the pieces are evenly coated with the seasoning. Letting it marinate for about 5 minutes will help the flavors penetrate deeper.

Step 4
Pour 3 cups (approximately 600ml) of water into the pot with the seasoned chicken. Adjust the water level so the chicken is mostly submerged. If you prefer a thicker sauce, you can reduce the water slightly.

Step 5
Place the pot on the stove over high heat and bring it to a boil. Starting on high heat helps to quickly seal the chicken’s proteins, locking in moisture and ensuring the sauce cooks evenly.

Step 6
Once the liquid comes to a rolling boil over high heat, stir everything gently to ensure the chicken cooks uniformly. This initial high-heat boil is crucial for developing the base flavor.

Step 7
As the stew begins to boil vigorously, skim off any foam or impurities that rise to the surface. This step is essential for achieving a clean and clear broth. After skimming, reduce the heat to medium or low, cover the pot, and let it simmer gently until the chicken is tender and cooked through, which usually takes about 20-25 minutes. Gentle simmering allows the flavors to meld beautifully.

Step 8
When the chicken is almost fully cooked, prepare the scallion. Cut 1 stalk of scallion into diagonal pieces, about 2-3cm long, starting with the white and light green parts. Add these to the pot. The aromatic scallion will infuse the stew with a wonderful fragrance.

Step 9
Once the sauce has reduced to your desired consistency and the chicken is completely tender, it’s time for the final touches. Add the darker green parts of the scallion and 2 Korean chili peppers (cheongyang peppers), sliced diagonally. You can adjust the number of chili peppers depending on your spice preference. Finally, add a pinch of black pepper for an extra layer of aroma. Let it simmer for another 1-2 minutes to allow all the flavors to meld. Then, turn off the heat and serve your delicious dakbokkeumtang!


