
Real Banana Milk Bingsu: Easy Homemade Shaved Ice Without a Machine
Make Real Banana Milk Bingsu: Homemade Shaved Ice Without Any Special Equipment!

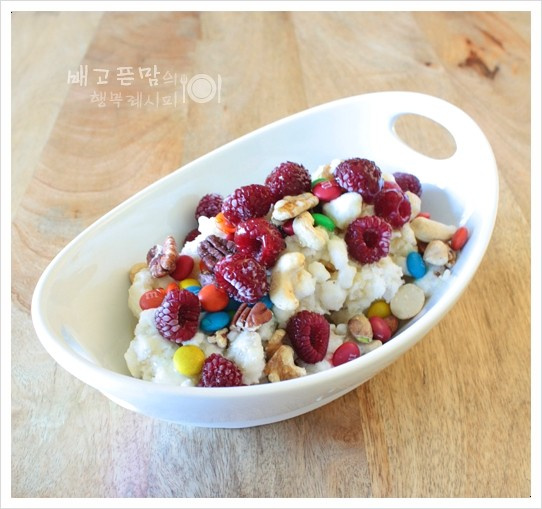
This recipe uses a sturdy zipper bag to create delicious shaved ice without a machine! Simply pour milk into the bag, freeze it thinly and widely, then crush it with a mallet or rolling pin. You’ll get fluffy milk ice at home. Top this with your favorite ice cream, syrup, nuts, or cereal for a customized mom-made bingsu. This time, we used overripe bananas, blended them with milk, and froze them to make a delightful Banana Milk Bingsu.
Ingredients- 2 ripe bananas
- 500ml milk
- Your preferred syrup (e.g., condensed milk, caramel syrup)
- 1 packet of mixed nuts (optional, for topping)
- Chocolate balls (for decoration, optional)
- Frozen raspberries (for a tart contrast, optional)
Cooking Instructions
Step 1
Place a large, sturdy zipper bag into a wide tray or baking dish with a bit of depth. Peel the 2 ripe bananas and place them inside the zipper bag. Mash the bananas thoroughly with your hands until they are mostly smooth. Ensuring smaller banana pieces will result in a smoother ice texture.

Step 2
After mashing the bananas, pour 500ml of milk into the zipper bag. Seal the bag securely and gently knead it with your hands to thoroughly mix the banana and milk. Ensure there are no lumps and that the banana flavor is well infused into the milk.

Step 3
After mashing the bananas and mixing them with milk, pour 500ml of milk into the zipper bag and gently knead it with your hands to ensure the banana and milk are well combined.

Step 4
Place the tray with the banana milk-filled zipper bag into the freezer and freeze until completely solid, which typically takes at least 4-6 hours. Ensure the bag lies flat so the milk freezes into a thin sheet for easier crushing.

Step 5
Once the banana milk is frozen solid, remove the zipper bag from the freezer. Now, it’s time to break up the frozen banana milk into fine ice particles. You can do this by wrapping the zipper bag in a kitchen towel or thick cloth, then using a mallet, rolling pin, or even a meat tenderizer to firmly and repeatedly pound the frozen block. Continue pounding until you achieve a fluffy, shaved ice consistency. Be careful not to hit too forcefully, as the bag could tear.

Step 6
The resulting banana milk ice, crushed without any machinery, is already delicious on its own! For a simpler treat, you can serve it as is, perhaps with a drizzle of condensed milk or your favorite syrup. The natural sweetness of the banana and the creaminess of the milk create a delightful, simple dessert.
