
Soft and Nutritious Rice Cooker Bread for the Whole Family
No-Oven Nutritious Bread Recipe: A Nostalgic Treat

This is a soft, homemade bread that I used to make for my children as a snack when they were little. It’s a simple, ordinary bread made with eggs and milk, similar to the delicious bakery breads you love! The secret is in the wonderful ingredients. Let’s make a healthy rice cooker bread with wholesome ingredients. You’ll love it! ^^
Ingredients- 5 large egg whites (from free-range eggs)
- 70g organic all-purpose flour
- 70g unsalted butter
- 5g vanilla extract (optional)
- 100g organic sugar
- 1g pink salt
- 70g organic milk
- 5 large egg yolks (from free-range eggs)
Cooking Instructions
Step 1
First, gently melt the butter and milk together in a small saucepan over low heat using a double boiler. Heat just until the butter is completely melted.

Step 2
Stir the milk and butter mixture until well combined. Ensure it’s smooth and free of lumps.

Step 3
Separate the eggs into yolks and whites. Ensure the eggs have been at room temperature for at least an hour; this helps them separate more easily. Carefully remove any chalazae (the white stringy bits) from the egg whites.

Step 4
Gradually add the egg yolks to the melted milk and butter mixture, dividing the yolks into three portions. Mix thoroughly after each addition. Adding them all at once can cause the mixture to separate.

Step 5
Stir in the vanilla extract. This adds a lovely aroma and flavor, but you can omit it if you don’t have any.

Step 6
In a separate bowl, sift the organic all-purpose flour and pink salt twice through a fine-mesh sieve. This aerates the flour and prevents lumps, leading to a lighter bread.

Step 7
Add the sifted dry ingredients to the yolk mixture. Gently mix with a whisk or spatula until just combined and no lumps remain. Be careful not to overmix.

Step 8
Pour the batter through the sieve one more time for an extra smooth texture. Cover the bowl with plastic wrap or a lid and place it over a larger bowl filled with warm water (double boiler method) to keep it warm and prevent it from drying out.

Step 9
In a clean, dry bowl, whisk the egg whites until foamy. Gradually add the organic sugar in 2-3 additions while continuing to whisk (using an electric mixer or a hand whisk). Whip until stiff peaks form – the meringue should hold its shape when the whisk is lifted.

Step 10
Gently fold the warm yolk batter into the stiff meringue. Use a spatula to scoop from the bottom and fold over the top, being careful not to deflate the meringue. This step is crucial for a fluffy texture.

Step 11
Lightly grease the inner pot of your rice cooker with cooking oil. You can use a baking spray or a paper towel dipped in oil to ensure an even coating. This prevents the bread from sticking.

Step 12
Carefully pour the batter into the prepared rice cooker pot. Smooth the surface and then gently tap the pot on the counter 2-3 times to release any large air bubbles.

Step 13
Close the lid of the rice cooker and select the ‘Steam’ or ‘Cake’ function (depending on your model). Cook for approximately 40-50 minutes. Cooking times may vary slightly between rice cooker models.

Step 14
Once the cooking cycle is complete, your bread is ready! The aroma filling your kitchen is wonderful.

Step 15
Carefully remove the bread from the rice cooker pot and invert it onto a wire rack. Let it cool for about 10-15 minutes. It’s best to let it cool slightly before slicing to prevent it from crumbling.

Step 16
Once the bread has cooled a bit, use a serrated bread knife to slice it into your desired portions. The crust should be lightly crisp, and the inside wonderfully soft.

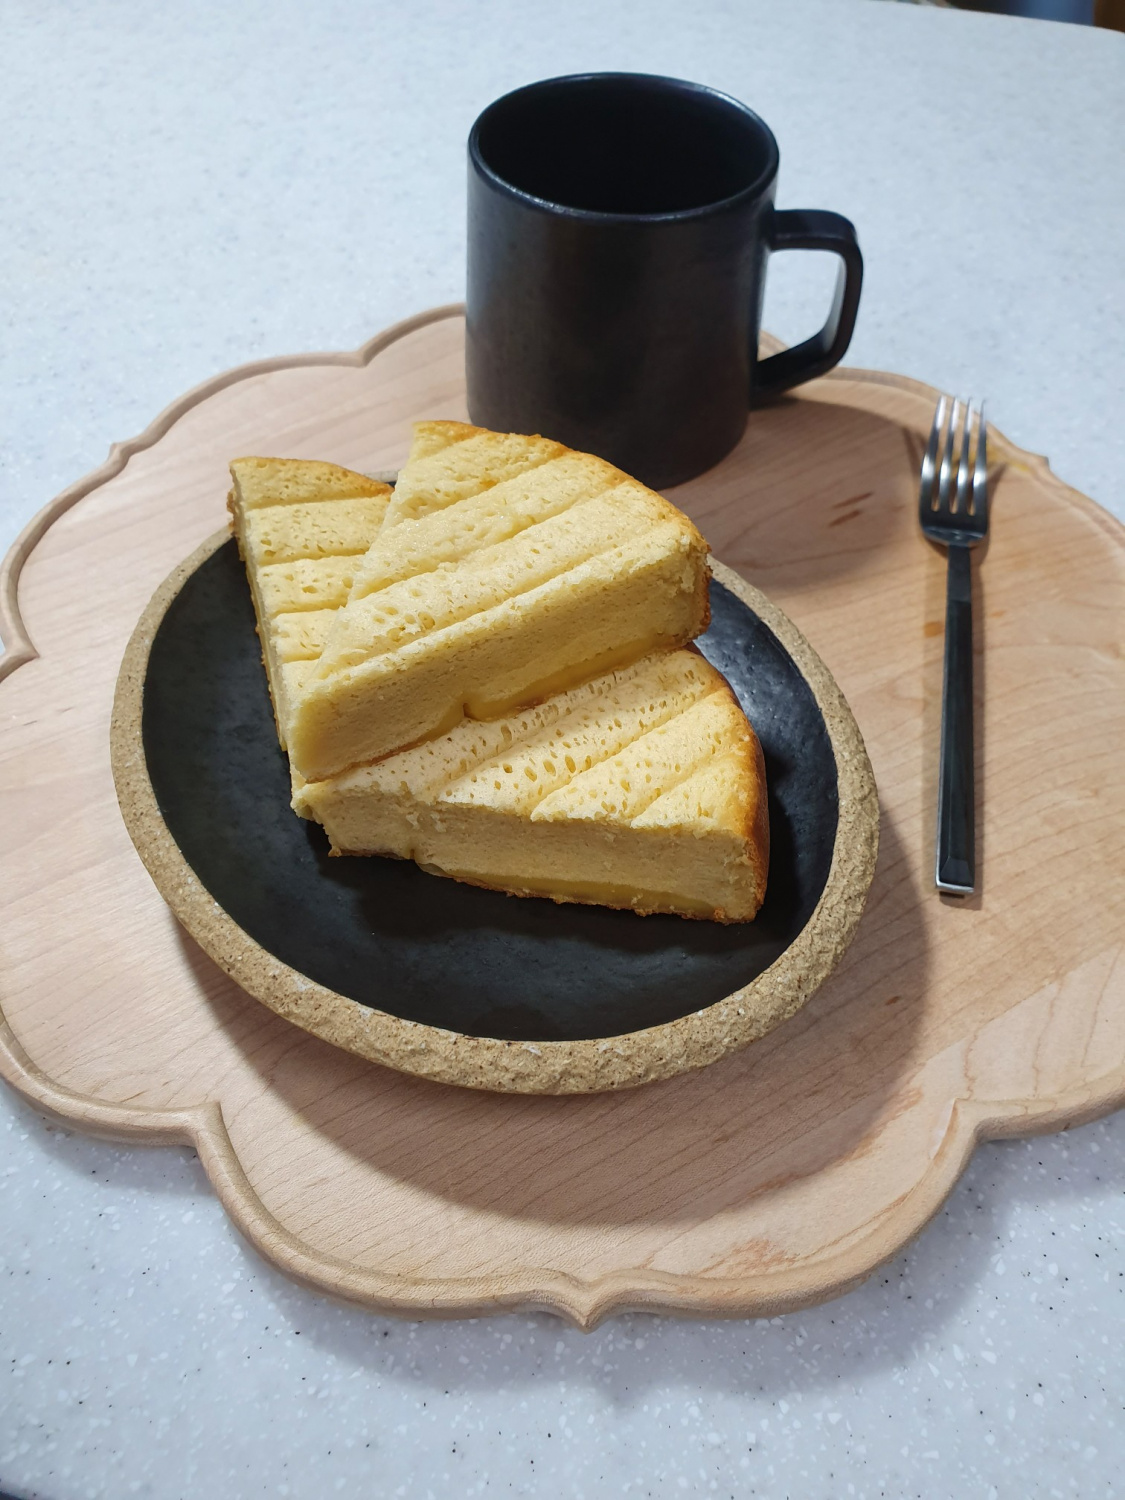
Step 17
Arrange the slices attractively on a plate and serve with your favorite beverage. It’s perfect for a cozy homemade cafe experience.

Step 18
Enjoy! This homemade nutritious bread is perfectly balanced – pleasantly sweet, incredibly soft, and wonderfully delicious. A healthy and delightful treat!
