
Sweet & Zesty Vitamin Bomb: Homemade Lemon Syrup (Without Bitterness)
Mastering Homemade Lemon Syrup: Achieve a Deep Lemon Flavor Without Any Bitterness!

Boost your vitamin C intake this winter with homemade lemon syrup! Discover the secret to creating a rich, flavorful lemon syrup that perfectly captures the zestiness of lemons while leaving any bitterness behind. Enjoy cafe-quality lemonades and teas right at home.
Ingredients- 2kg fresh lemons
- 2kg granulated sugar or white sugar (equal weight to lemons)
Cooking Instructions
Step 1
First, prepare 2kg of fresh lemons. If you don’t have a kitchen scale, it’s convenient to ask the greengrocer to weigh out 2kg for you. Let’s prepare them with gratitude to the kind greengrocer! ^^

Step 2
From the 2kg of lemons, select 1kg that might have some minor blemishes or aren’t perfectly shaped, even if the peel is otherwise fine. Even if their appearance isn’t ideal, as long as the inside is fresh, they are perfectly suitable for making syrup.

Step 3
For the 1kg of lemons with minor imperfections, peel them first. Then, place them in a juicer (like a Hurom) to extract the juice. This step is crucial for preserving the fresh lemon juice.

Step 4
If you don’t have a juicer, you can use a blender. Roughly chop the lemon flesh and blend until smooth. Strain the blended mixture through a fine-mesh sieve or cheesecloth to obtain the pure lemon juice. If using a blender, it’s best to remove the seeds beforehand.

Step 5
Don’t discard the lemon peels after juicing! These peels contain fragrant lemon oils that will add depth and aroma to your lemon syrup, making them a valuable ingredient.

Step 6
Using a clean sieve, press down firmly on the lemon peels to extract as much juice and fragrant oil as possible. This process is important for reducing bitterness and enhancing the overall flavor of the lemon syrup.

Step 7
Now, let’s thoroughly wash the remaining 1kg of visually appealing lemons. First, soak the lemons in water with a generous amount of baking soda for 30 minutes. Baking soda effectively removes pesticide residues and impurities from the lemon peel.

Step 8
After 30 minutes, discard the water and wash the lemon peels thoroughly with coarse salt, rubbing them by hand. The salt granules act as an exfoliant, helping to remove any waxy coating or contaminants from the peel.

Step 9
Finally, rinse the lemons once more by dipping them briefly in boiling hot water for about 10-20 seconds. This helps to reduce the bitter components in the peel and ensures the lemons are more hygienic to use.

Step 10
It’s crucial to completely dry the lemons after washing. Use clean kitchen towels to meticulously wipe the surface of the lemons dry. Any remaining moisture can lead to spoilage during storage.

Step 11
Once the lemons are completely dry, it’s time to slice them. Don’t hesitate to cut them decisively. Ensure you handle the knife safely.

Step 12
Cut the lemons in half, and then thinly slice the seedless portions into strips. Since you’ll be using the peel, slicing them not too thickly is recommended.

Step 13
Lemon seeds can impart bitterness, so be sure to remove them completely. Using a pointed tool like a fork or toothpick makes it easier to cleanly remove the seeds.

Step 14
Now, it’s time to combine all the ingredients! Place the extracted lemon juice, the liquid squeezed from the peels, and the thinly sliced lemon strips into a stainless steel bowl. If there are any remaining lemon pieces, press them by hand to extract any last bits of juice.

Step 15
Add 1.5kg of sugar to the prepared lemon mixture. The basic ratio of lemon to sugar is 1:1, but you can adjust the amount of sugar according to your preference.

Step 16
Mix the sugar and lemons well. Then, let it sit in the stainless steel bowl for about 30 minutes, allowing the sugar to dissolve and the lemon juice to fully infuse. This process helps the lemon flavor to meld beautifully with the sugar.

Step 17
Sterilize the glass jars by immersing them in boiling water, ensuring the openings are facing upwards. Sterilizing with high-temperature steam helps prevent bacterial growth, keeping your lemon syrup fresh for longer.

Step 18
Spread a thin layer of the remaining sugar on the bottom of the sterilized glass jar. This prevents the lemon syrup from sticking to the bottom and helps the sugar dissolve gradually, enhancing preservation.

Step 19
Carefully transfer the lemon mixture from the stainless steel bowl into the sterilized glass jar. You can layer the ingredients if desired.

Step 20
Finally, fill the top of the jar with the remaining sugar, ensuring no air pockets remain. Covering the surface of the lemon syrup with sugar minimizes contact with air, which helps prevent spoilage and maintains freshness. Your delicious lemon syrup is now complete!

Step 21
Keep the finished lemon syrup at room temperature and invert the jar upside down and back again daily for about a day to help the sugar dissolve evenly. In warmer environments, the sugar will dissolve more quickly.

Step 22
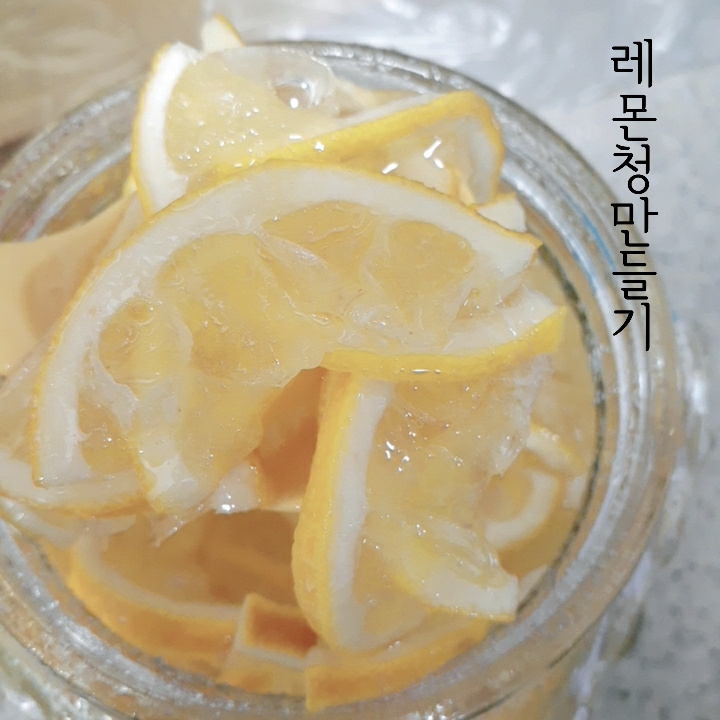
This is what the lemon syrup looks like after about 3 days. Since my house is relatively warm, the sugar has almost completely dissolved. You can feel the fragrant aroma and flavor of the lemon infusing into the sugar over time.

Step 23
On the 4th day, the sugar has fully dissolved, and the lemon syrup has become translucent. You can now store it in the refrigerator and enjoy it chilled or warm. When refrigerated, it stays fresh for over 6 months.

Step 24
Pour sparkling water or soda over this finished lemon syrup to instantly create a refreshing lemon-aid! You can also add ice cubes to your preference.

Step 25
Success! You’ve completed making your own healthy and delicious lemon syrup. Enjoy your delightful home cafe time!
