
Aromatic Garlic Chicken Breast Stir-Fry: Health and Flavor Combined!
[Eco-Natural Cook] Flavorful Garlic Chicken Breast Stir-Fry Recipe

The perfect harmony of savory garlic and tender chicken breast! Introducing a simple yet nutritious ‘Garlic Chicken Breast Stir-Fry’ recipe. Let’s create a healthy and delicious meal that the whole family can enjoy together. Experience the fantastic pairing of chewy chicken breast and fragrant garlic!
Main Ingredients- 20 cloves fresh garlic
- 2 pieces (approx. 300-400g) (Antibiotic-Free) Chicken Breast
- 2 Tbsp (Organic) Oyster Sauce
- 1 Tbsp Korean Soy Sauce (Guk-ganjang)
- 1 Tbsp Unrefined Sugar (or Allulose)
- 1 tsp Gochugaru (Korean Chili Flakes)
- 2 Tbsp Cooking Oil (Brown Rice Oil or Olive Oil)
- Pinch of Black Pepper
- Pinch of Bamboo Salt or Sea Salt
- Pinch of Toasted Sesame Seeds
Cooking Instructions
Step 1
First, thaw the frozen chicken breast slowly in the refrigerator or by soaking it in cold water. Once thawed, rinse the chicken breast lightly under running water to remove any impurities.

Step 2
Peel the garlic cloves. If you used calcium powder for eco-friendly washing, rinse thoroughly under running water. It’s important to meticulously clean off any dirt or debris from the garlic.

Step 3
Trim the pointed ends (the garlic root ends) of the washed garlic cloves cleanly with a knife. This step helps to make the garlic softer when cooked.

Step 4
Slice the prepared garlic into thin, uniform slices, about 2-3mm thick. If the garlic slices are too thick, they will take longer to cook.

Step 5
Cut the chicken breast into bite-sized pieces or your desired size. Avoid cutting them too small, as they might lose moisture and become dry during cooking.

Step 6
Heat about 2 Tbsp of cooking oil (like brown rice oil) in a pan over medium-low heat. Add the sliced garlic and stir-fry until it turns golden brown and becomes fragrant. Be careful not to burn it.

Step 7
Once the garlic is sufficiently cooked and aromatic, turn off the heat temporarily. Use a sieve to drain the excess oil from the cooked garlic, and set it aside in a separate bowl. The garlic-infused oil will add wonderful flavor to the chicken stir-fry.

Step 8
In the same pan used for the garlic (add a little more oil if needed), add the cut chicken breast and stir-fry over high heat. Cooking over high heat helps to keep the chicken breast moist.

Step 9
As you stir-fry the chicken breast, it’s done when the exterior turns white. Continue cooking until the entire piece of chicken breast is opaque white. Undercooked chicken breast will have an unpleasant texture.

Step 10
When the chicken breast is almost fully cooked, add the reserved fried garlic back into the pan. Toss everything together well to combine the chicken and garlic.

Step 11
Sprinkle a pinch of freshly ground black pepper over the stir-fry for added aroma. Be mindful not to add too much.

Step 12
Add about 1g of bamboo salt (or sea salt) to season. Adjust the amount of salt according to your preference. Stir well to ensure the salt is evenly distributed and absorbed by the chicken and garlic.

Step 13
Now it’s time to add the sauce. Pour in 1 Tbsp of Korean soy sauce, 2 Tbsp of organic oyster sauce, and 1 tsp of gochugaru. Stir-fry to combine all ingredients. Let it simmer slightly for the flavors to meld together, creating a richer taste.

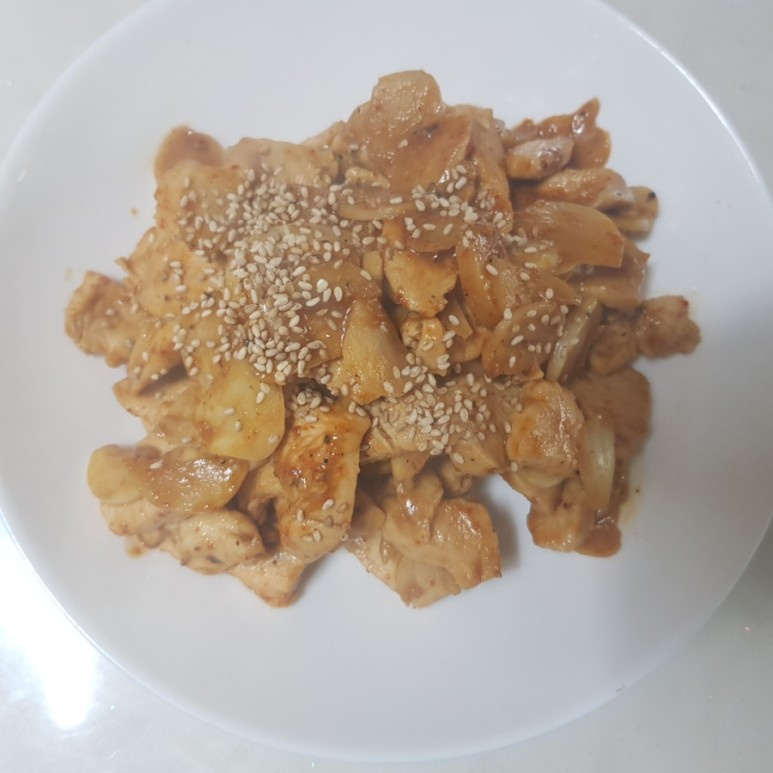
Step 14
Transfer the finished Garlic Chicken Breast Stir-Fry to a serving dish. Sprinkle a generous amount of toasted sesame seeds on top for an extra nutty flavor and visual appeal. Your delicious and healthy dish is ready!
