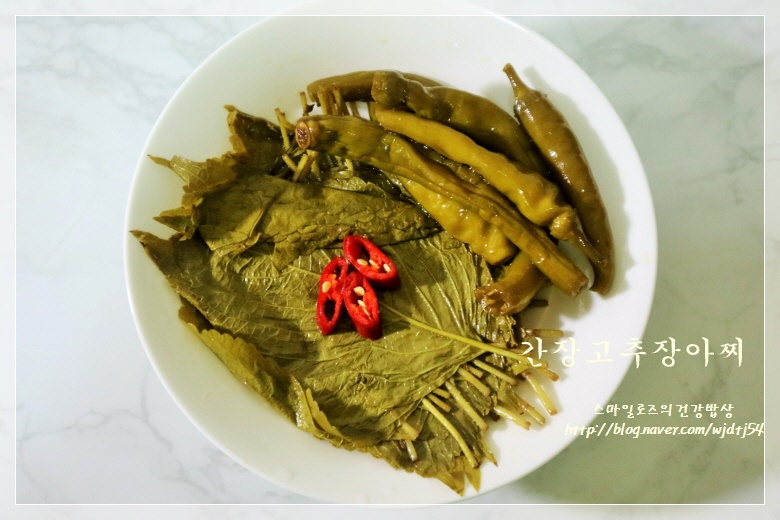
Crispy Pickled Perilla Leaves and Peppers (Kkaennip Gochujangaji)
The Ultimate Side Dish for Long-Term Enjoyment: Crispy Pickled Perilla Leaves and Peppers

Discover the magic of Kkaennip Gochujangaji (pickled perilla leaves and peppers), a delightful side dish that will make you devour rice in no time, especially when your appetite is low! Fresh perilla leaves and spicy peppers are marinated in a secret blend of savory soy sauce, ensuring a satisfying crunch and deep flavor that lasts. The aromatic freshness of the perilla leaves, combined with the delightful heat of the peppers, creates a perfect harmony that transforms any meal. Try this easy recipe to make your own batch of this rice-thief side dish! It’s perfect for impromptu guests or simply to elevate your everyday meals.
Ingredients- 300 sheets fresh perilla leaves
- 450g peppers (e.g., Cheongyang or regular chili peppers)
- 1/2 onion (optional)
- 2 Tbsp baking soda (for washing leaves)
- 1 Tbsp vinegar (for washing leaves)
Pickling Brine- 600ml soy sauce
- 600ml water
- 600ml vinegar
- 300ml plum extract (maesilcheong)
- 300ml sugar
- 600ml soy sauce
- 600ml water
- 600ml vinegar
- 300ml plum extract (maesilcheong)
- 300ml sugar
Cooking Instructions
Step 1
First, properly washing the perilla leaves is crucial for a clean and delicious result. Place the perilla leaves in a large bowl, sprinkle with 2 tablespoons of baking soda, and let them sit for about 5 minutes. This helps to effectively remove any dirt or impurities. Afterwards, rinse them thoroughly under running water, gently scrubbing the back of each leaf first, followed by the front.

Step 2
After washing, drain the perilla leaves well in a colander. Ensuring they are completely dry is key to achieving that signature crispiness. Pat them dry meticulously with paper towels or a clean, dry kitchen cloth. (Tip: If you wash and dry them the night before, the leaves will be perfectly dry by morning, making the process much easier.) Trim any excessively long stems from the perilla leaves. For the peppers, trim off the very ends or, for better brine penetration and to prevent splashing when eating, prick them several times with a fork. This step ensures the savory brine permeates the peppers thoroughly, enhancing their flavor.

Step 3
Begin layering the ingredients into your clean jar or container. Start with a layer of perilla leaves, then add a layer of peppers on top. Continue layering them in a zigzag pattern, alternating between perilla leaves and peppers. This arrangement helps the ingredients settle evenly and ensures the brine coats everything uniformly.

Step 4
Now, let’s prepare the special soy sauce brine that will give the pickles their amazing flavor. Measure and combine 600ml of soy sauce, 600ml of water, 600ml of vinegar, 300ml of plum extract (for a touch of sweetness and depth), and 300ml of sugar in a saucepan.

Step 5
Whisk all the brine ingredients together and bring the mixture to a rolling boil over medium heat. Once boiling, reduce the heat slightly and let it simmer for another 1-2 minutes. This ensures the sugar is fully dissolved and all ingredients are well combined.

Step 6
Pour the hot, freshly boiled brine directly over the layered perilla leaves and peppers in the container. Pouring the hot brine helps to sterilize the contents, extending the shelf life of your pickles. It also plays a vital role in preserving the delightful crunch of the leaves and peppers.

Step 7
If you have an onion, peel and thinly slice it, then add it to the container with the perilla leaves and peppers. The subtle sweetness of the onion will add another layer of flavor complexity to your pickles. (You can use leftover onion from other dishes for this.)

Step 8
To ensure all the ingredients stay submerged in the brine, place a small plate or a weight on top of the perilla leaves and peppers. This prevents them from floating to the surface and guarantees even pickling.

Step 9
Leave the sealed container at room temperature for one day to allow the brine to start penetrating the ingredients. After this initial day, transfer the container to the refrigerator for storage. Let it pickle for about 7 days. Then, carefully pour out the brine, bring it back to a boil, let it cool, and pour it back over the pickles. Taste the brine and adjust the seasoning by adding more soy sauce or sugar if needed, according to your preference. (For longer storage: Repeat the process of boiling and cooling the brine 2-3 times. This significantly extends the shelf life, allowing you to enjoy these crisp and flavorful pickles for up to a year!)

Step 10
These homemade pickled perilla leaves and peppers are a fantastic side dish for those times when your appetite isn’t quite there. Even with just a simple soup and a few of these pickles, you can create a truly satisfying and abundant meal, perfect for unexpected guests or a simple family dinner!

Step 11
Perilla leaves are such a versatile ingredient, aren’t they? They can be prepared in so many delicious ways, making them one of my absolute favorites. That’s why you’ll find perilla dishes frequently appearing on my dining table.

Step 12
While perilla kimchi is wonderful, a simple and clean pickled perilla leaf dish like this is all you need to finish a bowl of rice in minutes. It’s not about fancy dishes; it’s these seemingly humble, rustic side dishes that are the true ‘rice thieves’ – capable of making you eat more rice effortlessly!

Step 13
After a week of pickling and re-boiling the brine, the perilla leaves and peppers have transformed into a beautiful color, and the flavors have deepened considerably. They’re now perfectly ready to be enjoyed, adding a delightful touch to our daily meals!


