
Spicy Radish Kimchi and Mushroom Rice Bowl
One-Bowl Wonder: Delicious Kimchi Mushroom Rice Bowl

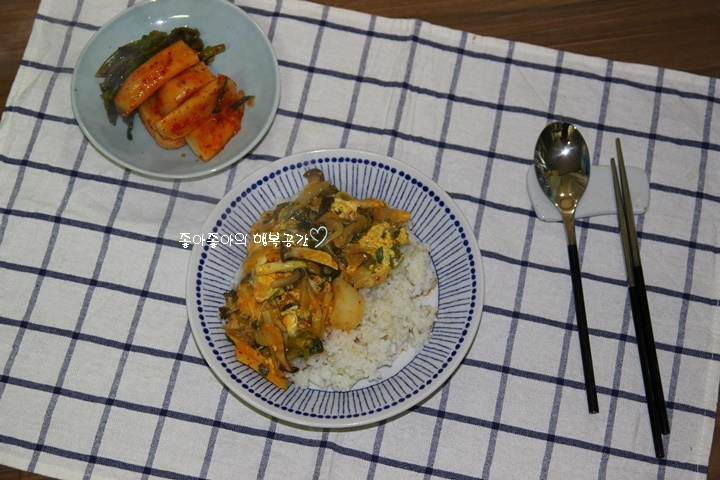
When you’re short on side dishes, this one-bowl meal is perfect! It’s also a fantastic way to use up ingredients in your fridge. This delightful rice bowl features the tangy crunch of radish kimchi and the savory aroma of mushrooms, all topped with a perfectly cooked egg. It’s a flavorful and satisfying meal that’s incredibly easy to make.
Main Ingredients- 1.5 bowls cooked rice
- 2 heads of Kkakdugi (cubed radish kimchi), cut into bite-sized pieces
- 2 large eggs
- A handful of Enoki mushrooms (or your favorite mushrooms), trimmed
- 1/2 stalk green onion
- 1/2 medium onion
Seasoning- 2 Tbsp Kkakdugi brine
- 1/4 cup water (approx. 50ml)
- 1 Tbsp plum extract (or honey/sugar)
- 1 Tbsp soy sauce for soup
- Pinch of black pepper
- 2 Tbsp Kkakdugi brine
- 1/4 cup water (approx. 50ml)
- 1 Tbsp plum extract (or honey/sugar)
- 1 Tbsp soy sauce for soup
- Pinch of black pepper
Cooking Instructions
Step 1
Prepare the Kkakdugi: First, prepare the radish kimchi for easy eating. Slice the radish portions thinly on the diagonal (about 0.5cm thick) and cut the leafy parts into approximately 2cm lengths. This helps the kimchi maintain its crispness and absorb the sauce well.

Step 2
Prepare the mushrooms: Trim the woody ends of the Enoki mushrooms and separate them into manageable pieces. You can use other mushrooms like shiitake or king oyster mushrooms if you prefer. Their fragrant flavor will add depth to the dish.

Step 3
Prepare the eggs: Crack the 2 eggs into a bowl and whisk them until well beaten. This will be gently cooked and placed on top of the rice bowl.

Step 4
Sauté the aromatics: Heat 1 tablespoon of perilla oil in a pan over medium-low heat. Add the sliced green onion and onion, and sauté until fragrant and translucent. Sautéing brings out their natural sweetness.

Step 5
Tip for using frozen onions: If you have frozen onions that have started to sprout, this is a great time to use them. Removing the sprouted part before use will ensure a clean flavor without any bitterness.

Step 6
Stir-fry the Kkakdugi: Add the prepared Kkakdugi to the pan with the sautéed vegetables and stir-fry them together. It’s important to stir-fry until the kimchi’s sharp tanginess mellows and its umami flavor intensifies.

Step 7
Add the mushrooms: Add the prepared mushrooms to the pan with the stir-fried kimchi and continue to cook. Stir-fry until the mushrooms are slightly wilted.

Step 8
Make the sauce: In a small bowl, combine 2 tablespoons of Kkakdugi brine, 1/4 cup of water, 1 tablespoon of plum extract, 1 tablespoon of soy sauce for soup, and a pinch of black pepper. Mix well to create the rice bowl sauce. Adjust the amount of soy sauce based on the kimchi’s saltiness.

Step 9
Simmer the sauce: Pour the prepared sauce over the stir-fried ingredients in the pan. Bring to a simmer over medium heat and let it bubble gently. Allow the sauce to cook and meld with all the ingredients.

Step 10
Cook the egg: Once the sauce is simmering nicely, gently pour the beaten eggs over the surface of the sauce, starting from the edges and working inwards. Pour carefully to avoid breaking the egg.

Step 11
Finish and serve: Do not stir the eggs. Let them cook undisturbed until they reach your desired doneness (semi-cooked is recommended, but fully cooked is also fine). Your delicious rice bowl topping is ready! Spoon the generous topping over a bowl of warm rice and enjoy!
