
Cream Cheese Scones
How to Make Scones: Butter Scones, Heavy Cream Scones, Homemade Baking Cafe Recipe

This is a recipe for scones made with heavy cream, which keeps them moist for a long time. I first encountered this recipe in a professional setting, and after exploring YouTube for home baking, I discovered it’s identical to the recipe by ‘Cafe Saekki’. Don’t be alarmed by the generous amount of baking powder – it’s key to their deliciousness!
Scone Dough Ingredients- 300g All-purpose flour
- 150g Unsalted butter
- 15g Baking powder
- 60g Sugar
- 3g Salt
- 60g Cold milk
- 60g Cold heavy cream
Cooking Instructions
Step 1
First, prepare the dry ingredients for your scone dough. Sift together 300g of all-purpose flour, 15g of baking powder, 60g of sugar, and 3g of salt at least 2-3 times. Sifting ensures the ingredients are evenly distributed and prevents clumps, making the dough easier to work with.

Step 2
Now, let’s prepare the butter. Make sure your unsalted butter (150g) is cold, then cut it into roughly 1 to 1.5 cm cubes. While some recipes call for a mix of cultured and fresh butter for enhanced flavor, using only cold fresh butter will still yield delicious results. The most crucial aspect is keeping the butter cold throughout the process.

Step 3
If using a food processor, add the sifted dry ingredients and the cold butter cubes. Pulse in short bursts until the butter is reduced to the size of small peas, resembling coarse crumbs. Be careful not to over-process, as this will melt the butter and result in a dense, sticky dough. The mixture should look crumbly. If mixing by hand, use a pastry blender or a scraper to cut the butter into the flour until you achieve the same pea-sized consistency.

Step 4
Once the dry ingredients and butter are processed, they should have an ivory hue and a crumbly texture, indicating they are well combined.

Step 5
Next, prepare the wet ingredients. In a separate bowl, combine 60g of cold milk and 60g of cold heavy cream. Keeping these liquids cold is essential for achieving a flaky and tender scone.

Step 6
Gradually add the cold milk and cream mixture to the flour and butter mixture, dividing it into two additions. Use a scraper to gently cut and fold the ingredients together. Mix just until the dry streaks disappear and a shaggy dough begins to form. Avoid overmixing. Once it starts to clump together, turn the dough out onto a clean surface.

Step 7
At this stage, the dough might seem very crumbly and not fully cohesive. This is exactly what you want! This indicates that the butter is still cold and intact, which is key for creating light and airy scones. Resist the urge to knead it extensively.

Step 8
Gently gather the crumbly dough into a rough mound on your work surface. Use a scraper to lightly shape it into a rough rectangle, without pressing down too firmly.

Step 9
To create layers, fold the dough in half, then in half again, repeating this process 2-3 times. This folding technique develops the scone’s characteristic flaky texture. Aim for about 3-4 folds total. Work quickly and lightly to prevent the butter from warming up and melting.

Step 10
Once the dough has come together loosely, wrap it tightly in plastic wrap and refrigerate for at least 30 minutes. This chilling period allows the butter to firm up again and the gluten to relax, resulting in a better texture.

Step 11
After chilling, unwrap the dough and place it on a lightly floured surface. Gently roll it out with a rolling pin to your desired thickness, about 1.5 to 2 cm (approximately 0.6 to 0.8 inches). I divided the dough into larger portions, resulting in 7 scones, each weighing about 90g (the original recipe suggests 10 scones).

Step 12
Cut the dough into your desired shapes – squares or triangles work well. Use a sharp knife to make clean cuts that preserve the dough’s layers. For any leftover scraps, gently stack them on top of each other rather than kneading them into a ball; this prevents them from becoming too dense.

Step 13
Prepare an egg wash by whisking one egg until smooth. Brush the tops and sides of the scones evenly with the egg wash. This will give them a beautiful golden-brown color when baked. Bake in a preheated oven at 180°C (350°F) for 25-35 minutes. The baking time can be adjusted based on your oven and your preferred level of crispness. A longer bake will yield crispier scones, while a shorter bake will result in a moister texture.

Step 14
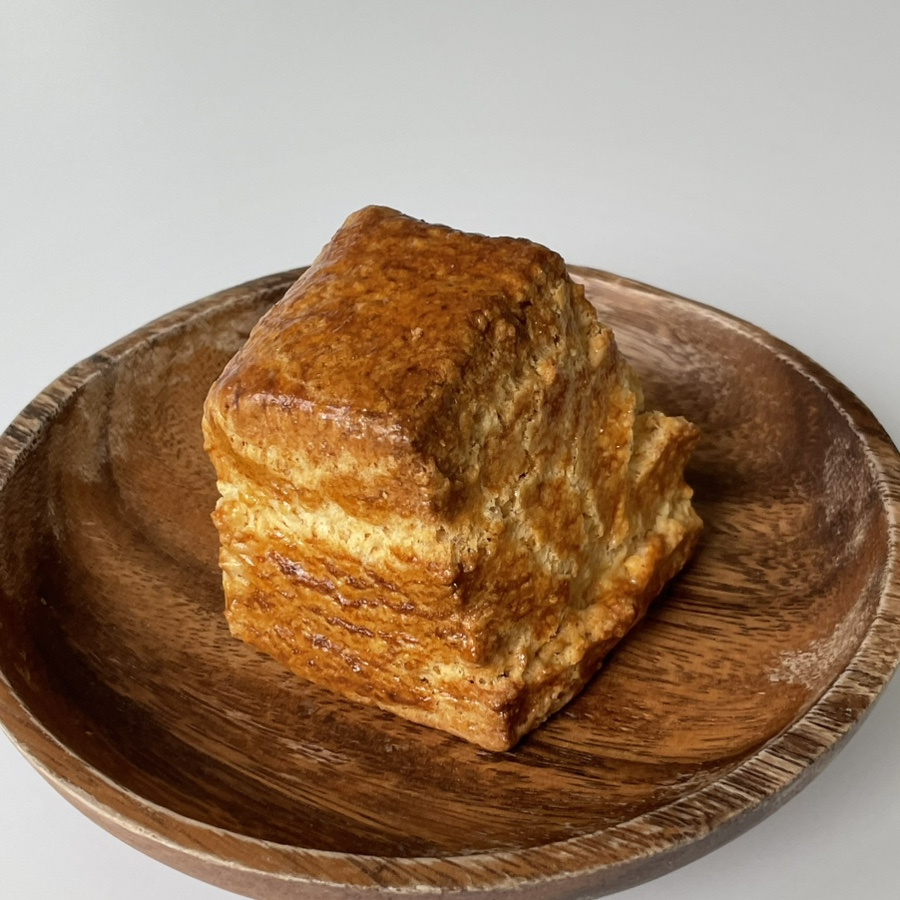
I baked mine for about 30 minutes. Brushing the sides with egg wash ensures an even golden-brown finish. The scones puff up beautifully, giving them a rustic yet enticing appearance. Once removed from the oven, let them cool on a wire rack for a few minutes before enjoying!
