
Braised Ggomchhi Kimchi with Chonggak Kimchi
A Deliciously Tangy Chonggak Kimchi Braised with Canned Saury: A True Rice Thief!

Don’t throw away your overly sour chonggak kimchi from kimchi-making! Braising it with canned saury transforms it into a mouthwatering side dish. While it’s delicious braised with doenjang after a quick rinse, today we’re adding canned saury for a dish where the tenderness of the radish and the rich umami of the saury meld perfectly. This is a fantastic rice accompaniment. Experience a unique twist on aged chonggak kimchi – let’s get started!
Main Ingredients- 600g Chonggak Kimchi (sour and aged)
- 1 sheet Dried Kelp (Dashima)
- 1 can Canned Saury
- 3 Cheongyang Peppers
- 1 Red Chili Pepper
Seasoning Ingredients- 2 Tbsp Perilla Oil
- 2 Tbsp Gochugaru (Korean chili flakes)
- 1 Tbsp Sugar
- 1 Tbsp Minced Garlic
- 2 Tbsp Rice Wine (Mirin)
- 2 Tbsp Perilla Oil
- 2 Tbsp Gochugaru (Korean chili flakes)
- 1 Tbsp Sugar
- 1 Tbsp Minced Garlic
- 2 Tbsp Rice Wine (Mirin)
Cooking Instructions
Step 1
First, prepare the stars of our dish: chonggak kimchi, dried kelp, and canned saury. The key to this recipe is well-fermented, sour chonggak kimchi.

Step 2
Lightly rinse the chonggak kimchi under running water once. (Tip: If you were to braise it with doenjang, you would soak it in water to remove saltiness before dissolving doenjang and braising. However, since we’re using canned saury today, just a light rinse is fine. After a gentle rinse, slightly drain excess water, then mix with perilla oil and sugar to marinate.

Step 3
Add gochugaru to the marinated chonggak kimchi, and also include the sheet of dried kelp. Pour in enough water to just cover the ingredients. Using less water will concentrate the flavors better.

Step 4
Braising chonggak kimchi until tender in a regular pot can take quite a long time. If you want to save time, try using a pressure cooker! A pressure cooker will allow you to cook the chonggak kimchi until it’s very tender in a short amount of time.

Step 5
Once the pressure cooker’s whistle starts to blow, cook for about 5 minutes. When the pressure is released and you open the lid, the chonggak kimchi should be wonderfully tender. Remove the cooked kelp. Add the canned saury, including its sauce, into the pot. Next, add the gochugaru and minced garlic.

Step 6
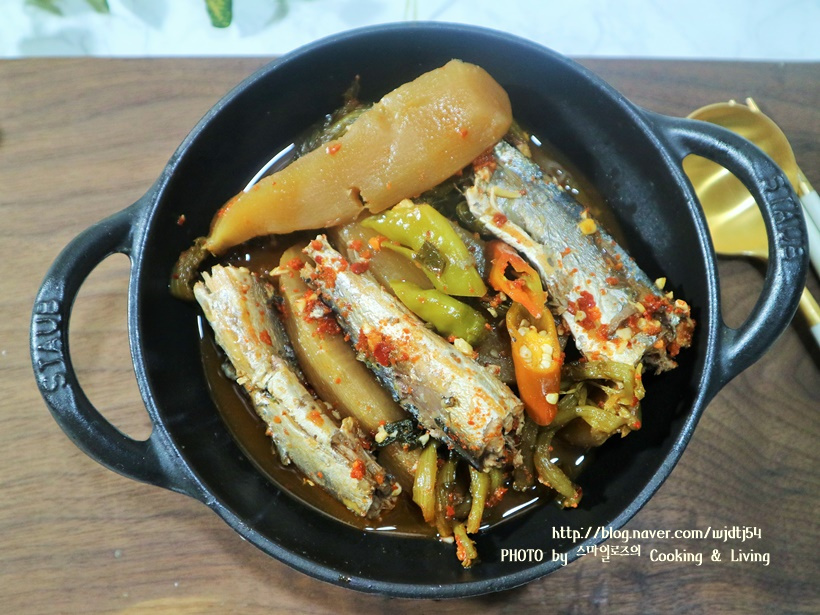
Finally, add the rice wine (mirin) and let it simmer for a bit longer until all the ingredients are well combined. This braising process will result in a delicious rice accompaniment where the tender chonggak kimchi and saury flavors meld together perfectly.

Step 7
Chonggak kimchi already has a good amount of flavor from its fermentation, so even just braising with perilla oil and a few seasonings would be tasty. However, adding canned saury significantly enhances the depth of flavor and umami, making it twice as delicious. You’ll find yourself finishing a bowl of rice in no time!
