
Ryu Soo-young’s Galbi Chicken: A Special Homemade Chicken Recipe
Master the ‘Ryu Soo-young Galbi Chicken’ Recipe: Crispy Outside, Tender Inside Perfection!

My son, a huge chicken lover, always wants chicken for his weekend relaxation. Since delivery chicken can be quite pricey, I decided to make Ryu Soo-young’s Galbi Chicken at home! It’s incredibly cost-effective and delicious. This recipe offers amazing value and fantastic flavor, perfect for any occasion.
Ryu Soo-young’s Galbi Chicken- 10-size chicken for stew (approx. 1kg)
- 2 stalks green onion
- 1 handful garlic (whole cloves)
- 3 pinches salt
- 1 knob ginger (thumb-sized)
- 1 Tbsp sugar
- 3 Tbsp soy sauce
- 1 Tbsp generous oyster sauce
- 6 Tbsp corn syrup
- Pinch of toasted sesame seeds
Cooking Instructions
Step 1
First, it’s crucial to prepare the chicken properly. Rinse the chicken thoroughly inside and out under running water. Pay close attention to removing any remaining internal organs or blood from between the bones to eliminate any gamey odors and achieve a clean taste. Don’t trim off too much of the fat under the skin; this fat will render during cooking, keeping the chicken moist and flavorful.

Step 2
Locate the tendons in the thickest part of the chicken legs. Make 2-3 small cuts across these tendons with a knife. This prevents the meat from shrinking and curling up when cooked, resulting in a more appealing presentation and making it easier for everyone, especially children, to eat.

Step 3
After cleaning and preparing the chicken, place it on a sieve to drain excess water completely. Excess moisture on the chicken skin can prevent it from becoming crispy when fried. You can gently pat it dry with paper towels or let it drain naturally for a while.

Step 4
Now, let’s start cooking the chicken. Preheat a frying pan over medium heat. Do not add any oil. Place the chicken pieces skin-side down in the preheated pan. Starting with the skin side helps achieve a delightfully crispy texture later on.

Step 5
Once the skin side is in the pan, immediately sprinkle about 3 pinches of salt evenly over the chicken. Keep the heat on high for now and resist the urge to move the chicken frequently, as this can prevent the skin from crisping up. Let it cook undisturbed for about 3 minutes.

Step 6
After 3 minutes, when the skin is golden brown, reduce the heat to medium. Flip the chicken pieces to cook the other sides. Cover the pan with a lid and continue cooking for another 3 minutes. Covering the pan allows heat to penetrate the chicken, ensuring it cooks evenly.

Step 7
When you remove the lid after another 3 minutes, you’ll notice quite a bit of rendered chicken fat in the pan. Don’t discard this! This fat is essential for frying the chicken to a beautiful crisp. Thinly slice the knob of ginger and add it to the rendered fat in the pan. The ginger will help neutralize any gamey flavors and add a wonderful aromatic quality.

Step 8
Cover the pan again and continue cooking the chicken until a total of 15 minutes have passed since you first placed it in the pan. Occasionally lift the lid to stir and flip the chicken, ensuring it doesn’t burn. Scrape any browned bits from the bottom of the pan to keep everything cooking evenly. The goal is to achieve a crispy exterior and a tender, juicy interior.

Step 9
As the chicken nears doneness, add the chopped green onions and whole garlic cloves to the pan. Stir-fry them with the chicken, allowing their aromas to meld. This step will infuse the chicken with even more delicious flavor.

Step 10
Now, let’s create the delicious Galbi Chicken sauce. Start by adding 1 tablespoon of sugar and coating the chicken and vegetables evenly. Adding sugar first helps the sauce adhere well to the chicken and caramelize, giving the Galbi Chicken a beautiful glaze and rich flavor.

Step 11
Next, add 3 tablespoons of soy sauce. To enhance the flavor, pour the soy sauce around the edges of the pan (if using a gas stove) or into a central groove (if using induction). This allows it to briefly simmer and deepen its aroma.

Step 12
Once the soy sauce has simmered for a moment, mix it thoroughly with the chicken and vegetables. The warm soy sauce will add savory depth to the chicken.

Step 13
Now, add 1 generous tablespoon of oyster sauce and 6 tablespoons of corn syrup. Oyster sauce adds umami and complexity, while corn syrup provides a glossy finish and mild sweetness. After adding these, reduce the heat to low. Stir well, being careful not to let the sauce burn.

Step 14
With all the ingredients and sauce combined, cover the pan and let it steam over low heat for about 5 minutes. This ‘steaming’ or ‘resting’ step allows the sauce to penetrate the chicken fully and lets all the flavors meld together beautifully, creating a truly delicious Galbi Chicken.

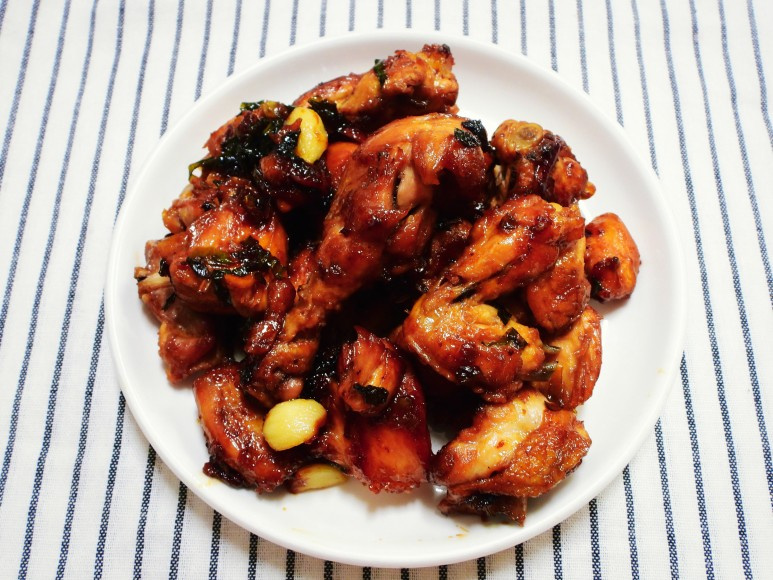
Step 15
And there you have it! Ryu Soo-young’s Galbi Chicken from ‘Pyunstaurant’ is ready. It looks incredibly appetizing, making your mouth water just by looking at it.

Step 16
This is the Galbi Chicken that my picky son raved about, calling it his ‘life chicken’! The sweet and savory galbi-flavored sauce is also fantastic served with rice; you can even mix some rice into the leftover sauce. This special chicken is perfect for the whole family, so be sure to give it a try!
