Homemade Pickled Radish (Mujangachi) Recipe
#HomeCooking #EasySideDish How to Make Delicious and Savory Pickled Radish

A true rice thief! This savory pickled radish (Mujangachi) is incredibly easy and quick to make, perfect for stocking up your side dish repertoire. It pairs wonderfully with meat or fish dishes, and adds a delightful umami boost to your everyday meals. Let’s get started!
Essential Ingredients- 660g Daikon Radish (approx. 1/3 medium radish)
- 1 medium Onion
Brining Sauce Ingredients- 200ml Soy Sauce
- 200ml Vinegar
- 200ml Water
- 160g Sugar
Optional Flavor Enhancers- 3 Cheongyang Peppers (spicy Korean green chili peppers)
- 3 Red Chili Peppers
- 200ml Soy Sauce
- 200ml Vinegar
- 200ml Water
- 160g Sugar
Optional Flavor Enhancers- 3 Cheongyang Peppers (spicy Korean green chili peppers)
- 3 Red Chili Peppers
Cooking Instructions
Step 1
First, thoroughly wash the daikon radish and peel it. Slice it into uniform, bite-sized pieces about 0.5 cm thick using a mandoline slicer or a knife. Peel and slice the onion, aiming for pieces similar in size or slightly smaller than the radish. Prepare the Cheongyang and red chili peppers by removing their stems and thinly slicing them for a touch of spice and vibrant color.

Step 2
Now, let’s prepare the essential brining sauce that will give our pickled radish its delicious flavor. Measure out the soy sauce, vinegar, water, and sugar in a 200ml, 200ml, 200ml, and 160g ratio, respectively. (Golden Ratio: Soy Sauce:Vinegar:Water = 1:1:1, with sugar at about 80% of the soy sauce volume).

Step 3
In a pot, combine the water (200ml), soy sauce (200ml), and sugar (160g). Place it over medium heat and bring it to a gentle boil. Stir occasionally to ensure the sugar dissolves completely and the mixture comes to a smooth simmer.

Step 4
Once the mixture starts to boil vigorously, reduce the heat to very low or turn it off momentarily. Then, carefully add the vinegar (200ml). You can either bring it back to a brief simmer or immediately turn off the heat. Turning off the heat right after adding the vinegar will help preserve its tangy aroma and flavor.

Step 5
Sterilize a storage container, such as a glass jar. Arrange the prepared radish, onion slices, and the optional sliced Cheongyang and red chili peppers attractively inside the container. Filling the container about 80% full with vegetables will allow the brine to penetrate evenly.

Step 6
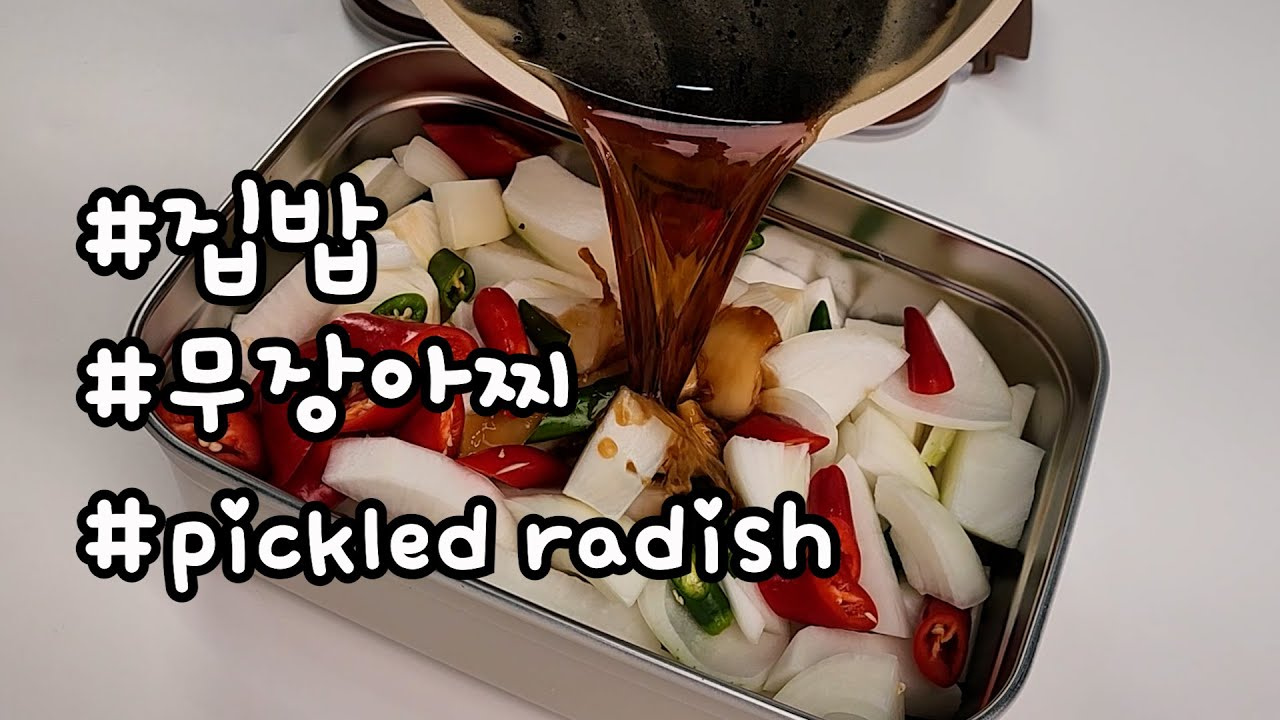
Pour the hot brining sauce you just made over the vegetables in the container, filling it to the brim. Ensure that all the vegetables are completely submerged in the brine for even pickling. Securely close the lid to seal the container.

Step 7
Let the pickled radish sit at room temperature to mature for at least half a day (approximately 12 hours). Once the vegetables have absorbed the brine sufficiently, transfer the container to the refrigerator for storage. Stored in the refrigerator, your delicious Mujangachi can be enjoyed for over two weeks!


