
Soft Milk Bread
Easy No-Knead Milk Bread

Introducing an easy ‘No-Knead Milk Bread’ recipe, perfect for those sudden bread cravings using ingredients you likely have at home. This bread develops its gluten structure simply by folding, resulting in a wonderfully chewy yet soft texture. Unlike traditionally kneaded breads that are very dense and chewy, this loaf offers a delightful melt-in-your-mouth softness due to its lower gluten content. While not entirely effortless, the absence of intensive kneading makes it a much more accessible and relaxing baking experience. Let’s embark on a simple and enjoyable journey to create this ‘No-Knead Milk Bread’!
For one 10-korn loaf pan- Bread flour 220g
- Whole wheat flour 80g
- Milk 105g
- Water 120g
- Instant dry yeast 3g
- Unrefined sugar 30g
- Salt 5g
- Melted unsalted butter 20g
Cooking Instructions
Step 1
Prepare the warm liquid: First, gently warm the milk and water in the microwave for about 40-45 seconds until they reach a comfortable lukewarm temperature, around 37-38°C (99-100°F). This is the ideal temperature for activating yeast. Sprinkle the instant dry yeast (3g) over the liquid and let it sit for about 5 minutes. You’ll see it start to foam and bubble on the surface, indicating it’s active. Give it a gentle stir to incorporate.

Step 2
Combine other ingredients: To the activated yeast mixture, add the unrefined sugar (30g), salt (5g), and the melted unsalted butter (20g) which has cooled slightly. Mix lightly with a spoon or spatula until everything is just combined.

Step 3
Liquid base ready: Your moist liquid base for the bread is now prepared and ready for the next step.

Step 4
Add and mix the flours: Pour both the bread flour (220g) and the whole wheat flour (80g) into the bowl with the liquid ingredients. Using a spatula held vertically, mix vigorously in a circular motion, scraping the sides of the bowl, until no dry flour is visible and a shaggy dough forms. This should take about 1-2 minutes.

Step 5
Prepare for first proof: Cover the bowl with plastic wrap or a lid to prevent the dough surface from drying out and to maintain a good environment for fermentation.

Step 6
First proof (30 minutes): Let the dough rest and ferment at room temperature for about 30 minutes. You should notice it has puffed up slightly. Since this is a no-knead method, the rise might be less dramatic than with traditional kneading.

Step 7
Stretch and fold (1st time): This is a crucial step for developing gluten without kneading. Gently pick up one edge of the dough, stretch it upwards as far as it will comfortably go without tearing, and fold it towards the center. Repeat this stretching and folding motion in four directions (like north, south, east, west) to create tension on the dough surface.

Step 8
Second proof (40 minutes): Cover the dough again and let it proof for an additional 40 minutes. The dough should become smoother and slightly puffier.

Step 9
Stretch and fold (2nd time): Just like before, repeat the stretch and fold process on the dough, working in four directions. This further strengthens the gluten structure.

Step 10
Third proof (30 minutes): Cover the dough once more and let it proof for another 30 minutes. The dough should feel noticeably softer and more elastic.

Step 11
Check for readiness (Finger Test): Lightly dust your work surface and hands with flour to prevent sticking. Gently poke the dough about 1 to 1.5 cm deep with a floured finger. If the indentation remains or slowly springs back, the dough is ready. If it springs back immediately, it might need another 10 minutes of proofing. (Adjust as needed)

Step 12
Shape and bench rest: Gently turn the proofed dough out onto a lightly floured surface. Carefully round it into a ball without degassing it too much. Cover the rounded dough with plastic wrap or a damp cloth and let it rest for 10 minutes. This ‘bench rest’ makes the dough more pliable and easier to shape.

Step 13
Oval shaping: After the rest, gently press the dough down slightly to release large air bubbles, then shape it into an elongated oval. You can gently roll it with a rolling pin or stretch it by hand to achieve the desired shape. Be careful not to flatten it too thinly.

Step 14
Pan and second proof preparation: Place the shaped dough into your greased 10-korn loaf pan. Gently press it down so it sits snugly. Cover the pan with plastic wrap or a lid, and let it undergo its second proof in a slightly warmer environment than room temperature (around 27-29°C or 80-84°F). Placing the pan inside a microwave with a cup of hot water can create a stable proofing environment.

Step 15
Second proof (until 1cm below the rim): Allow the dough to rise until it reaches about 1 cm below the rim of the loaf pan. This typically takes around 1 hour and 20 minutes. Once the dough has risen sufficiently, begin preheating your oven. (Preheat to 170°C / 340°F for a Smeg oven).

Step 16
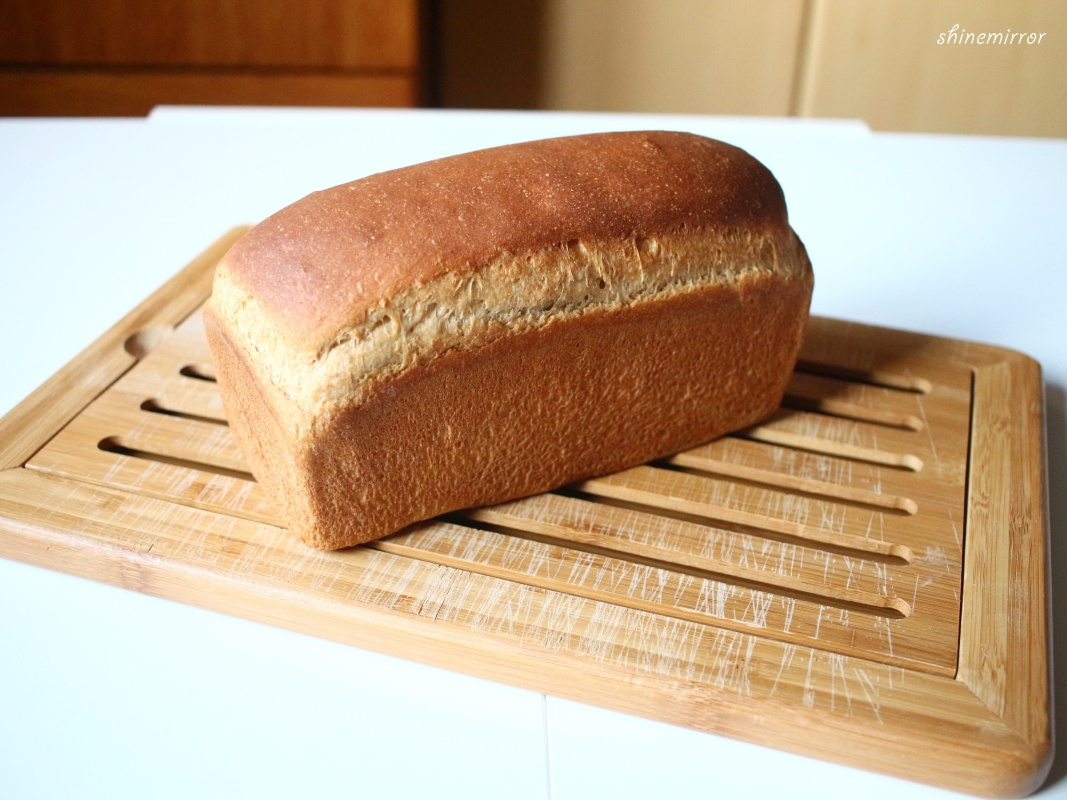
Bake and finish: When the second proof is complete, lower the oven temperature to 160°C (320°F) and bake for approximately 30 minutes, or until the crust is golden brown. Once baked, carefully invert the loaf pan onto a wire rack and drop the pan once to help release the bread. Remove the bread from the pan and let it cool slightly on the wire rack before slicing and enjoying. Savor the wonderfully soft texture of your freshly baked bread!
