
Hearty Bulgogi Bibimbap
Bulgogi Bibimbap

This Bulgogi Bibimbap is packed with tender beef and fresh vegetables, making it a satisfying meal on its own, even without additional side dishes! It’s the kind of dish that makes people understand why Bibimbap is so beloved globally. The phrase ‘this is why’ (이래서) is a shortened form of ‘because it’s this delicious.’ Enjoy a truly flavorful and vibrant Bibimbap experience right in your own home.
Main Ingredients- 7 slices Carrot (approx. 1/3 carrot)
- 10 slices Cucumber (approx. 1/4 cucumber)
- 200g Marinated Beef (Bulgogi)
- 1/4 Onion
- 2 Eggs
- 3 leaves Fresh Lettuce
- 1-2 bowls Cooked Rice (warm)
Seasoning & Garnish- 2 Tbsp Stir-fried Gochujang (spicy chili paste)
- 2 Tbsp Perilla Oil
- Pinch of Salt
- Little Cooking Oil (for stir-frying vegetables)
- 2 Tbsp Stir-fried Gochujang (spicy chili paste)
- 2 Tbsp Perilla Oil
- Pinch of Salt
- Little Cooking Oil (for stir-frying vegetables)
Cooking Instructions
Step 1
First, prepare the fresh vegetables for your Bibimbap. Take 7 slices of carrot, 10 slices of cucumber, and 1/4 onion. Wash them thoroughly. Then, julienne each vegetable into thin strips. Cut the carrots and cucumbers thinly, and the onion not too thick, to achieve a pleasant texture.

Step 2
Now, let’s stir-fry the vegetables. Heat a little cooking oil in a pan over high heat. Add the julienned carrots and onions, and sprinkle a pinch of salt. Carrots take longer to cook, so add them first. Add the onions when the carrots are slightly softened, and stir-fry them together. Since these ingredients can be eaten raw, stir-frying them briefly until they are just slightly tender is key to preserving their crispness. Cooking the carrots thoroughly and the onions for a shorter time will enhance their sweetness and crunch, making your Bibimbap even more delicious.

Step 3
It’s time to cook the flavorful bulgogi! Place the beef in a pan and cook over high heat, stirring quickly. Since the beef is thinly sliced, it’s convenient to use both chopsticks and a spoon. As the meat cooks and clumps together, gently separate it with chopsticks, loosening it strand by strand. It’s important to cook it quickly over high heat to prevent the juices from drying out.

Step 4
Spread the well-cooked bulgogi out evenly and keep it warm. Spreading it out prevents it from clumping and keeps it at a good temperature for topping your Bibimbap.

Step 5
Let’s make a savory fried egg! Heat a little cooking oil in a pan over medium heat. Crack two eggs into the pan and cook them to your desired doneness. You can choose between a runny yolk (sunny-side up) or a fully cooked yolk (over-hard), depending on your preference. Sprinkle a pinch of salt on the yolk, then carefully flip the egg and cook the other side until golden brown. A beautifully fried egg is the perfect crowning touch for your Bibimbap.

Step 6
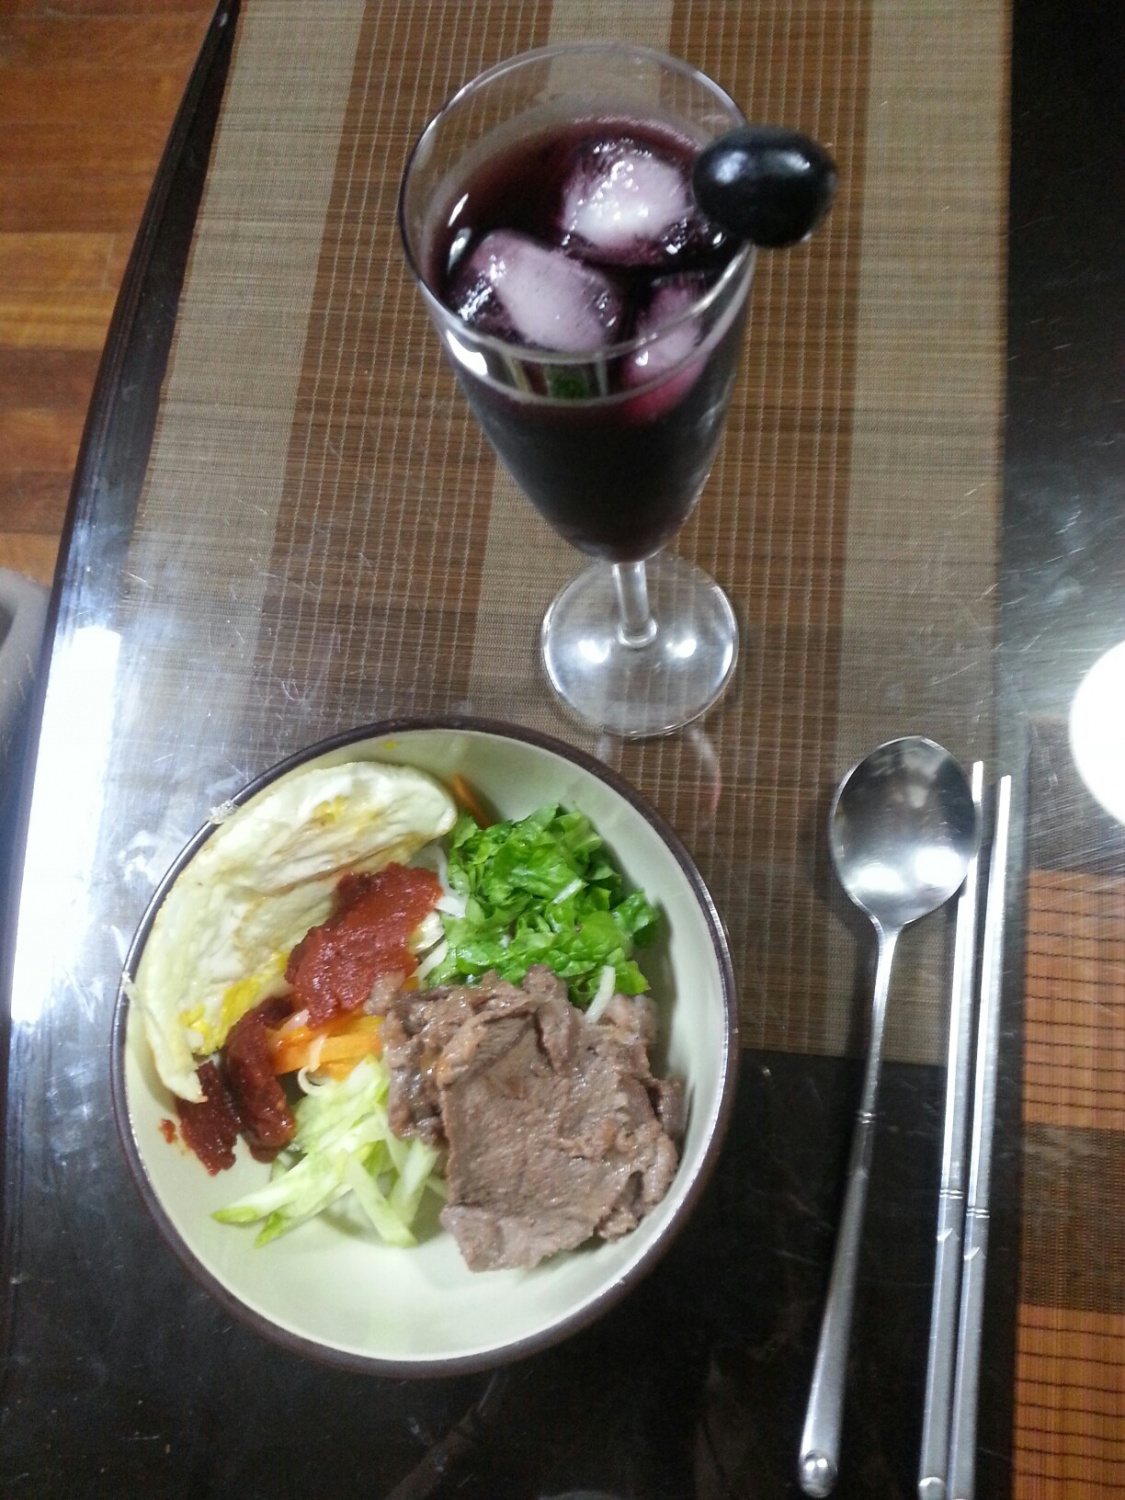
Finally, it’s time to assemble your delicious Bibimbap! Place warm rice in a bowl. Arrange the prepared julienned carrots, cucumber, stir-fried onion, and bulgogi attractively around the rice. Shred the washed lettuce into bite-sized pieces and add it on top for extra freshness. Finish by placing the golden fried egg in the center. Drizzle with 2 tablespoons of stir-fried gochujang and 2 tablespoons of perilla oil according to your taste. Your hearty Bulgogi Bibimbap is now complete! Mix everything together and enjoy your flavorful creation.
